I have been passionate about reusing and repurposing ever since the start of my plasticless journey, and all the meanwhile I have been collecting old clothing, fabric scraps and other items that could be given a new life one day. When I heard of the Foundations Revealed 2021 Competition I decided it was the time to put my new sewing skills to the test and come up with a project for some of these collected materials.
I am still very new at sewing, this competition was very intriguing when I first found out about it but also immensely scary. I have seen previous winners' pictures and felt a huge sense of inadequacy. However, I felt an urge to give it a go and to use this as an opportunity to learn more about this incredibly useful skill and take me further in my zero waste journey. Without further ado, here is my journey with my #foundationsrevealedcompetition2021 entry.
The Theme
The theme for the 2021 competition is 'Once Upon A Time'. In short, the entry must be a single garment or a whole outfit for a specific character from a piece of literature. This excludes Film and TV characters as it is specifically a fictional literature theme. This competition is a chance to show off sewing and garment construction skills, as well as an opportunity to have fun with the interpretation of a new theme each year. The full brief can be found on this page.
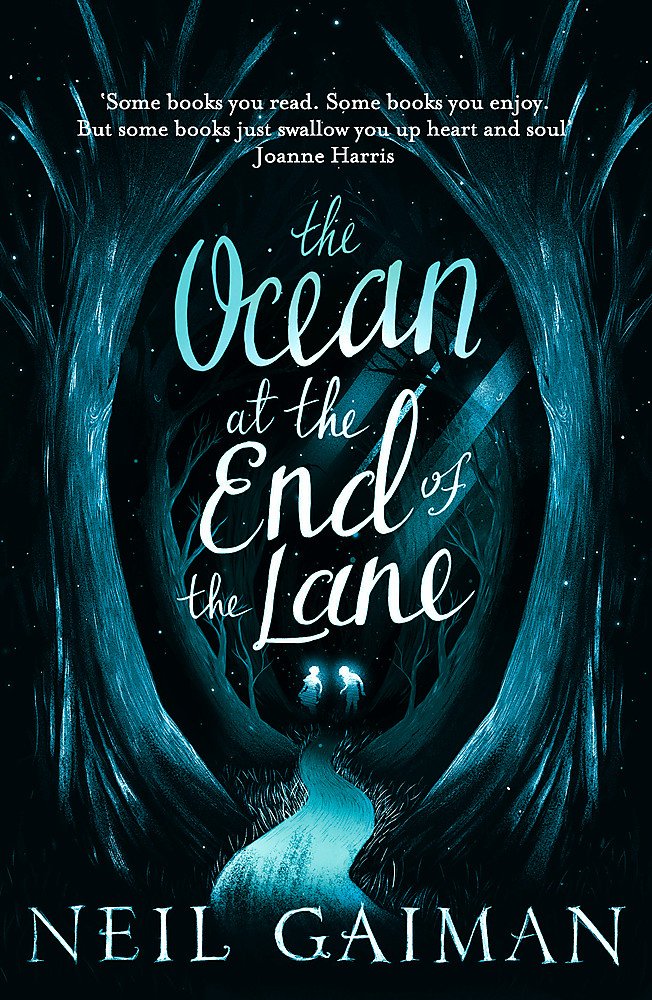
As my inspiration I chose a book by one of my favourite authors: The Ocean at the End of the Lane by Neil Gaiman. It is a fantastical tale of childhood and friendship that takes you through a hidden, magical world. The character I am making a garment for is Mrs Hempstock. Her family (made up of three women: Old Mrs Hempstock, Mrs Hempstock and Lettie Hempstock) runs Hempstock Farm at the end of the lane, but Hempstock farm is also at the margins of the old country from where strange beings and creatures can escape through. I imagine the Hempstock women as guardians and ancient protectors of this border between worlds. This theme of being on the edge will become quite prominent in the process.
The Design
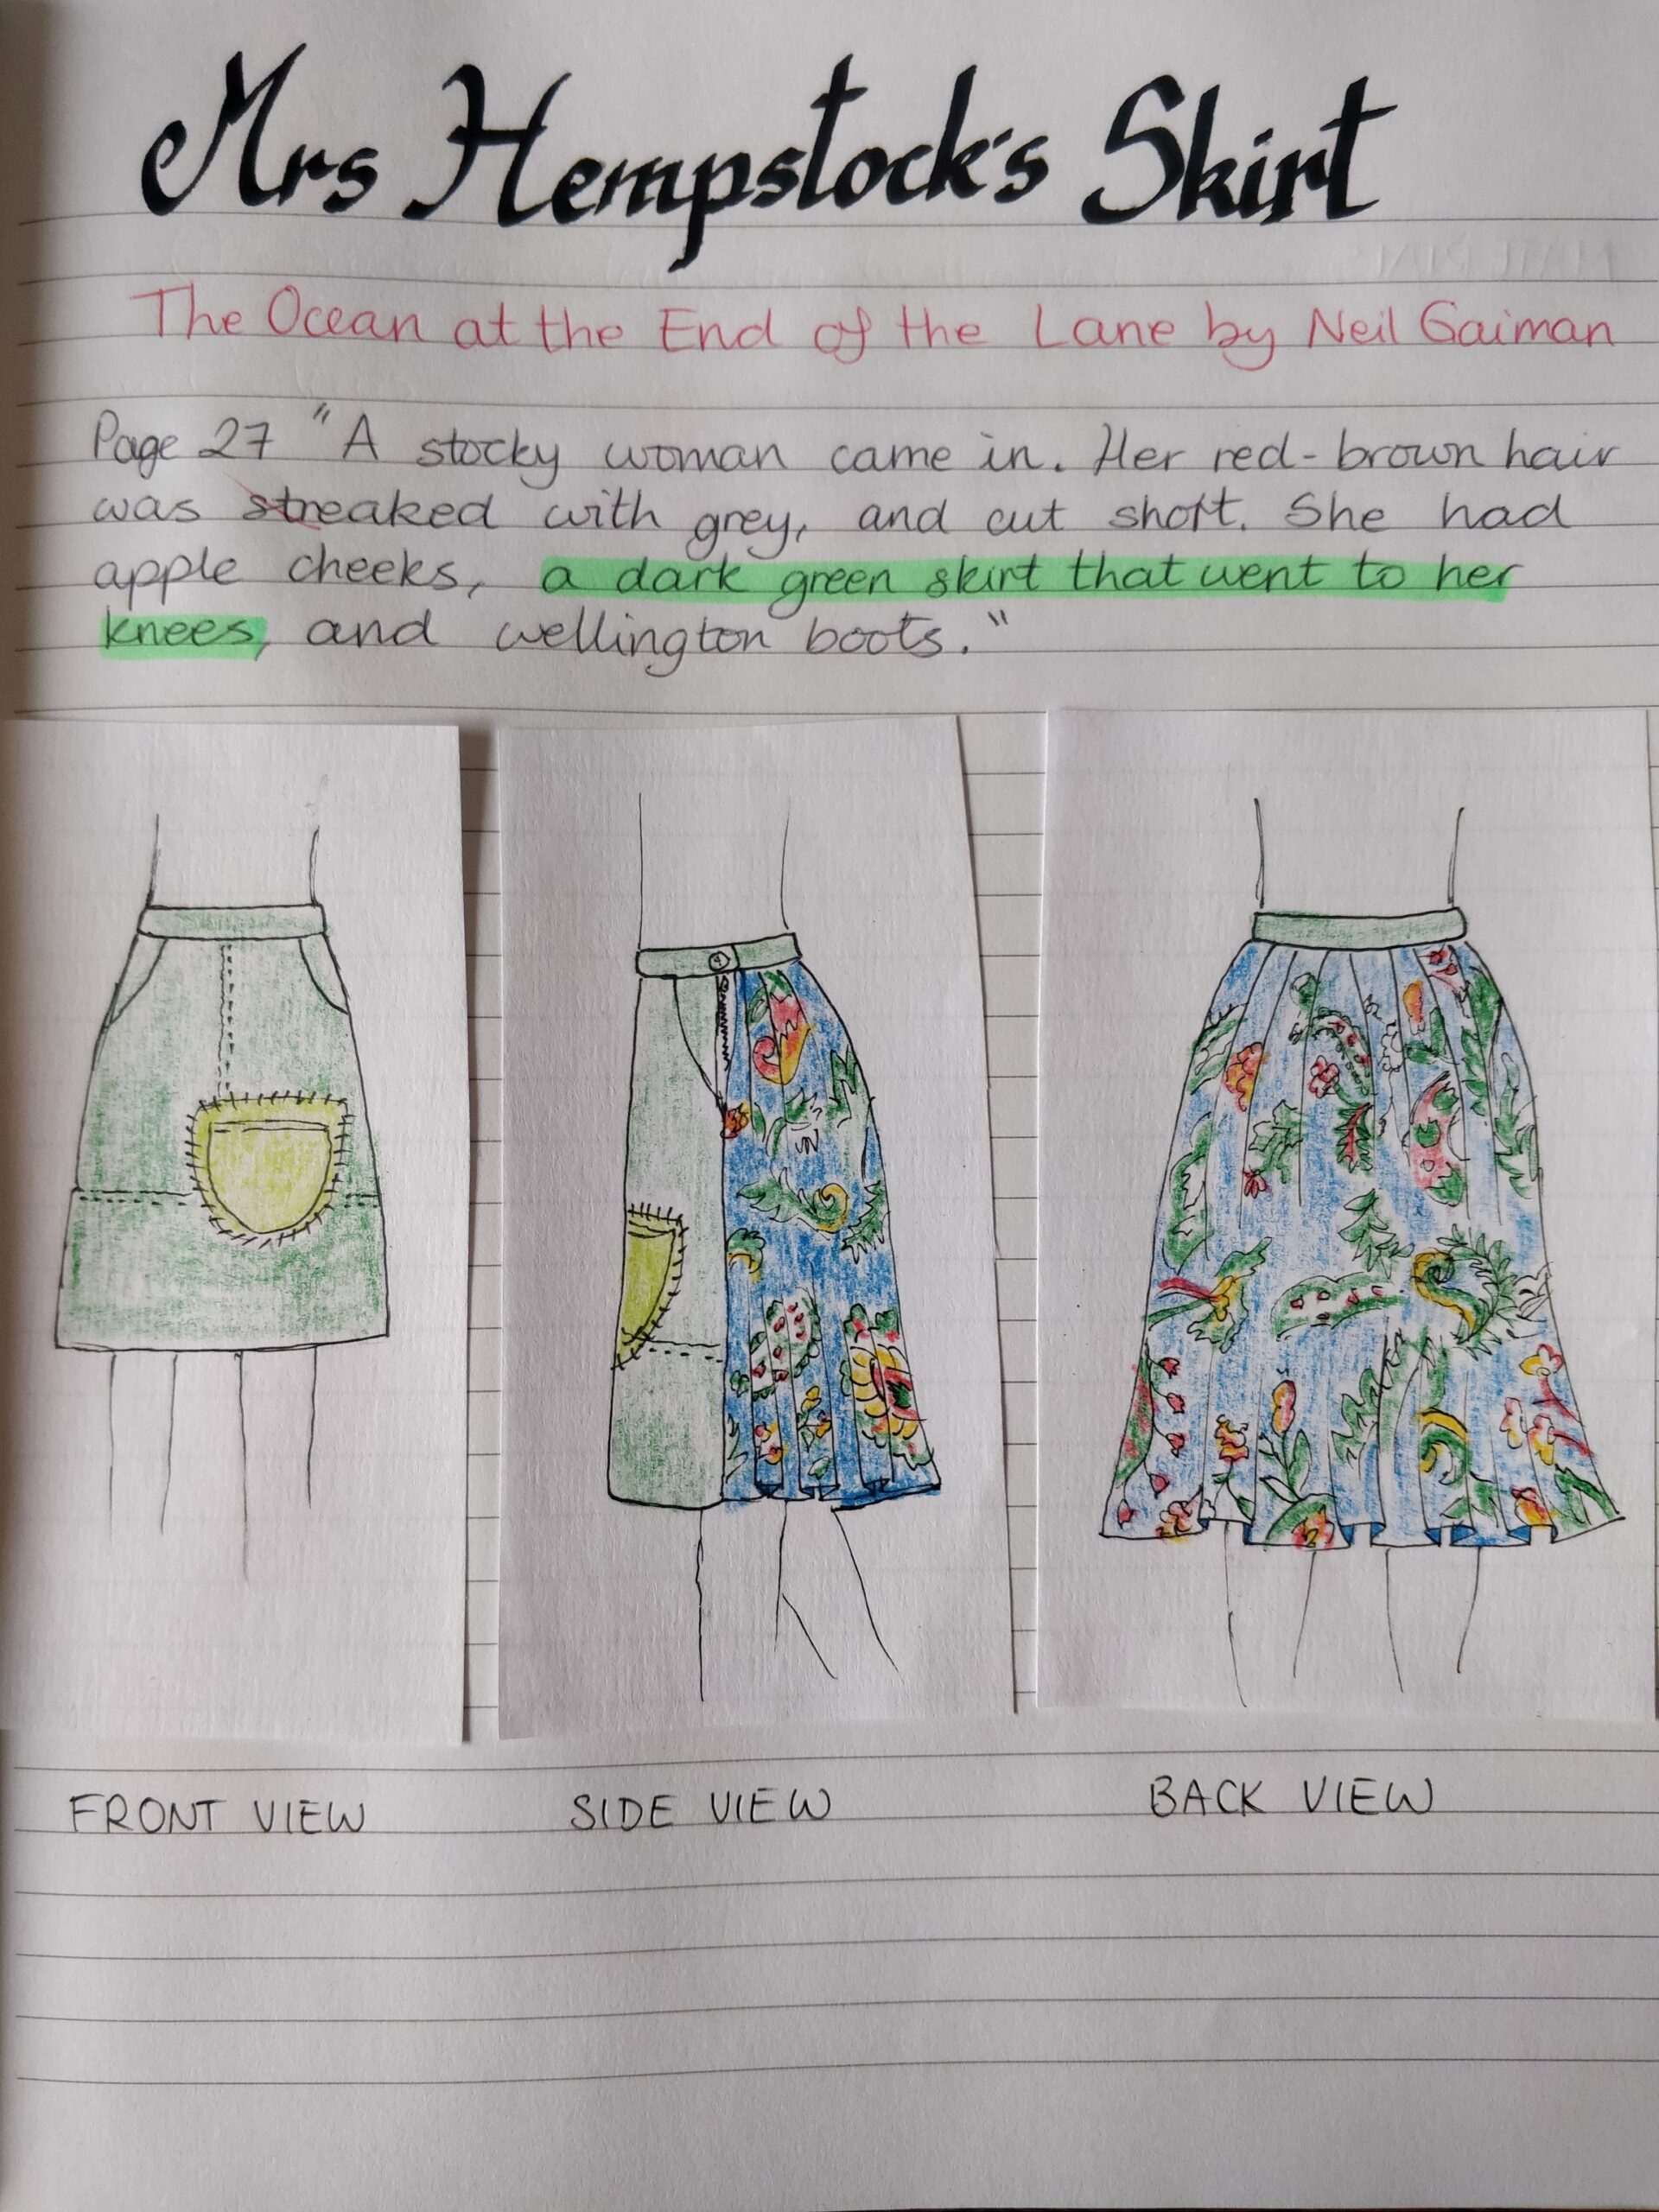
In the book, Mrs Hempstock is described as follows: "A stocky woman came in. Her red-brown hair was streaked with grey, and cut short. She had apple cheeks, a dark green skirt that went to her knees, and wellington boots."
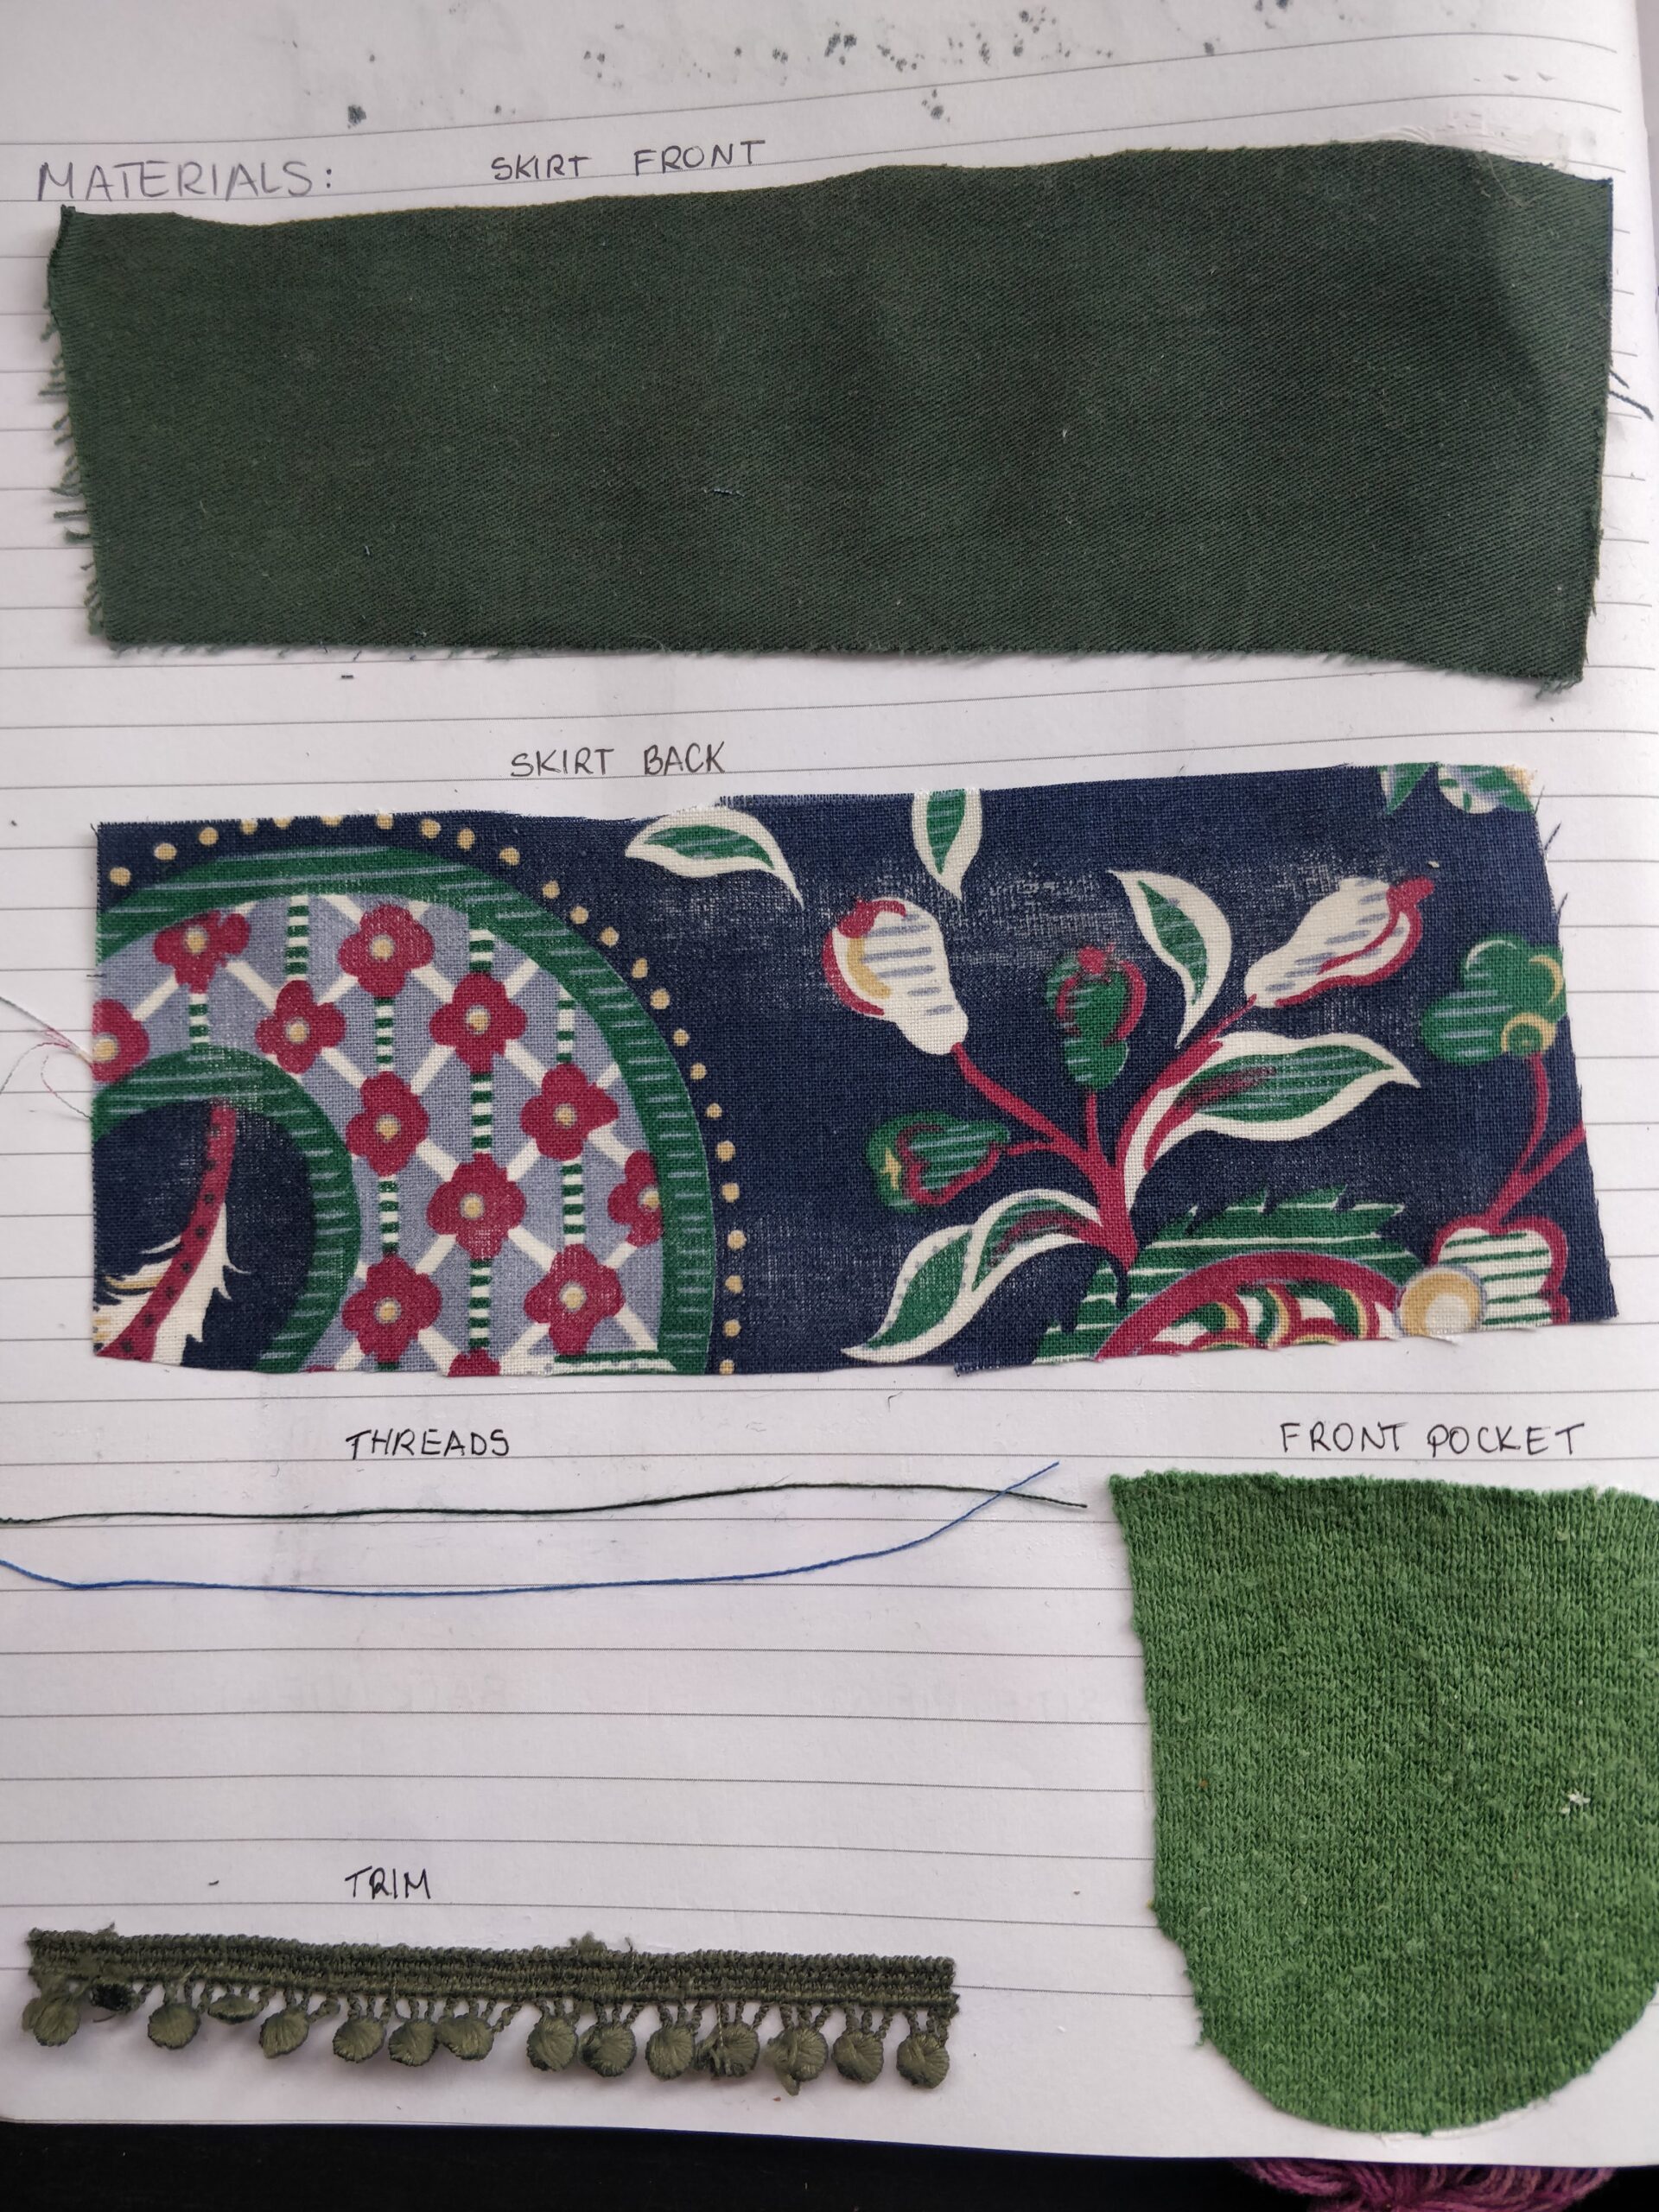
As this was primarily a repurposing project, I set about looking at all the dark green scraps of fabric and discarded clothing in my stash. I would like to thank all the friends who have contributed to the stash over the years. This is what I found: a ripped (and partially already used up) pair of trousers, a pocket off an old jumper (the jumper had already been cut up and used to make bunting, see special occasions post), a beautiful patterned second-hand duvet cover obtained from a charity shop and a pair of damaged shorts with a decorative trim.
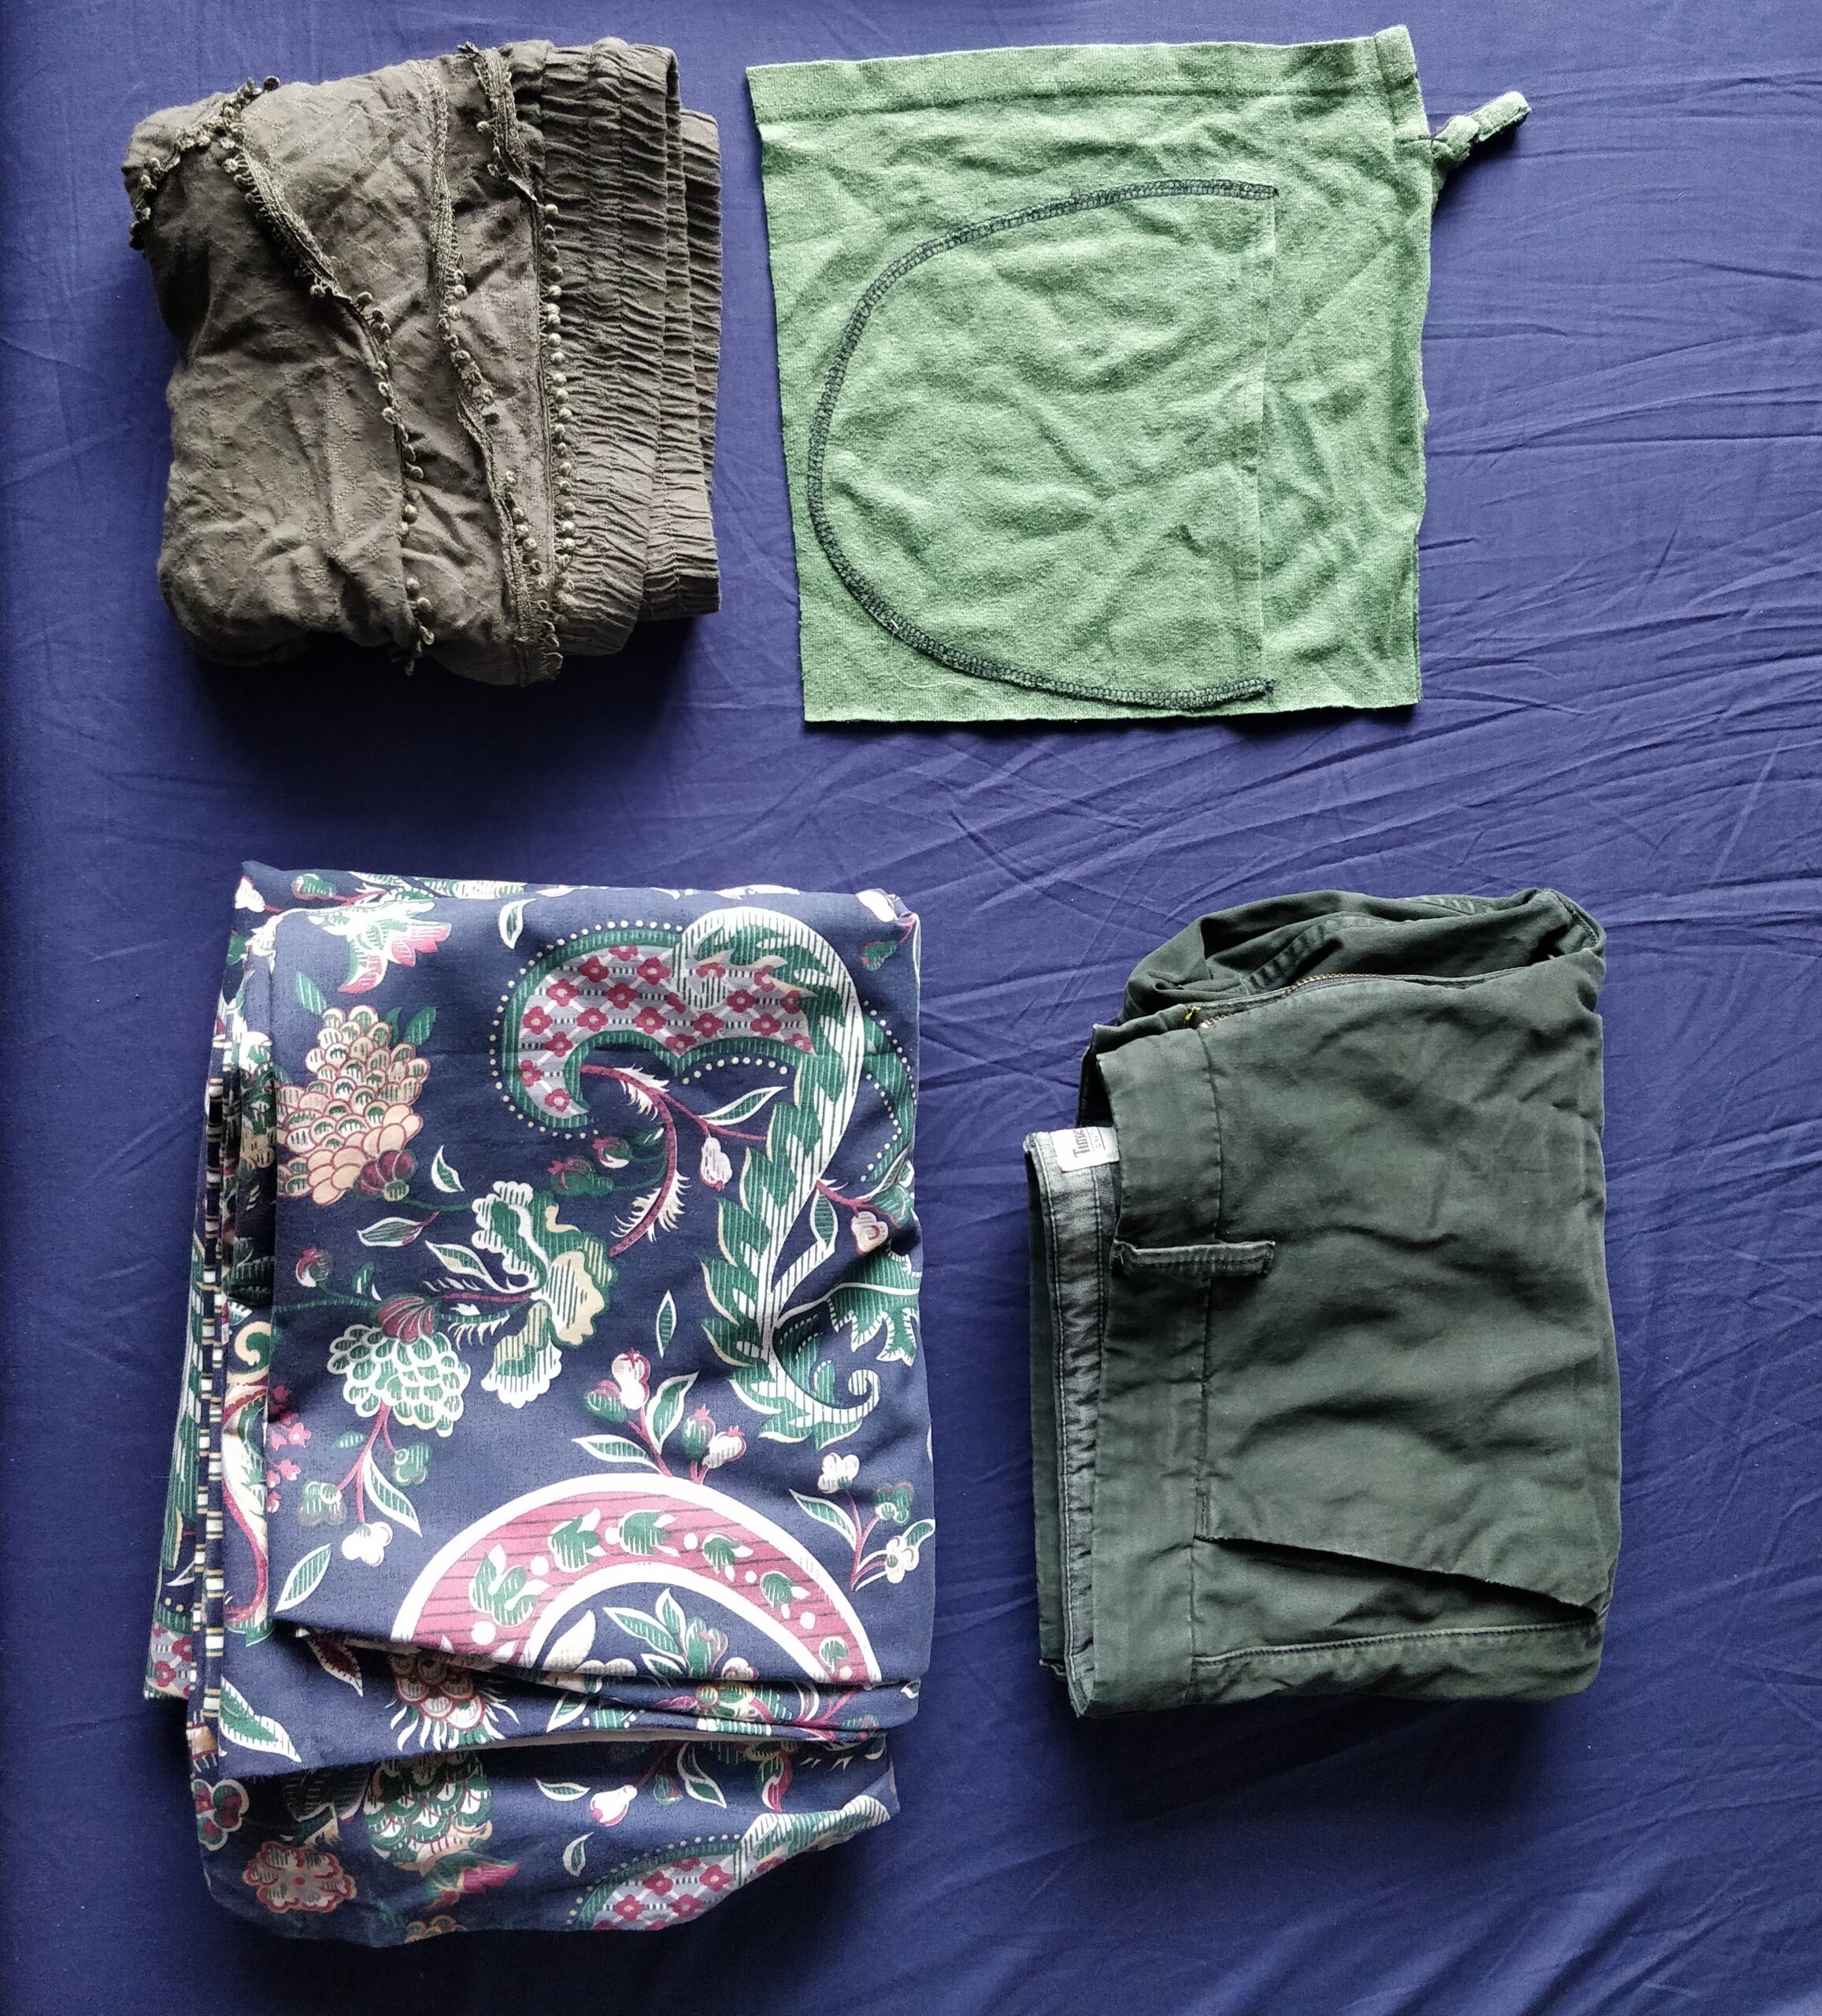
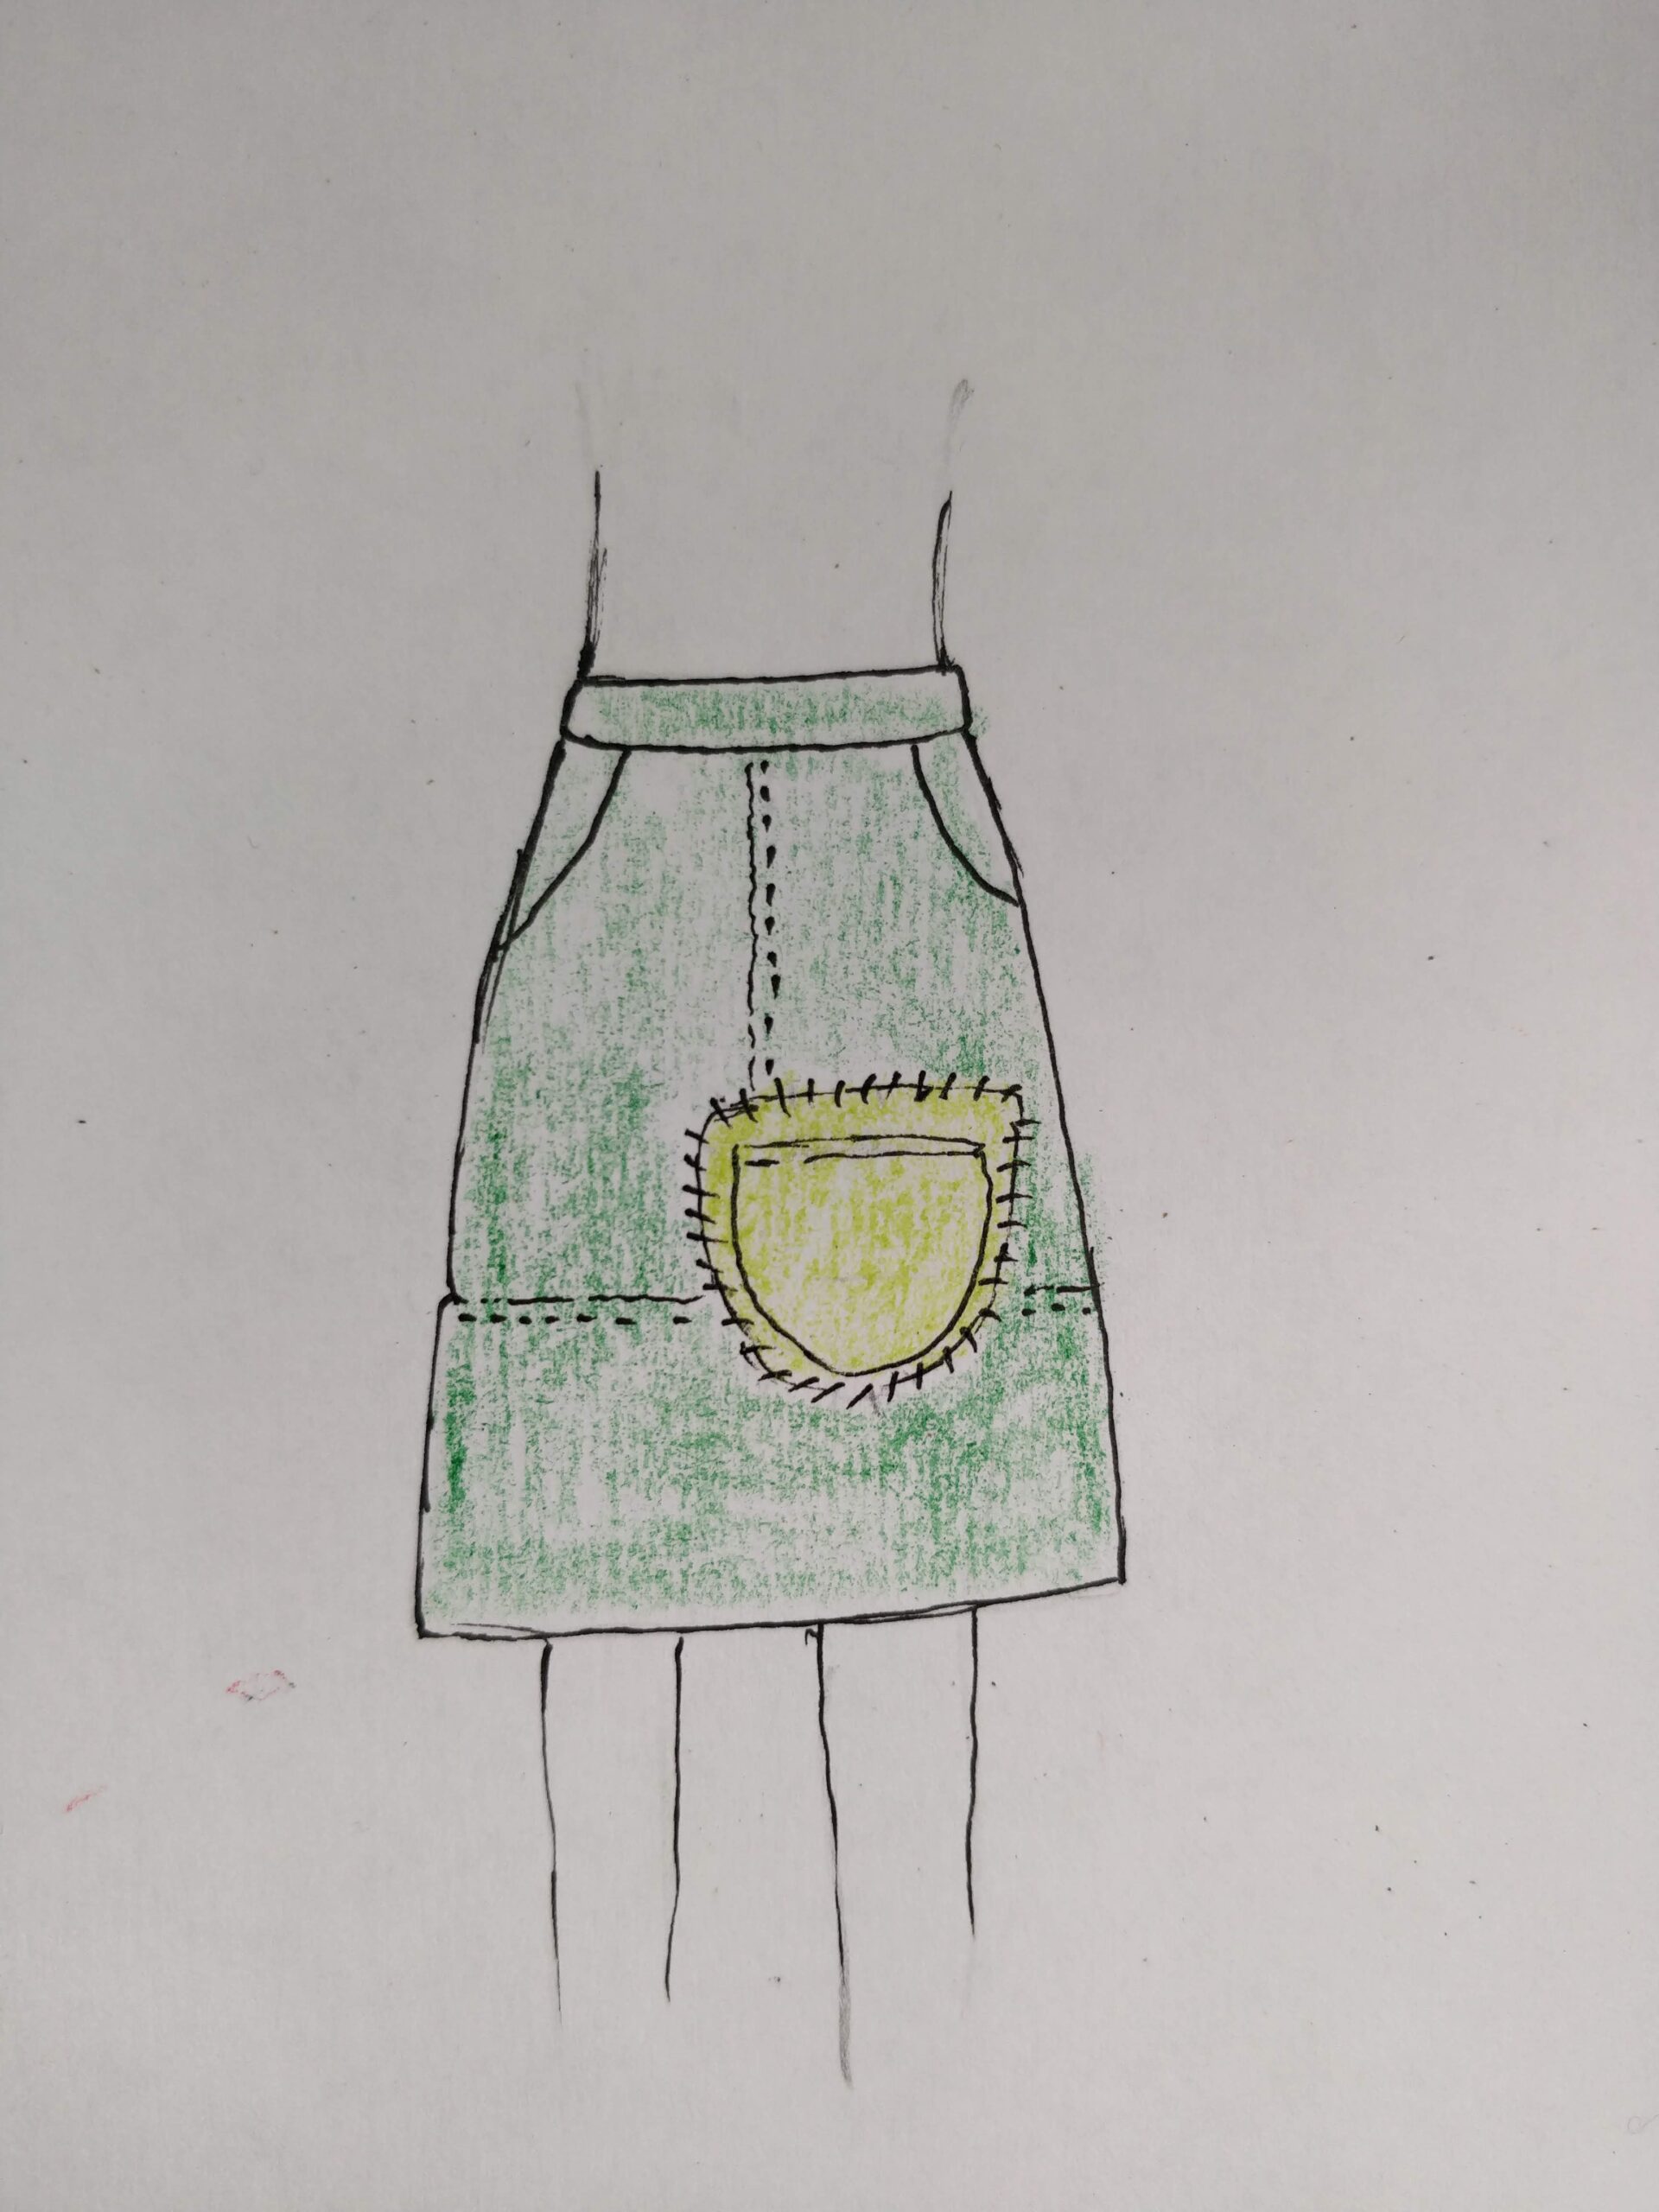
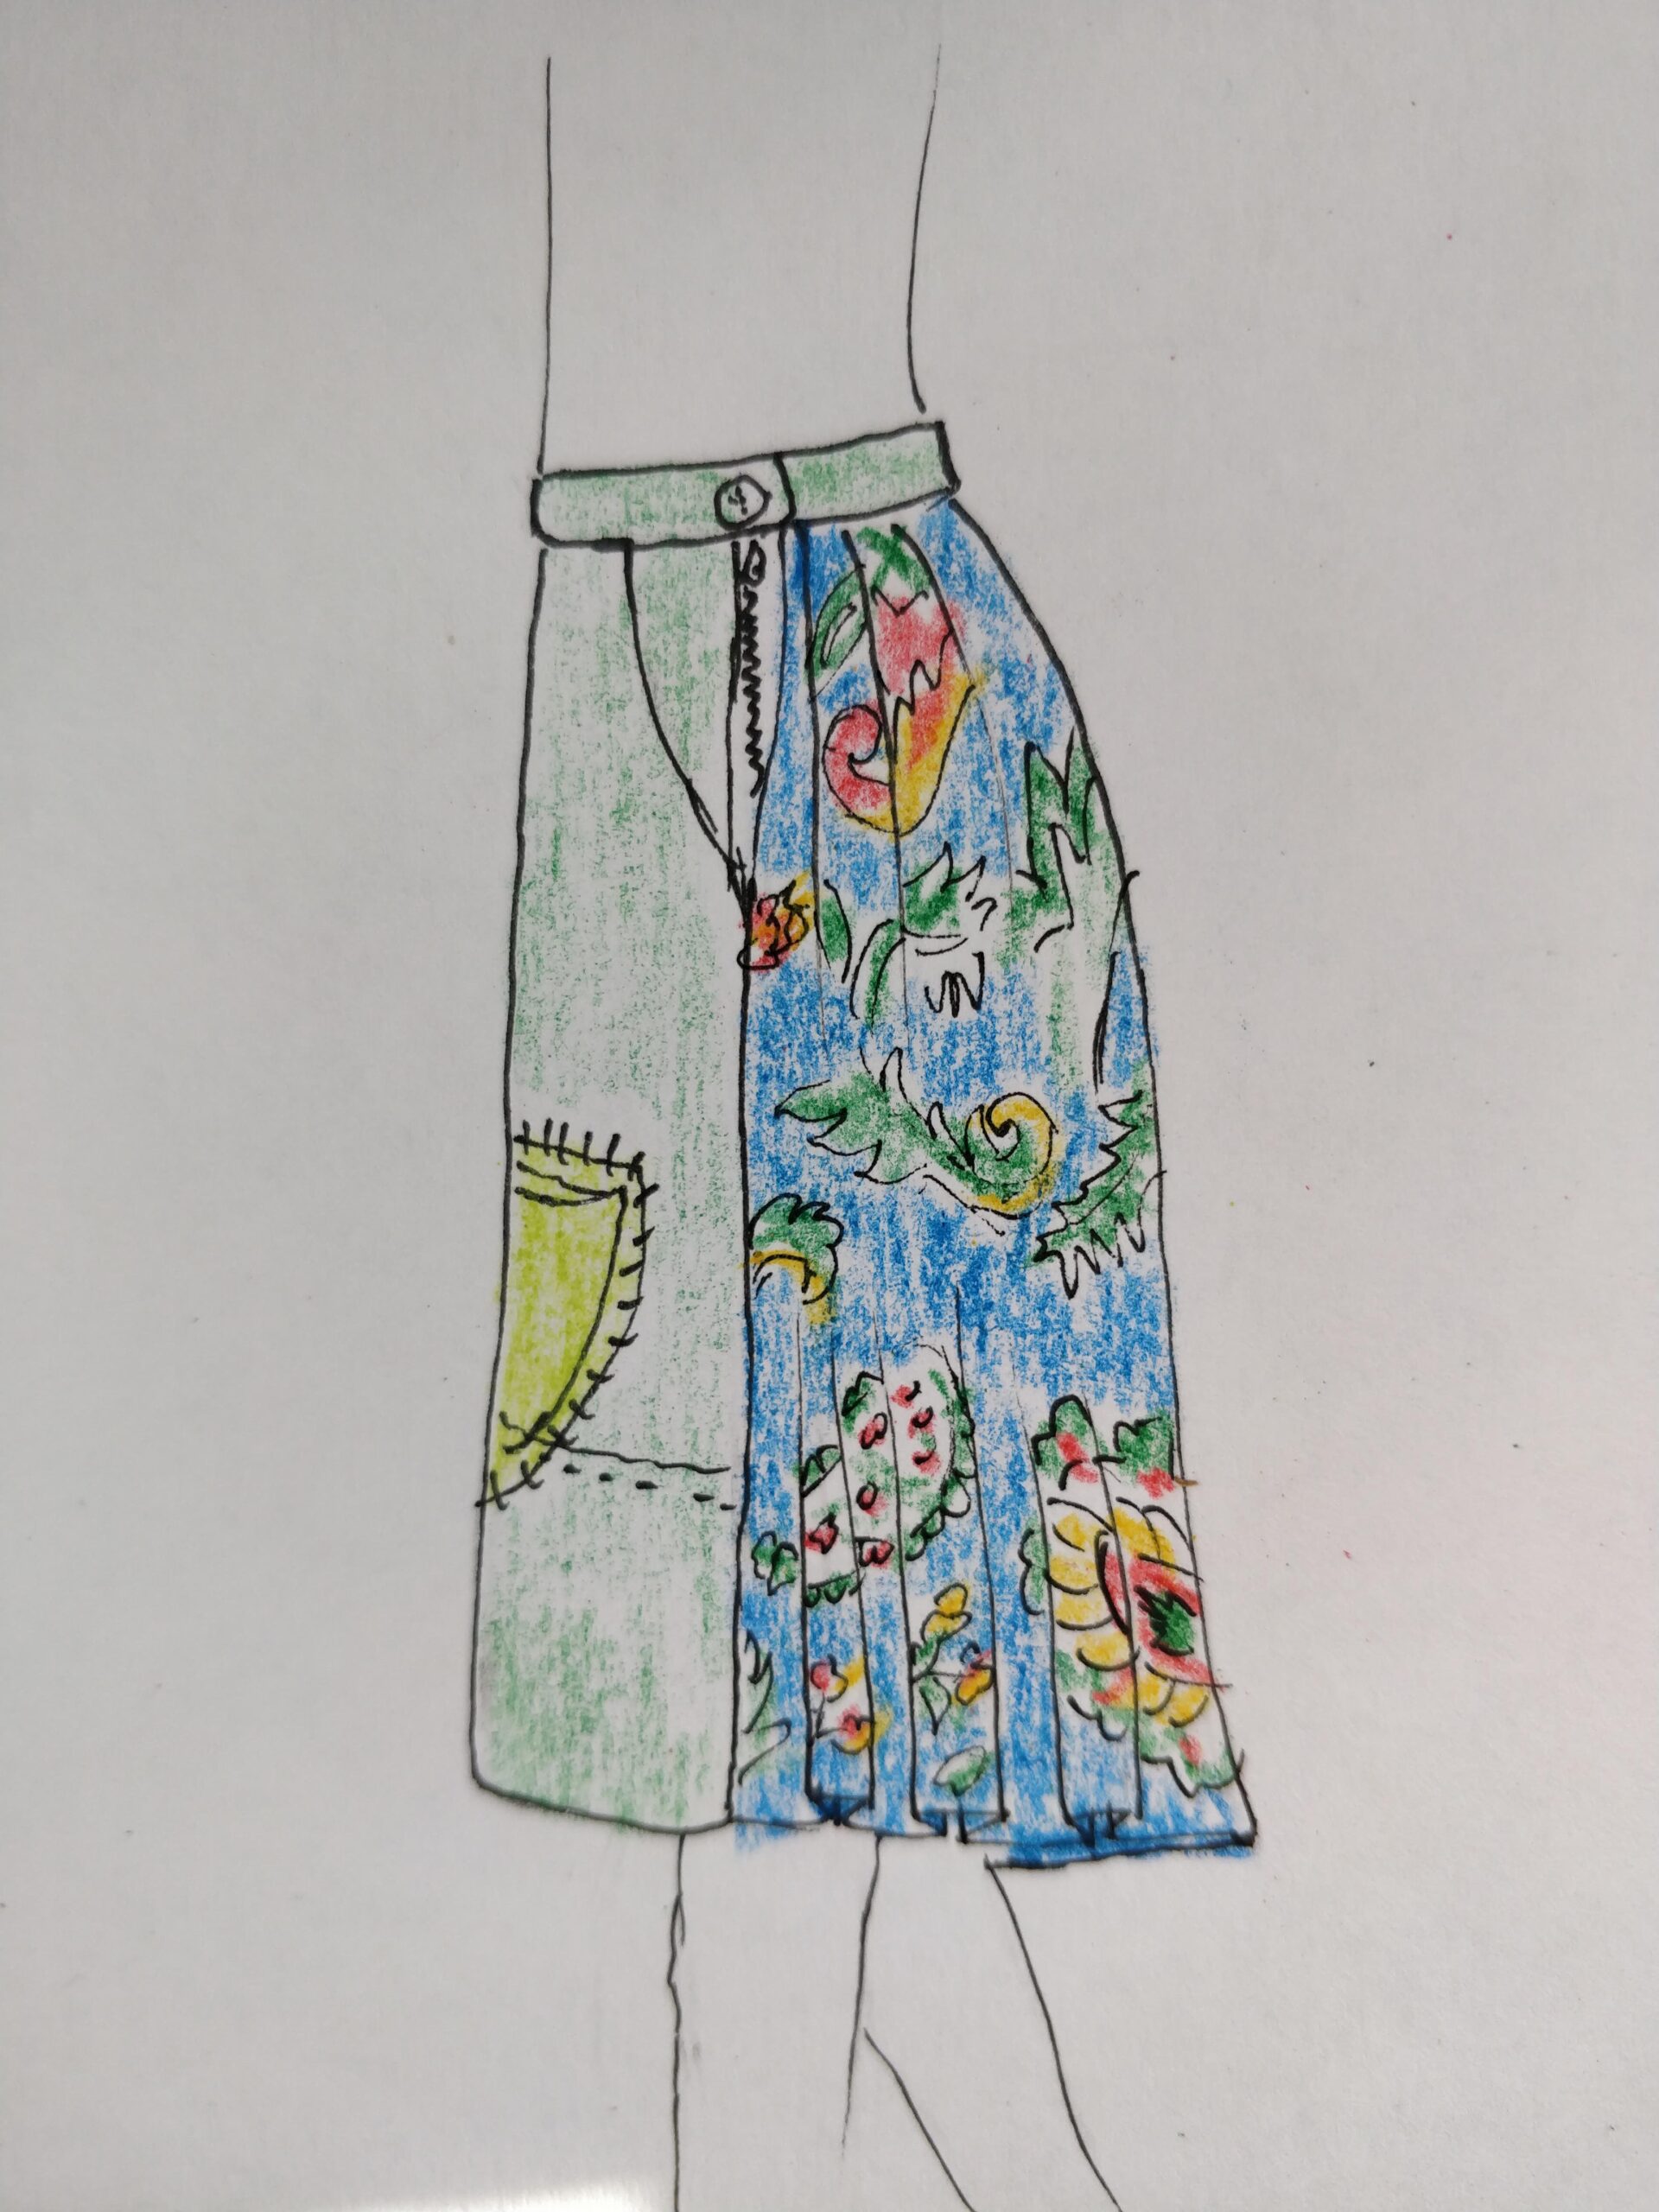
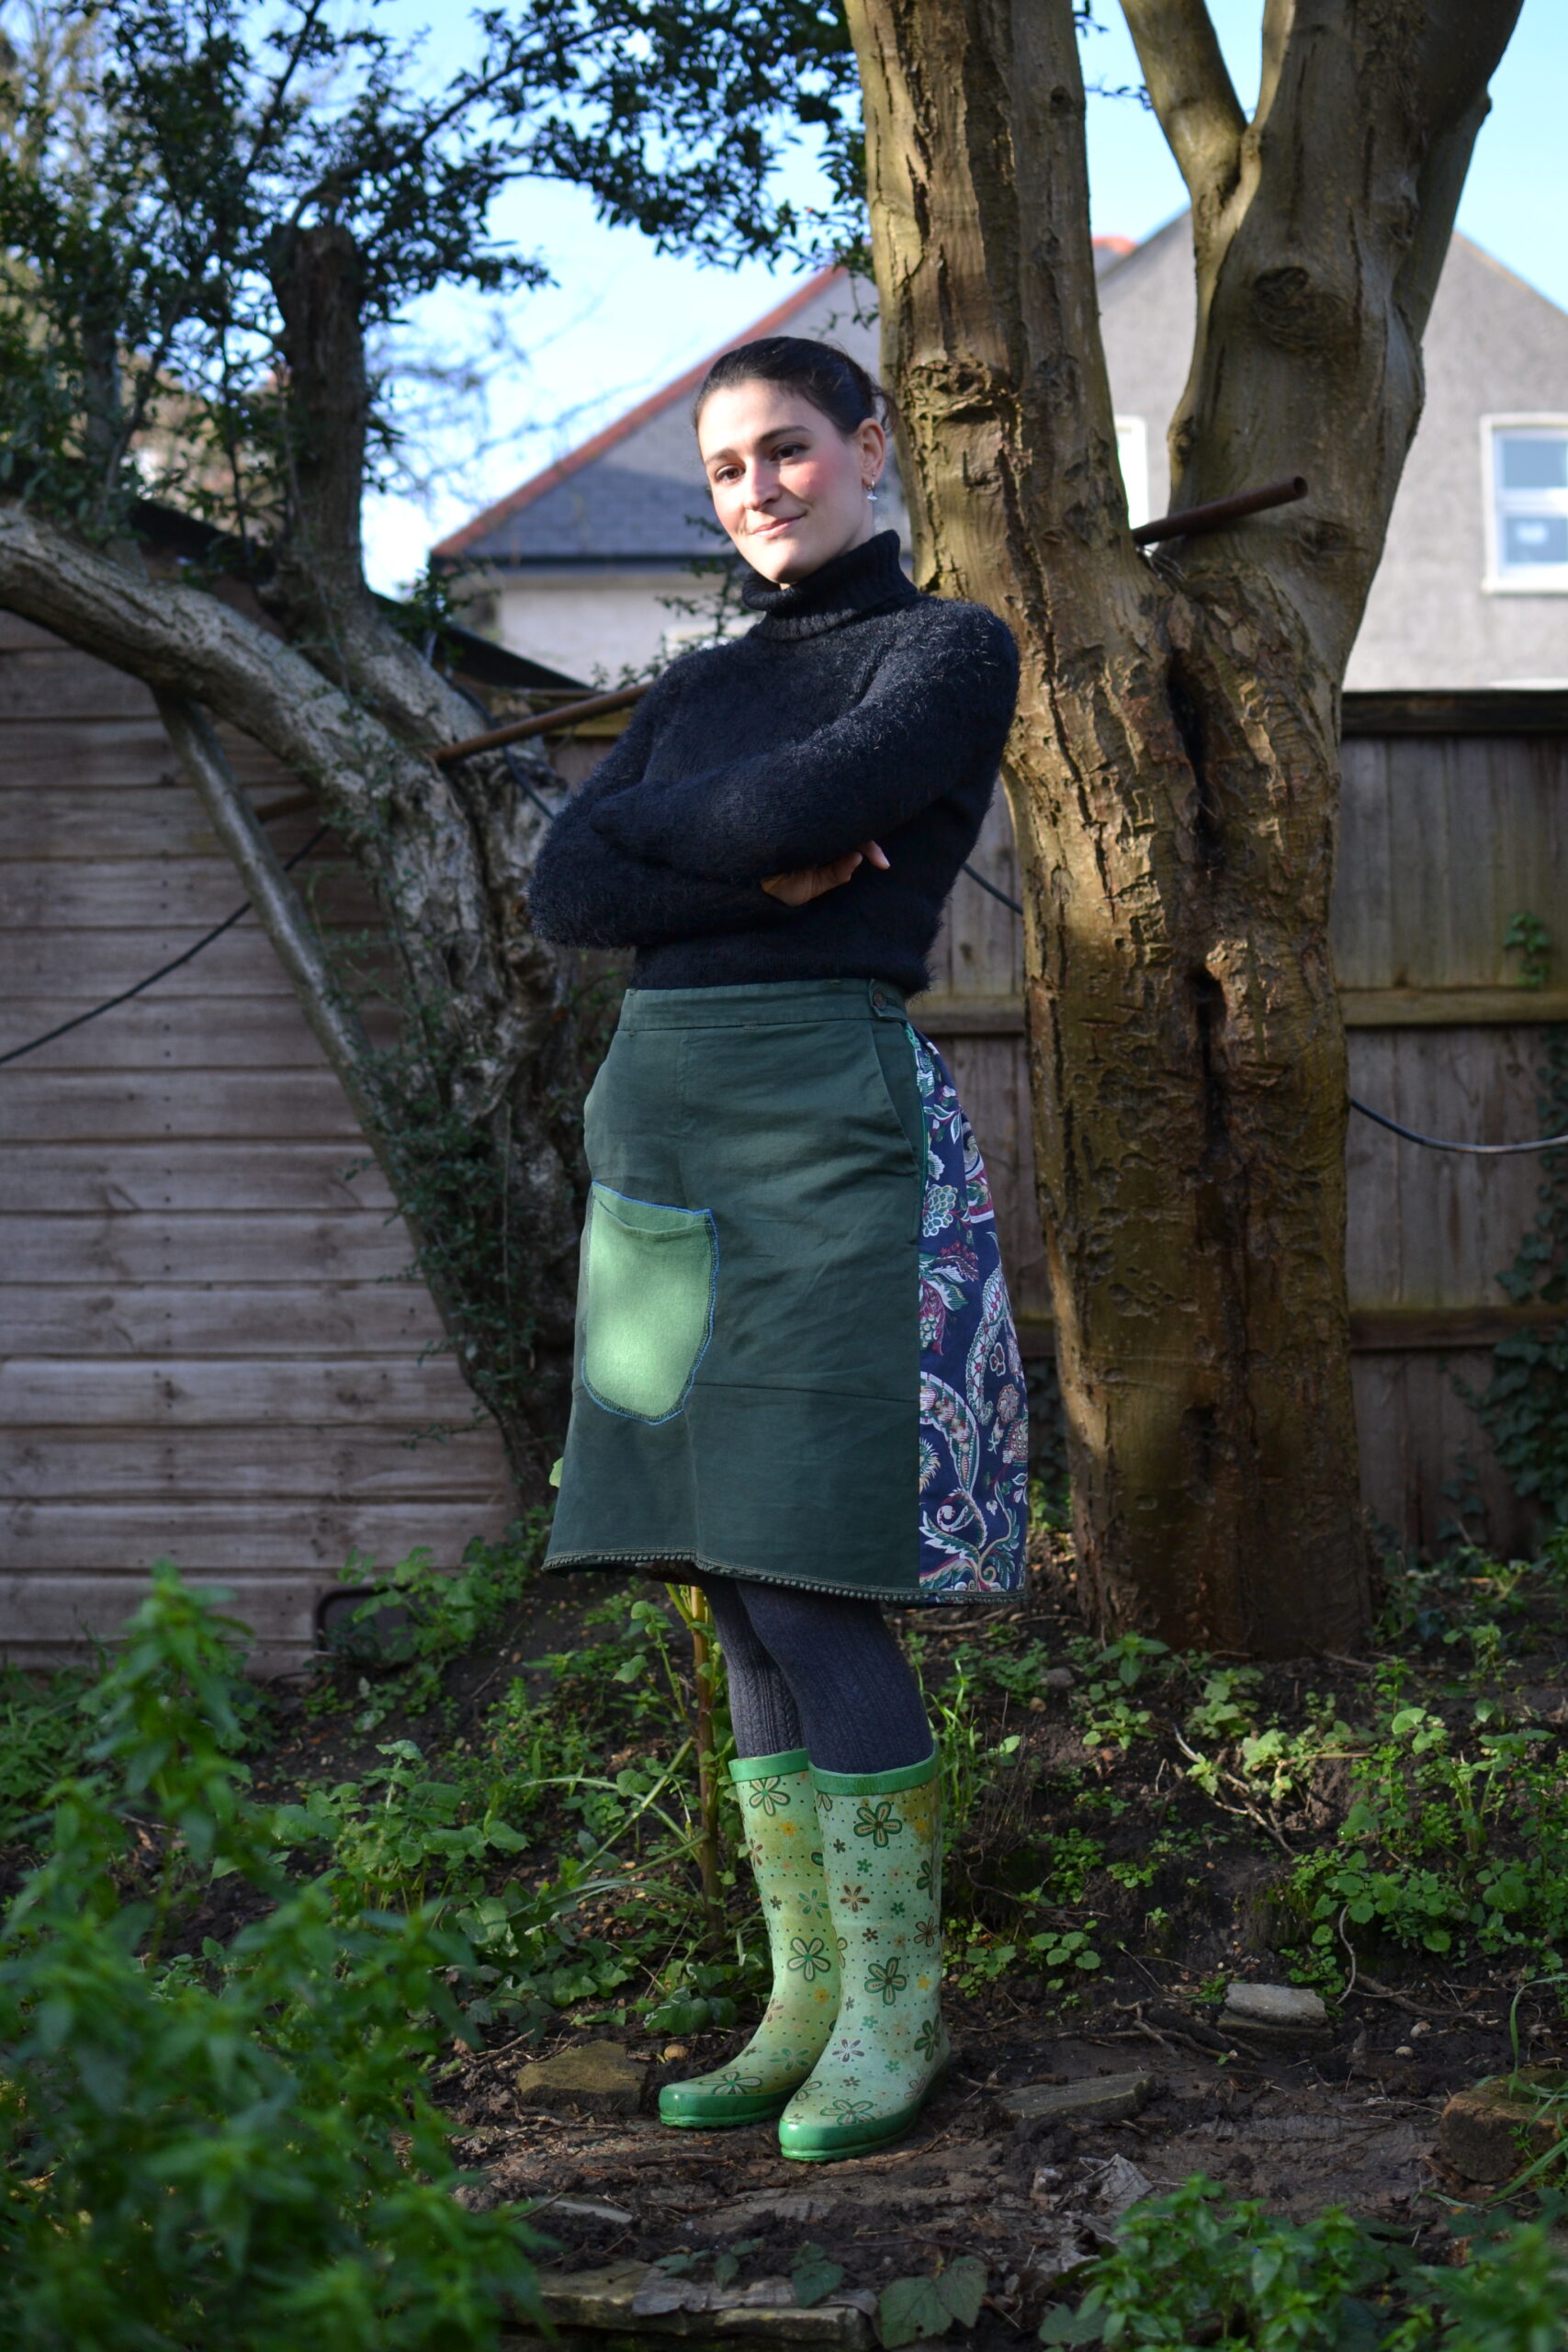
I gathered all my materials and started thinking about how I could combine them into a skirt for Mrs Hempstock. I contemplated trying to find a pattern that might work with this but I quickly realised that I needed to let the materials guide me. The first thing I noticed was the pocket. I decided that, as Mrs Hempstock is a highly practical woman, she would need plenty of pockets, so I set out to keep the trousers' side pockets intact and make them integral to the skirt. Later, I decided on adding on the extra pocket at the front to give it an even more 'farmyard apron' look. The blue and green fabric of the duvet cover on the other hand gave me inspiration of pleats, folds and hidden nooks in the fabric of time. I imagine this skirt as being made by Old Mrs Hempstock as she is seen as very competent with thread and needle and is in the habit of meddling with people's memories using a 'snip and stitch' technique on their clothing. Perhaps the large front pocket represents an important memory that her mother didn't want her to forget.
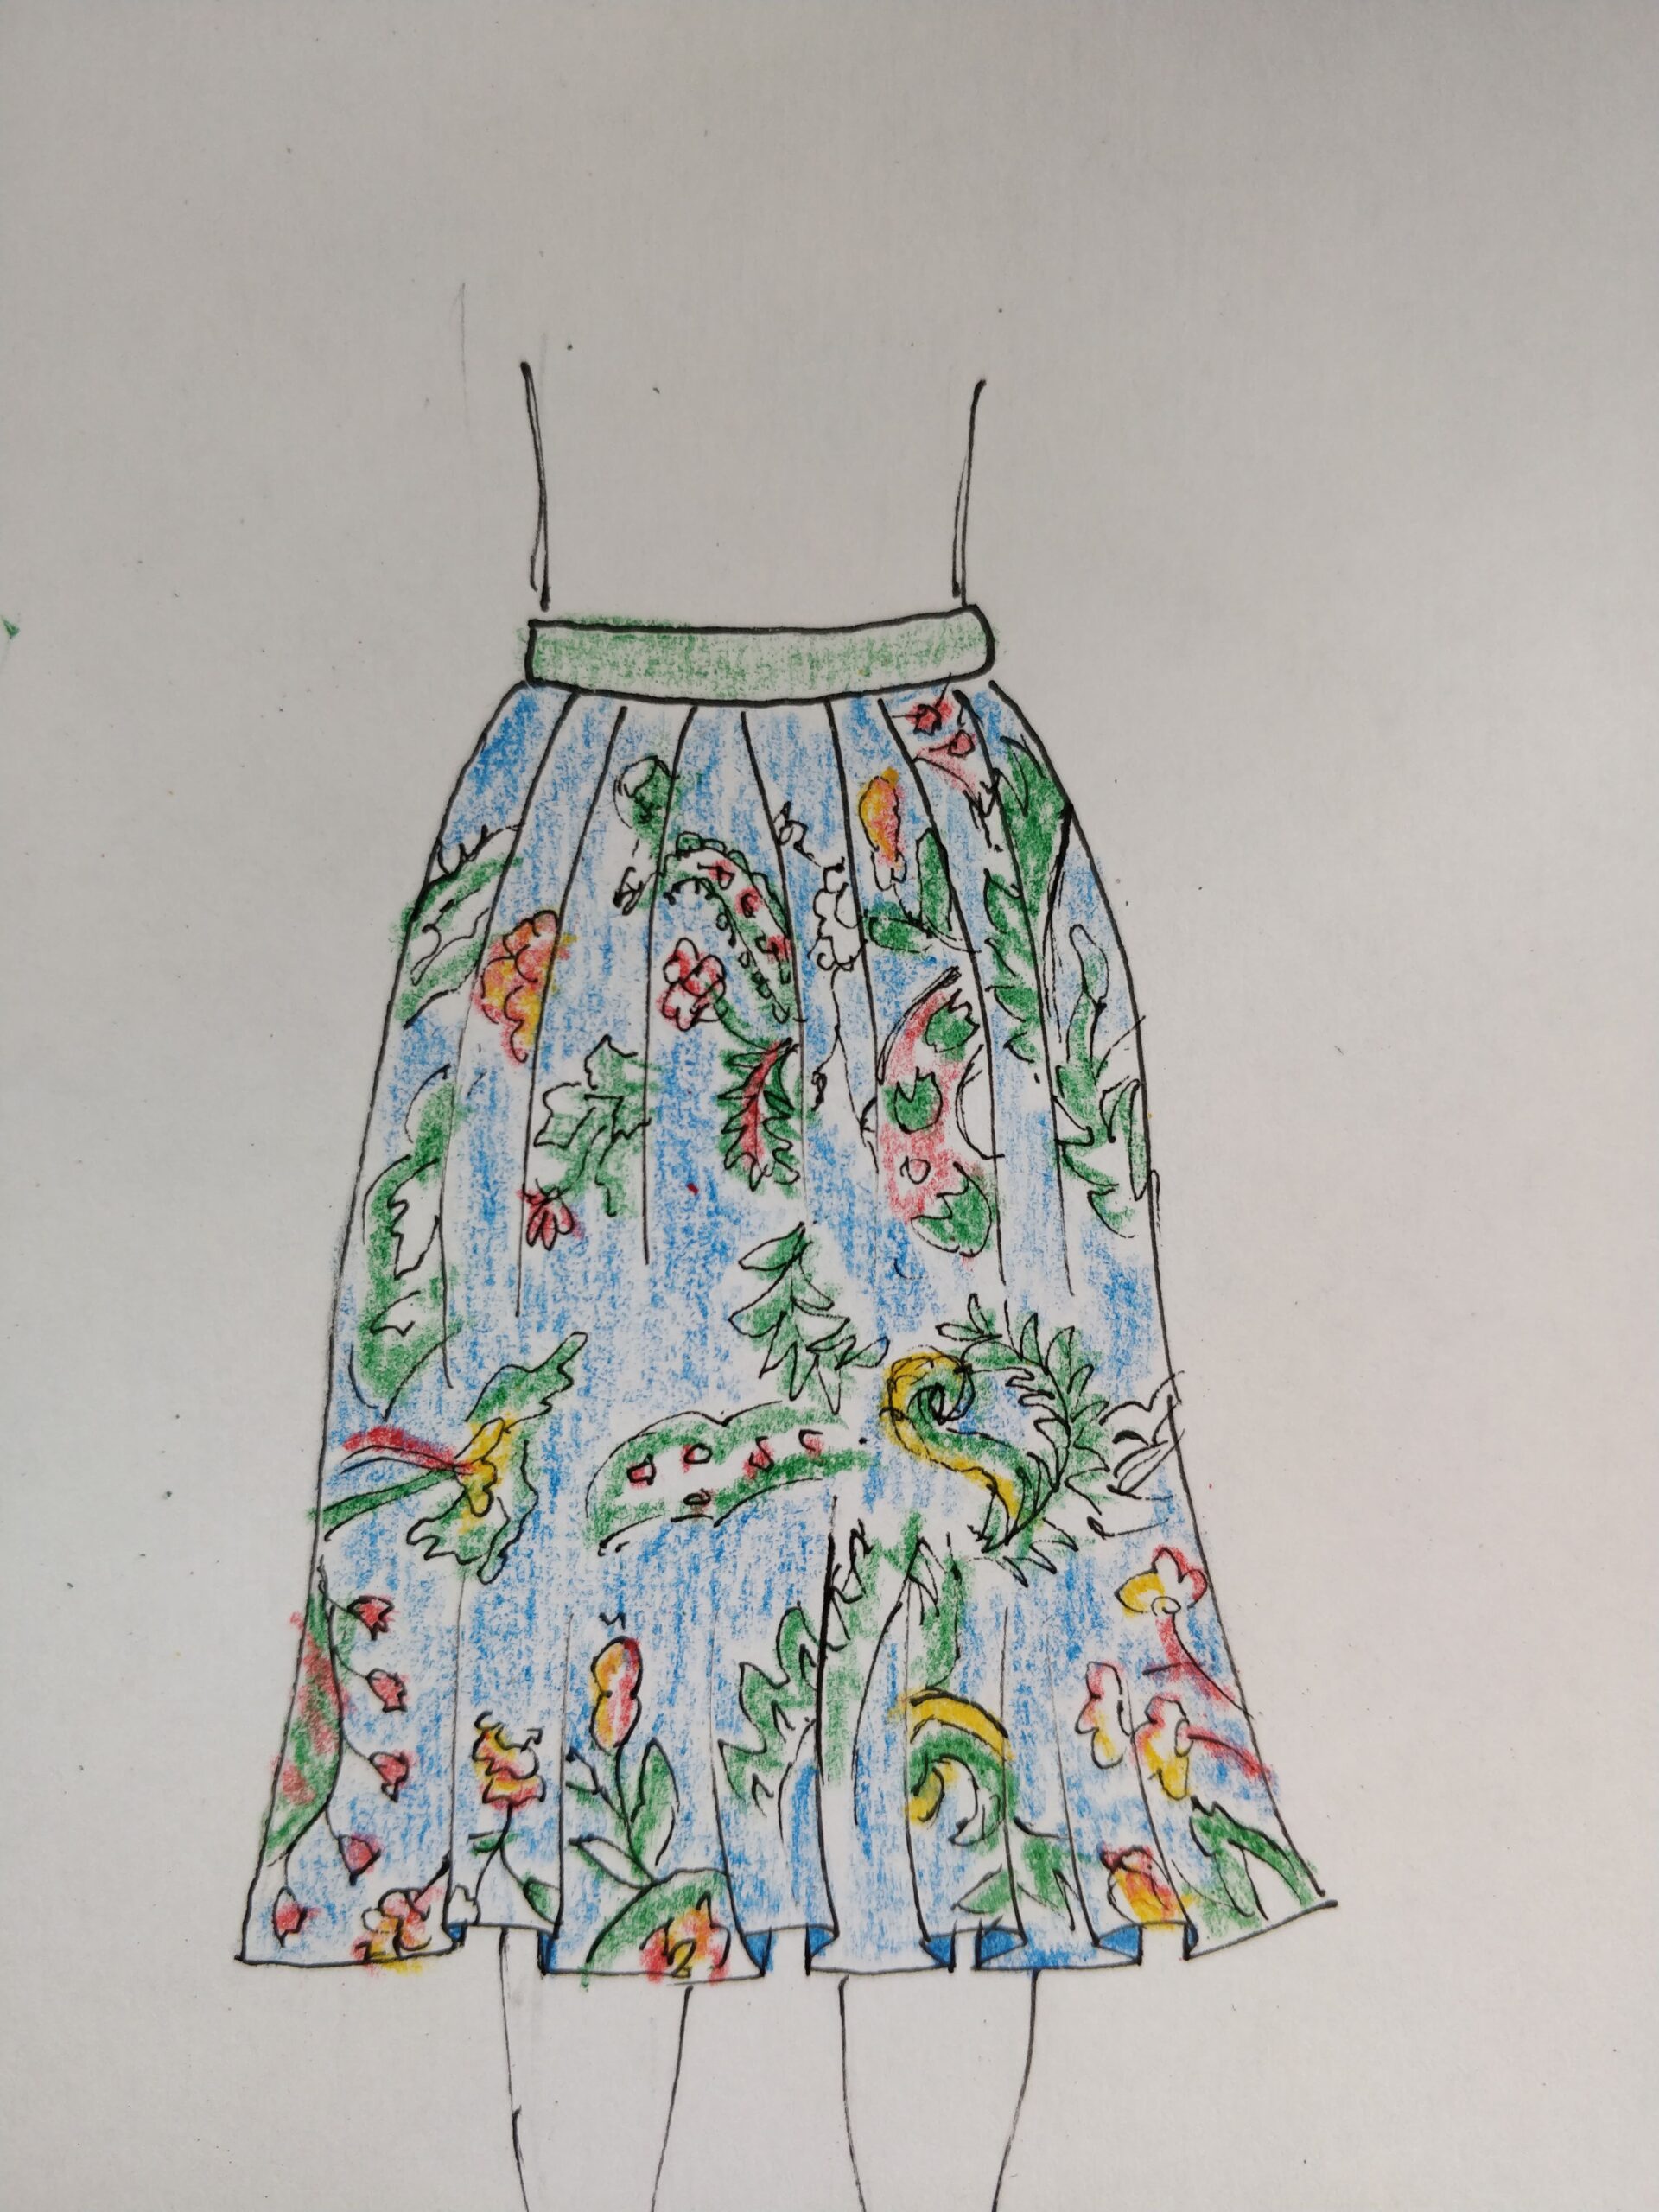
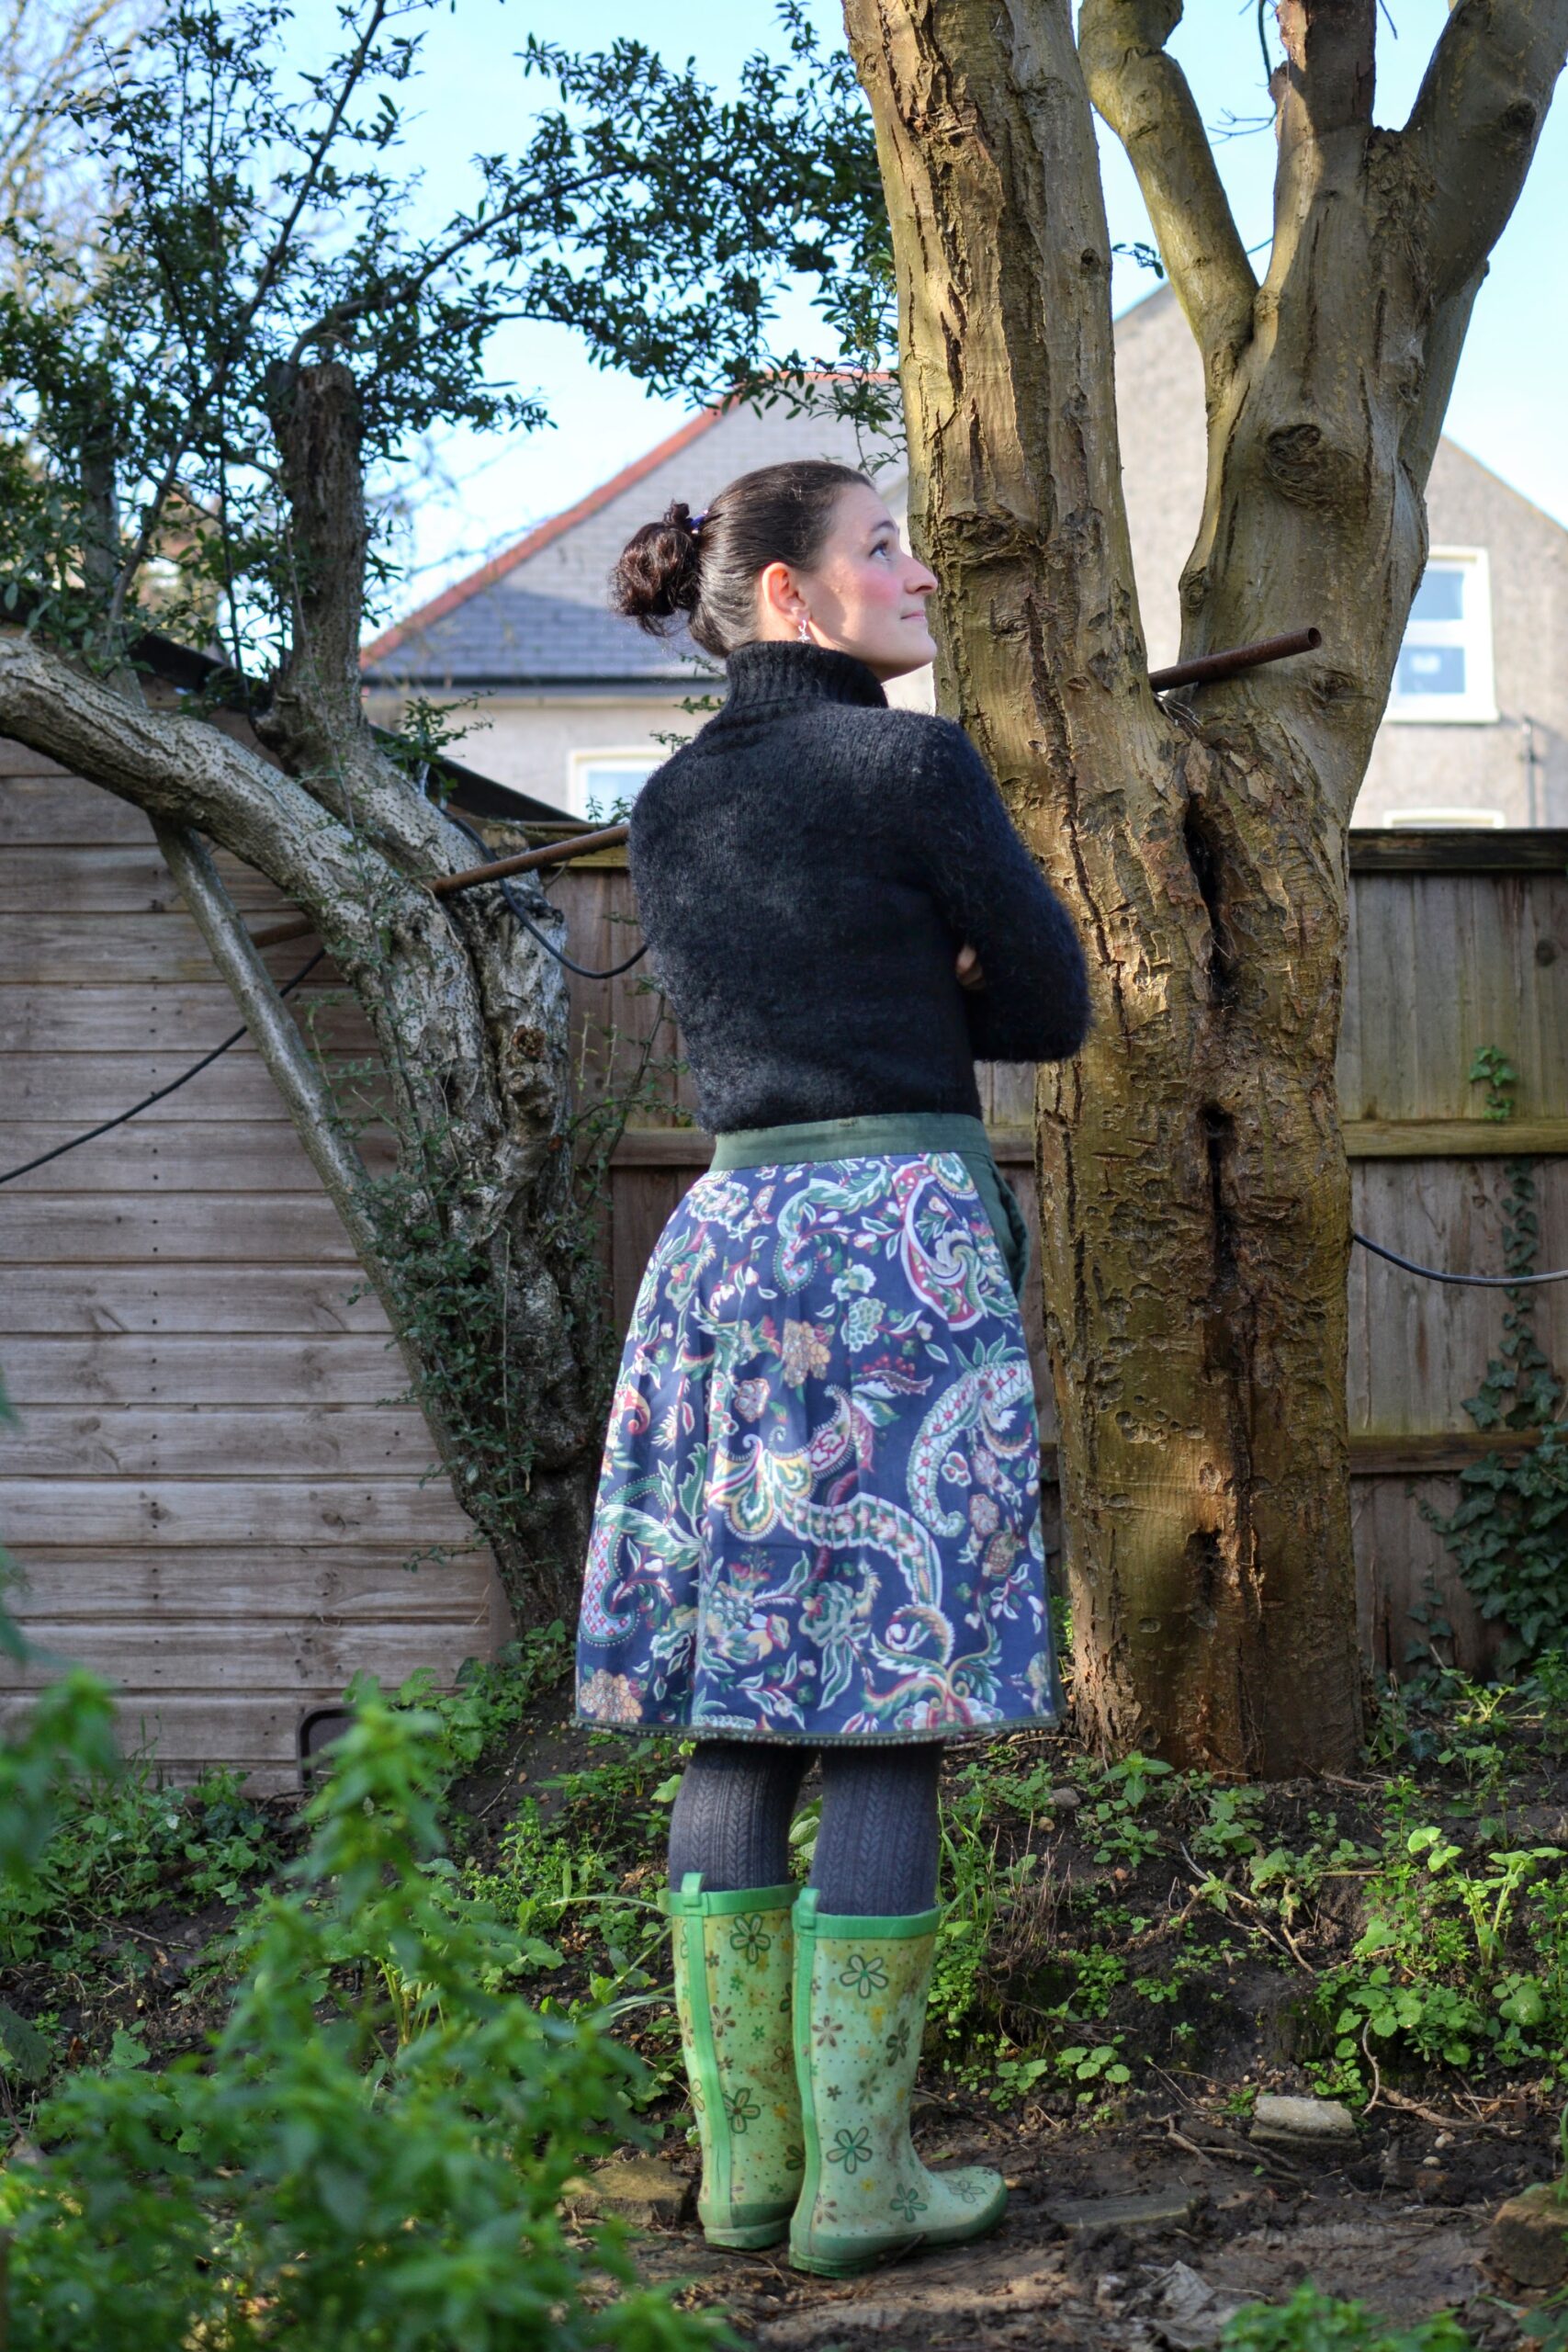
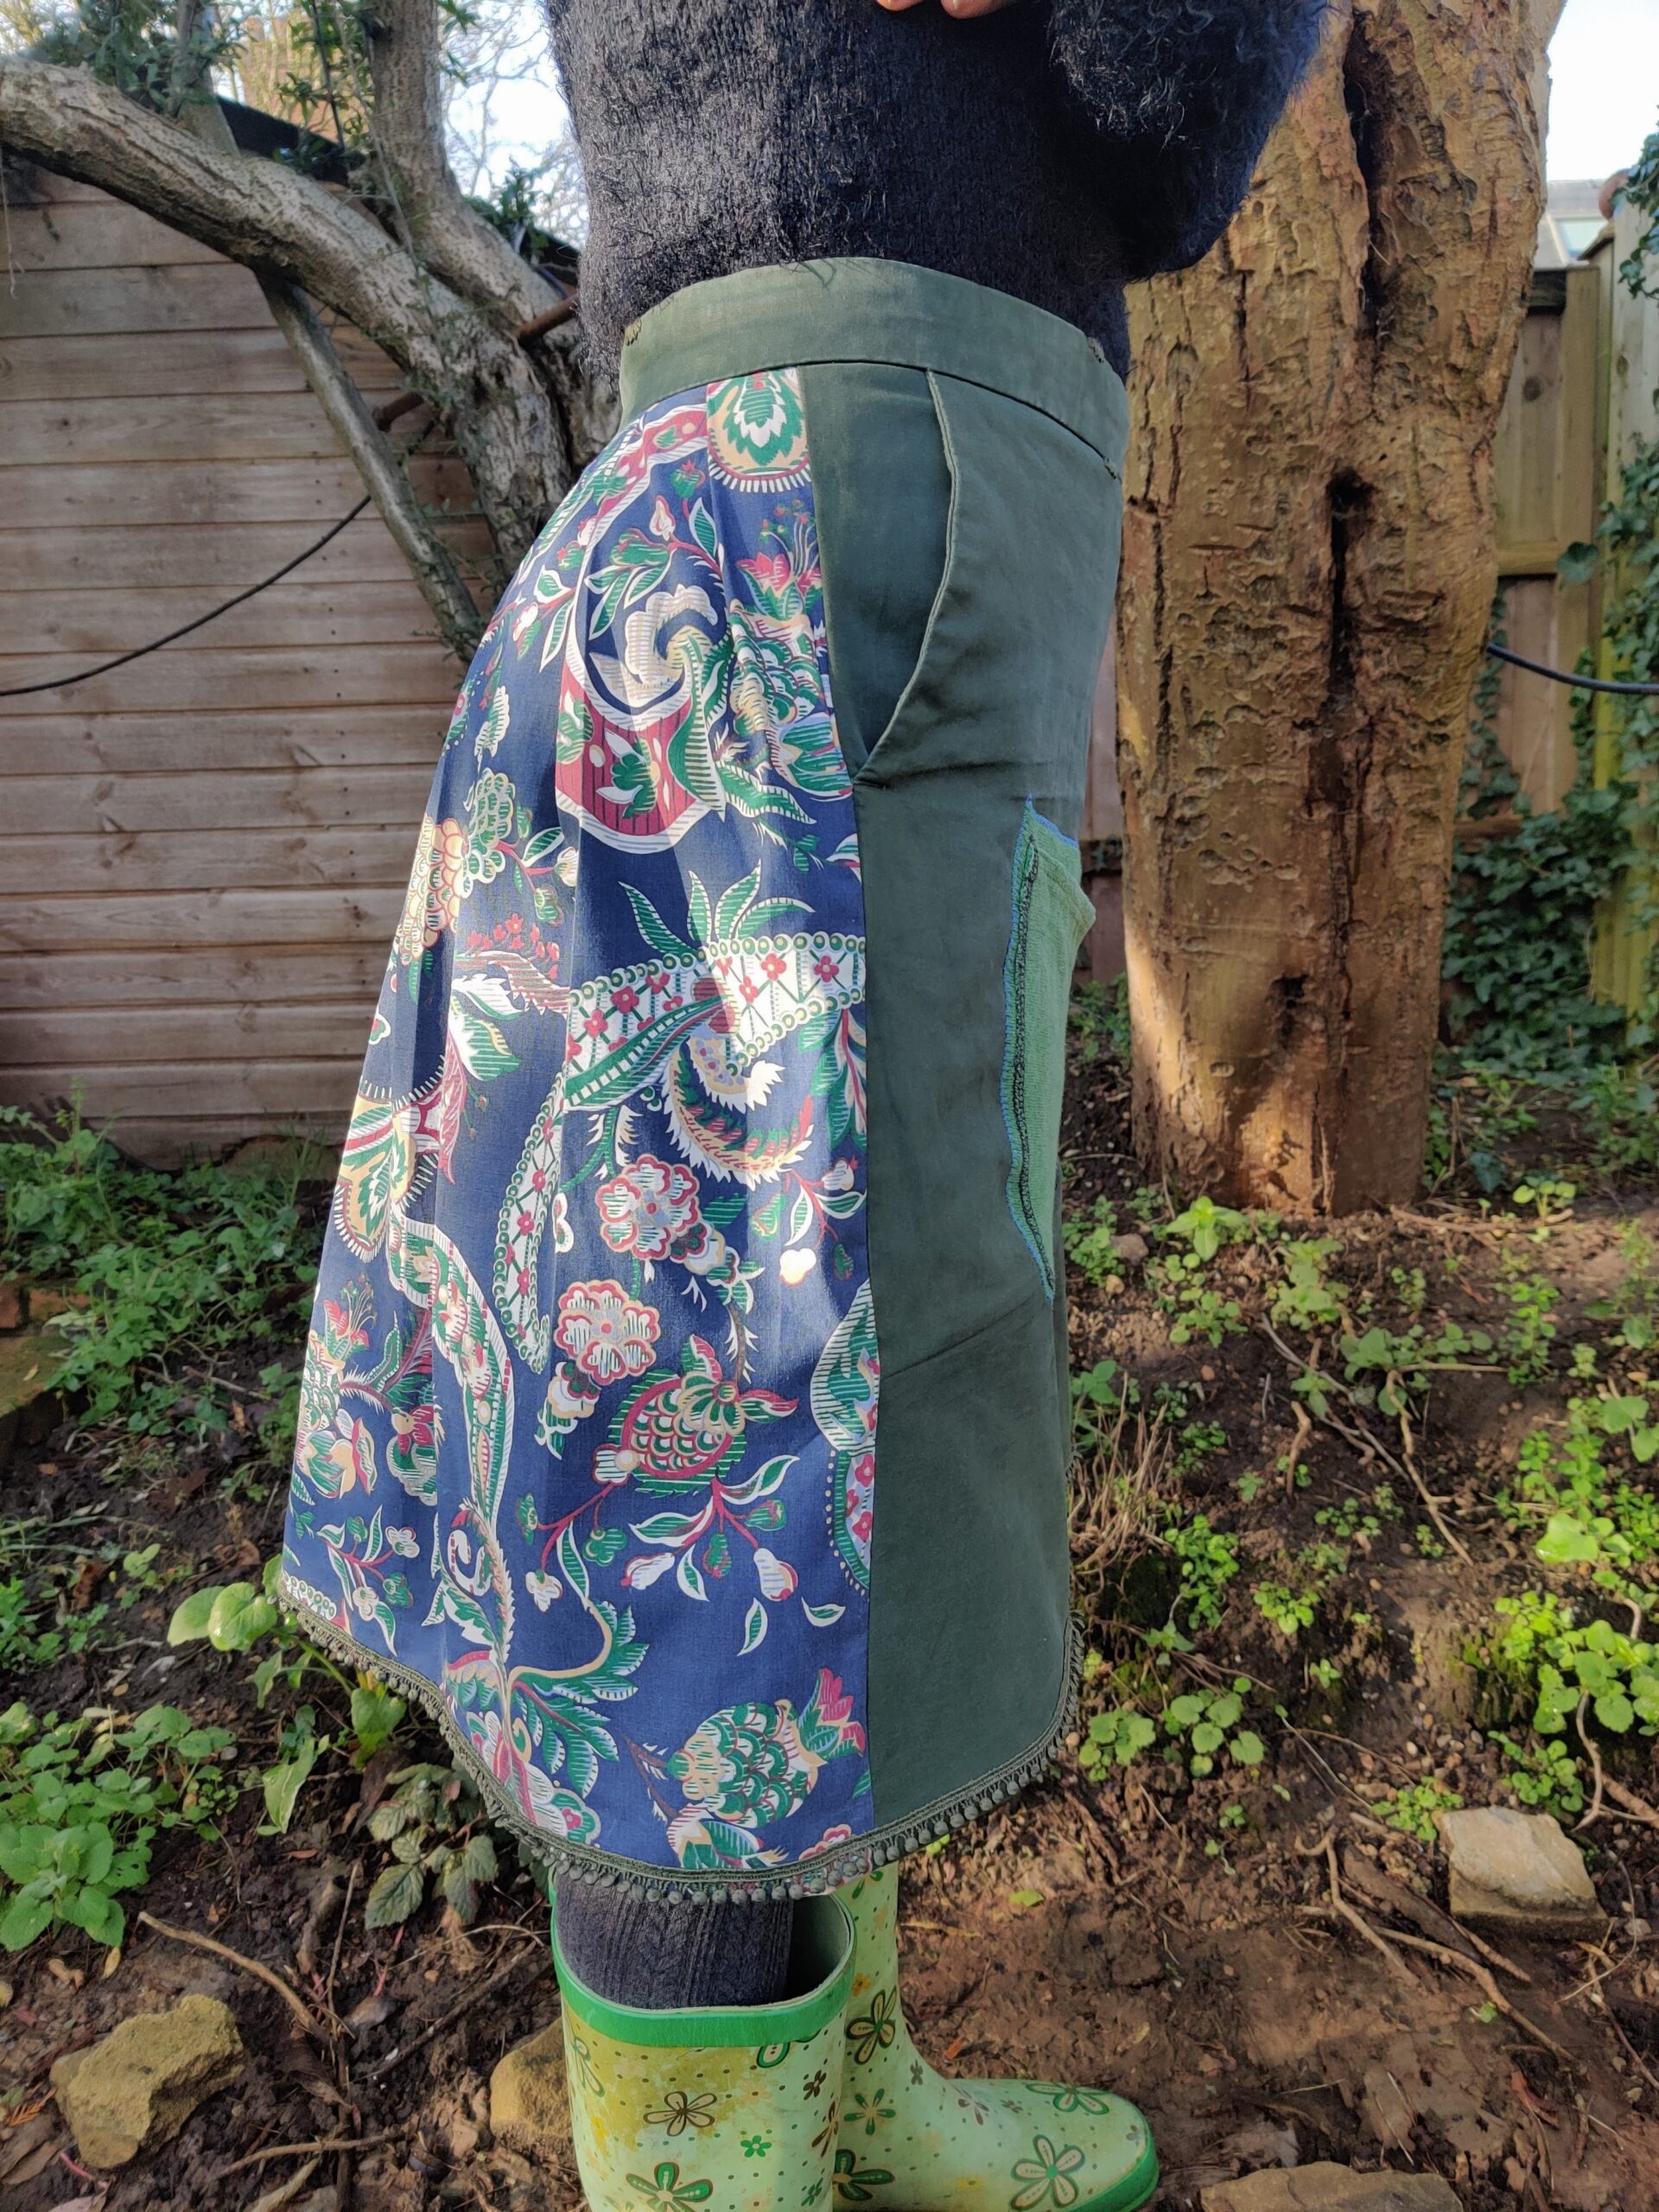
I designed the skirt based on this illusion of normality that reveals a much more faceted reality on the other side. I decided to make the skirt in a completely different style on the back using the softer flowing fabric in pleats. I also tried to reuse as many interesting and practical features of the garments I was repurposing so I decided to keep the trousers' waistband and buttonhole for the closure. From the shorts I unstitched the trim, unsure whether I would use it later. Here are my initial sketches of the design.
The Construction
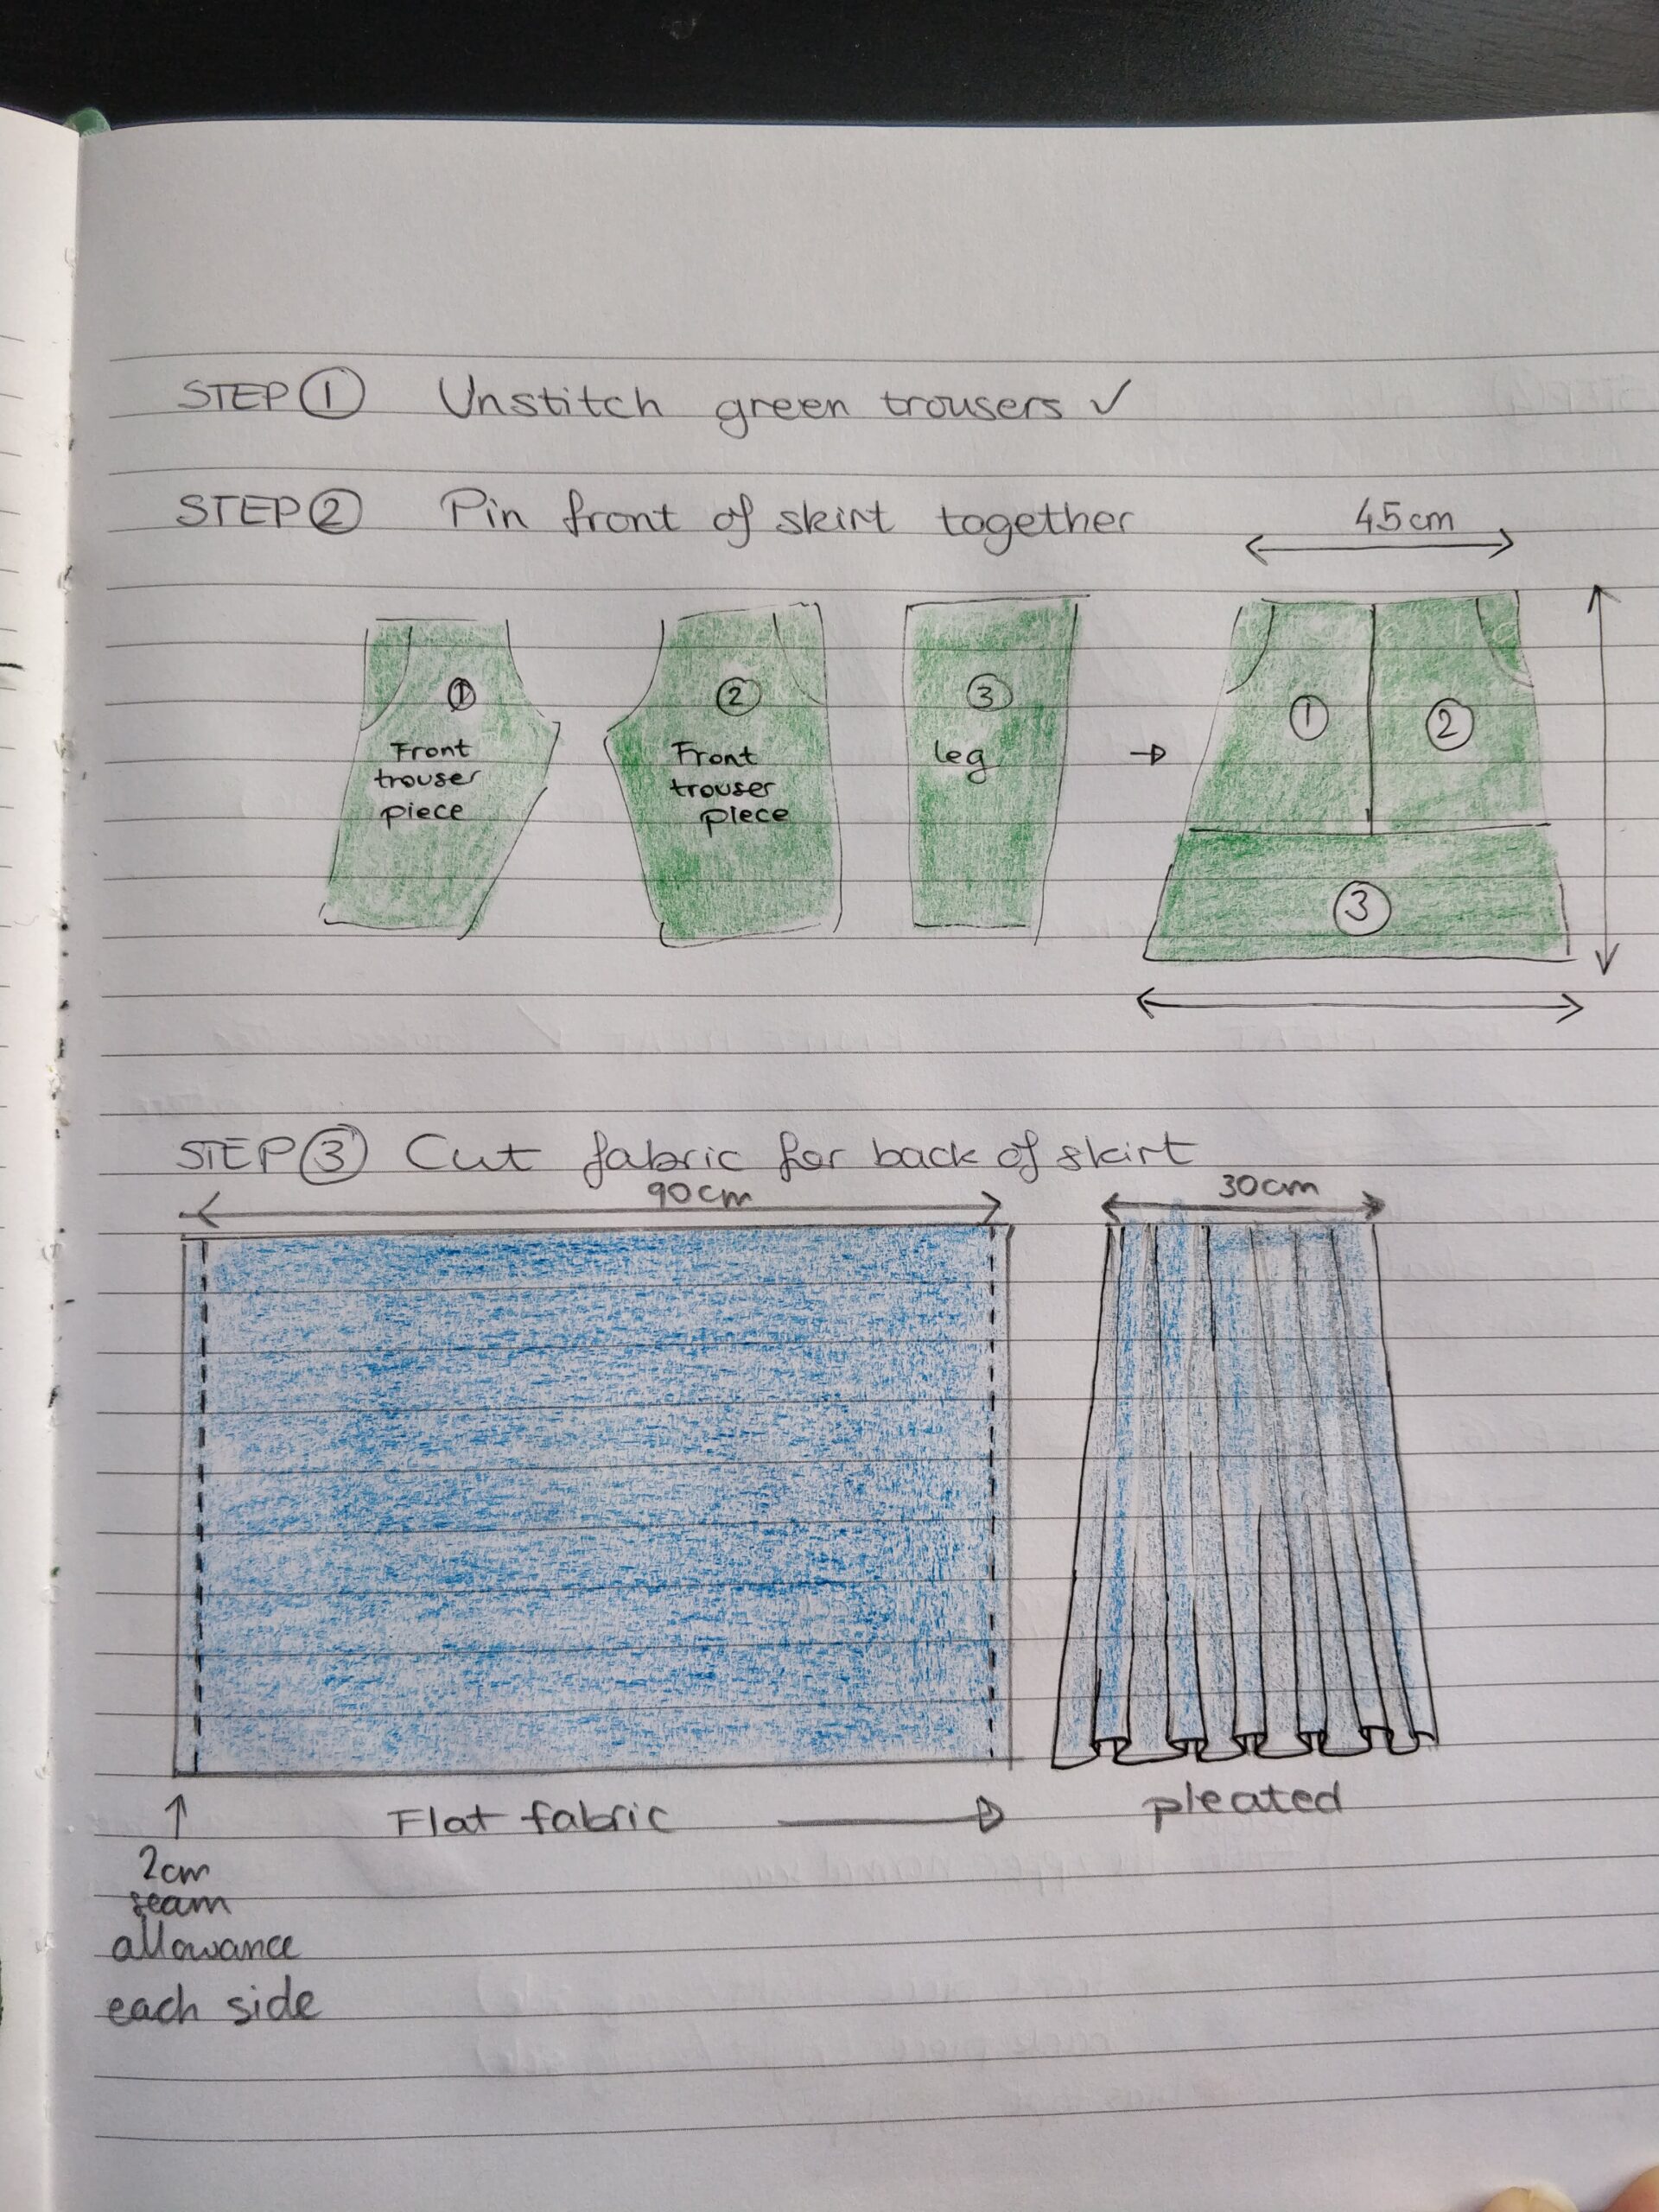
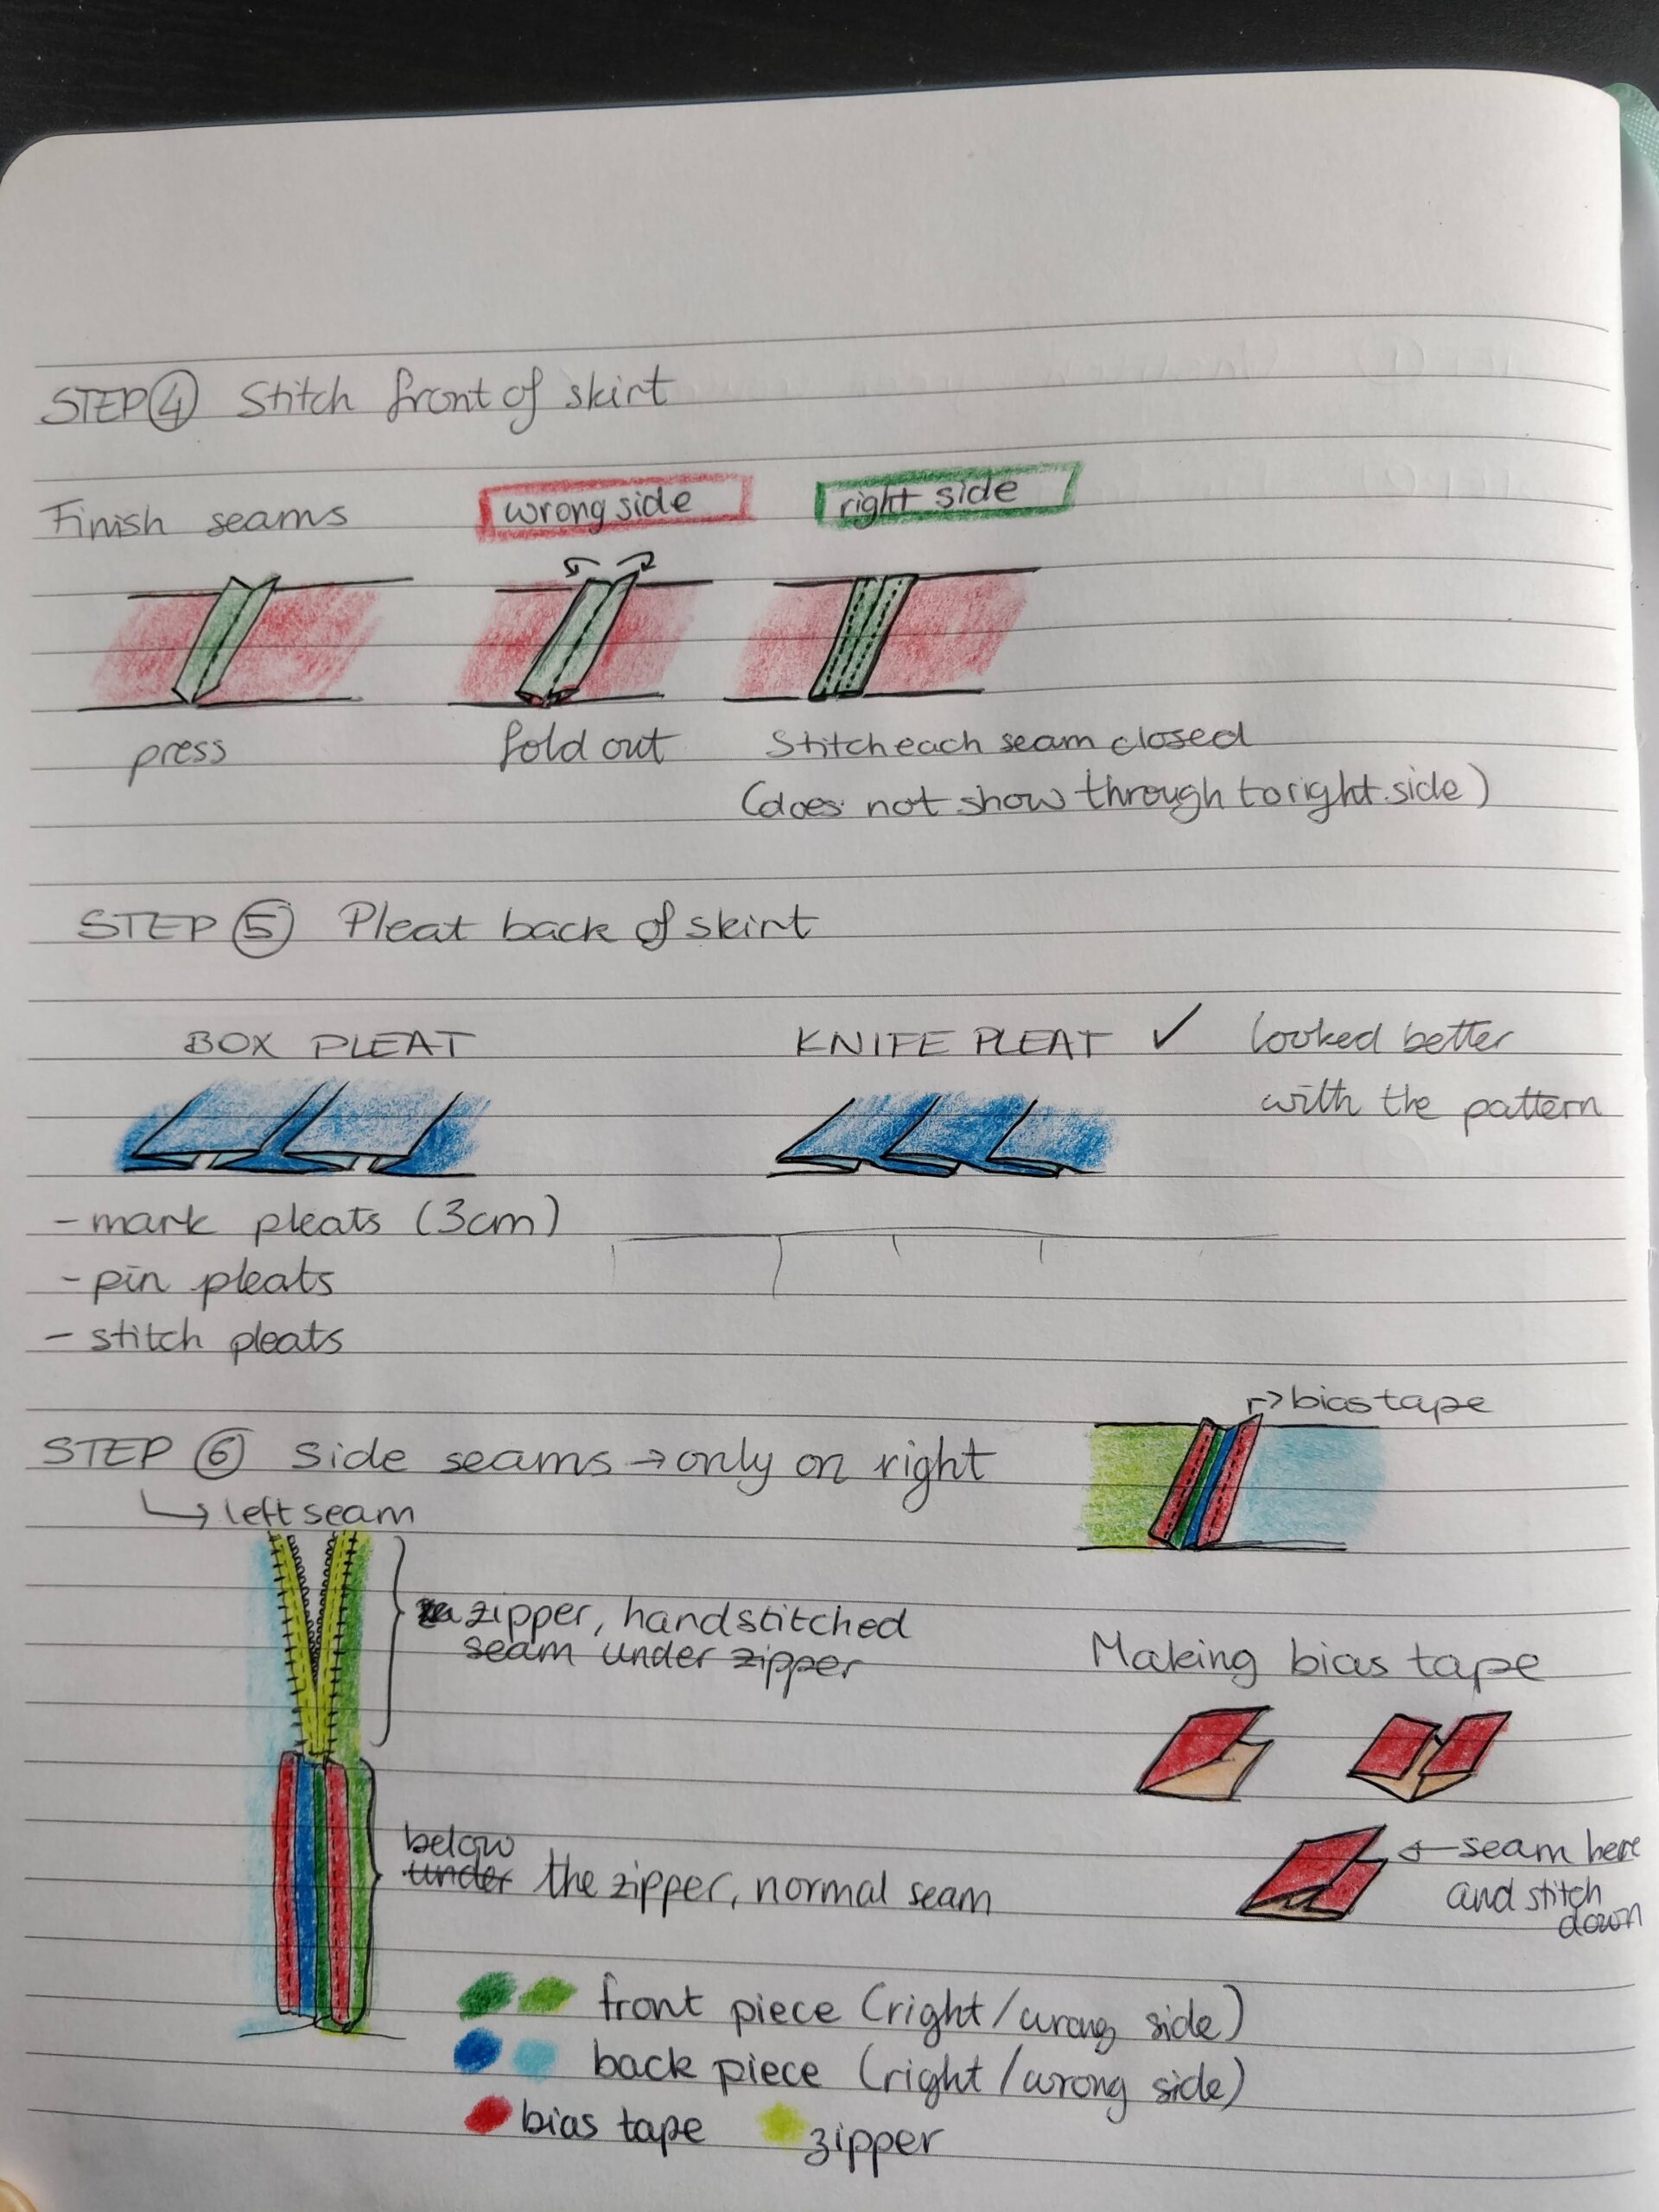
In the absence of a pattern or a dress form, I used some existing skirts that already fit me well as a base for the shapes and proportions. First, I spent a day unstitching and picking apart the trousers in all the separate pieces. Then, I laid down and adjusted all the different parts that I obtained to get the shape I was after. As I mentioned before, the side pockets were very central to the design process as I really wanted to keep them intact, so I pinned together the two front panels from the trousers to create the front of the skirt. I then added a piece from the trouser leg sideways to achieve knee length. After sewing the pieces together, I trimmed the extra seam allowance and finished the seams by turning them under and securing with a straight stitch. I chose this method as it wouldn't show at all on the right side of the fabric, making the patchworking of the different pieces less evident.
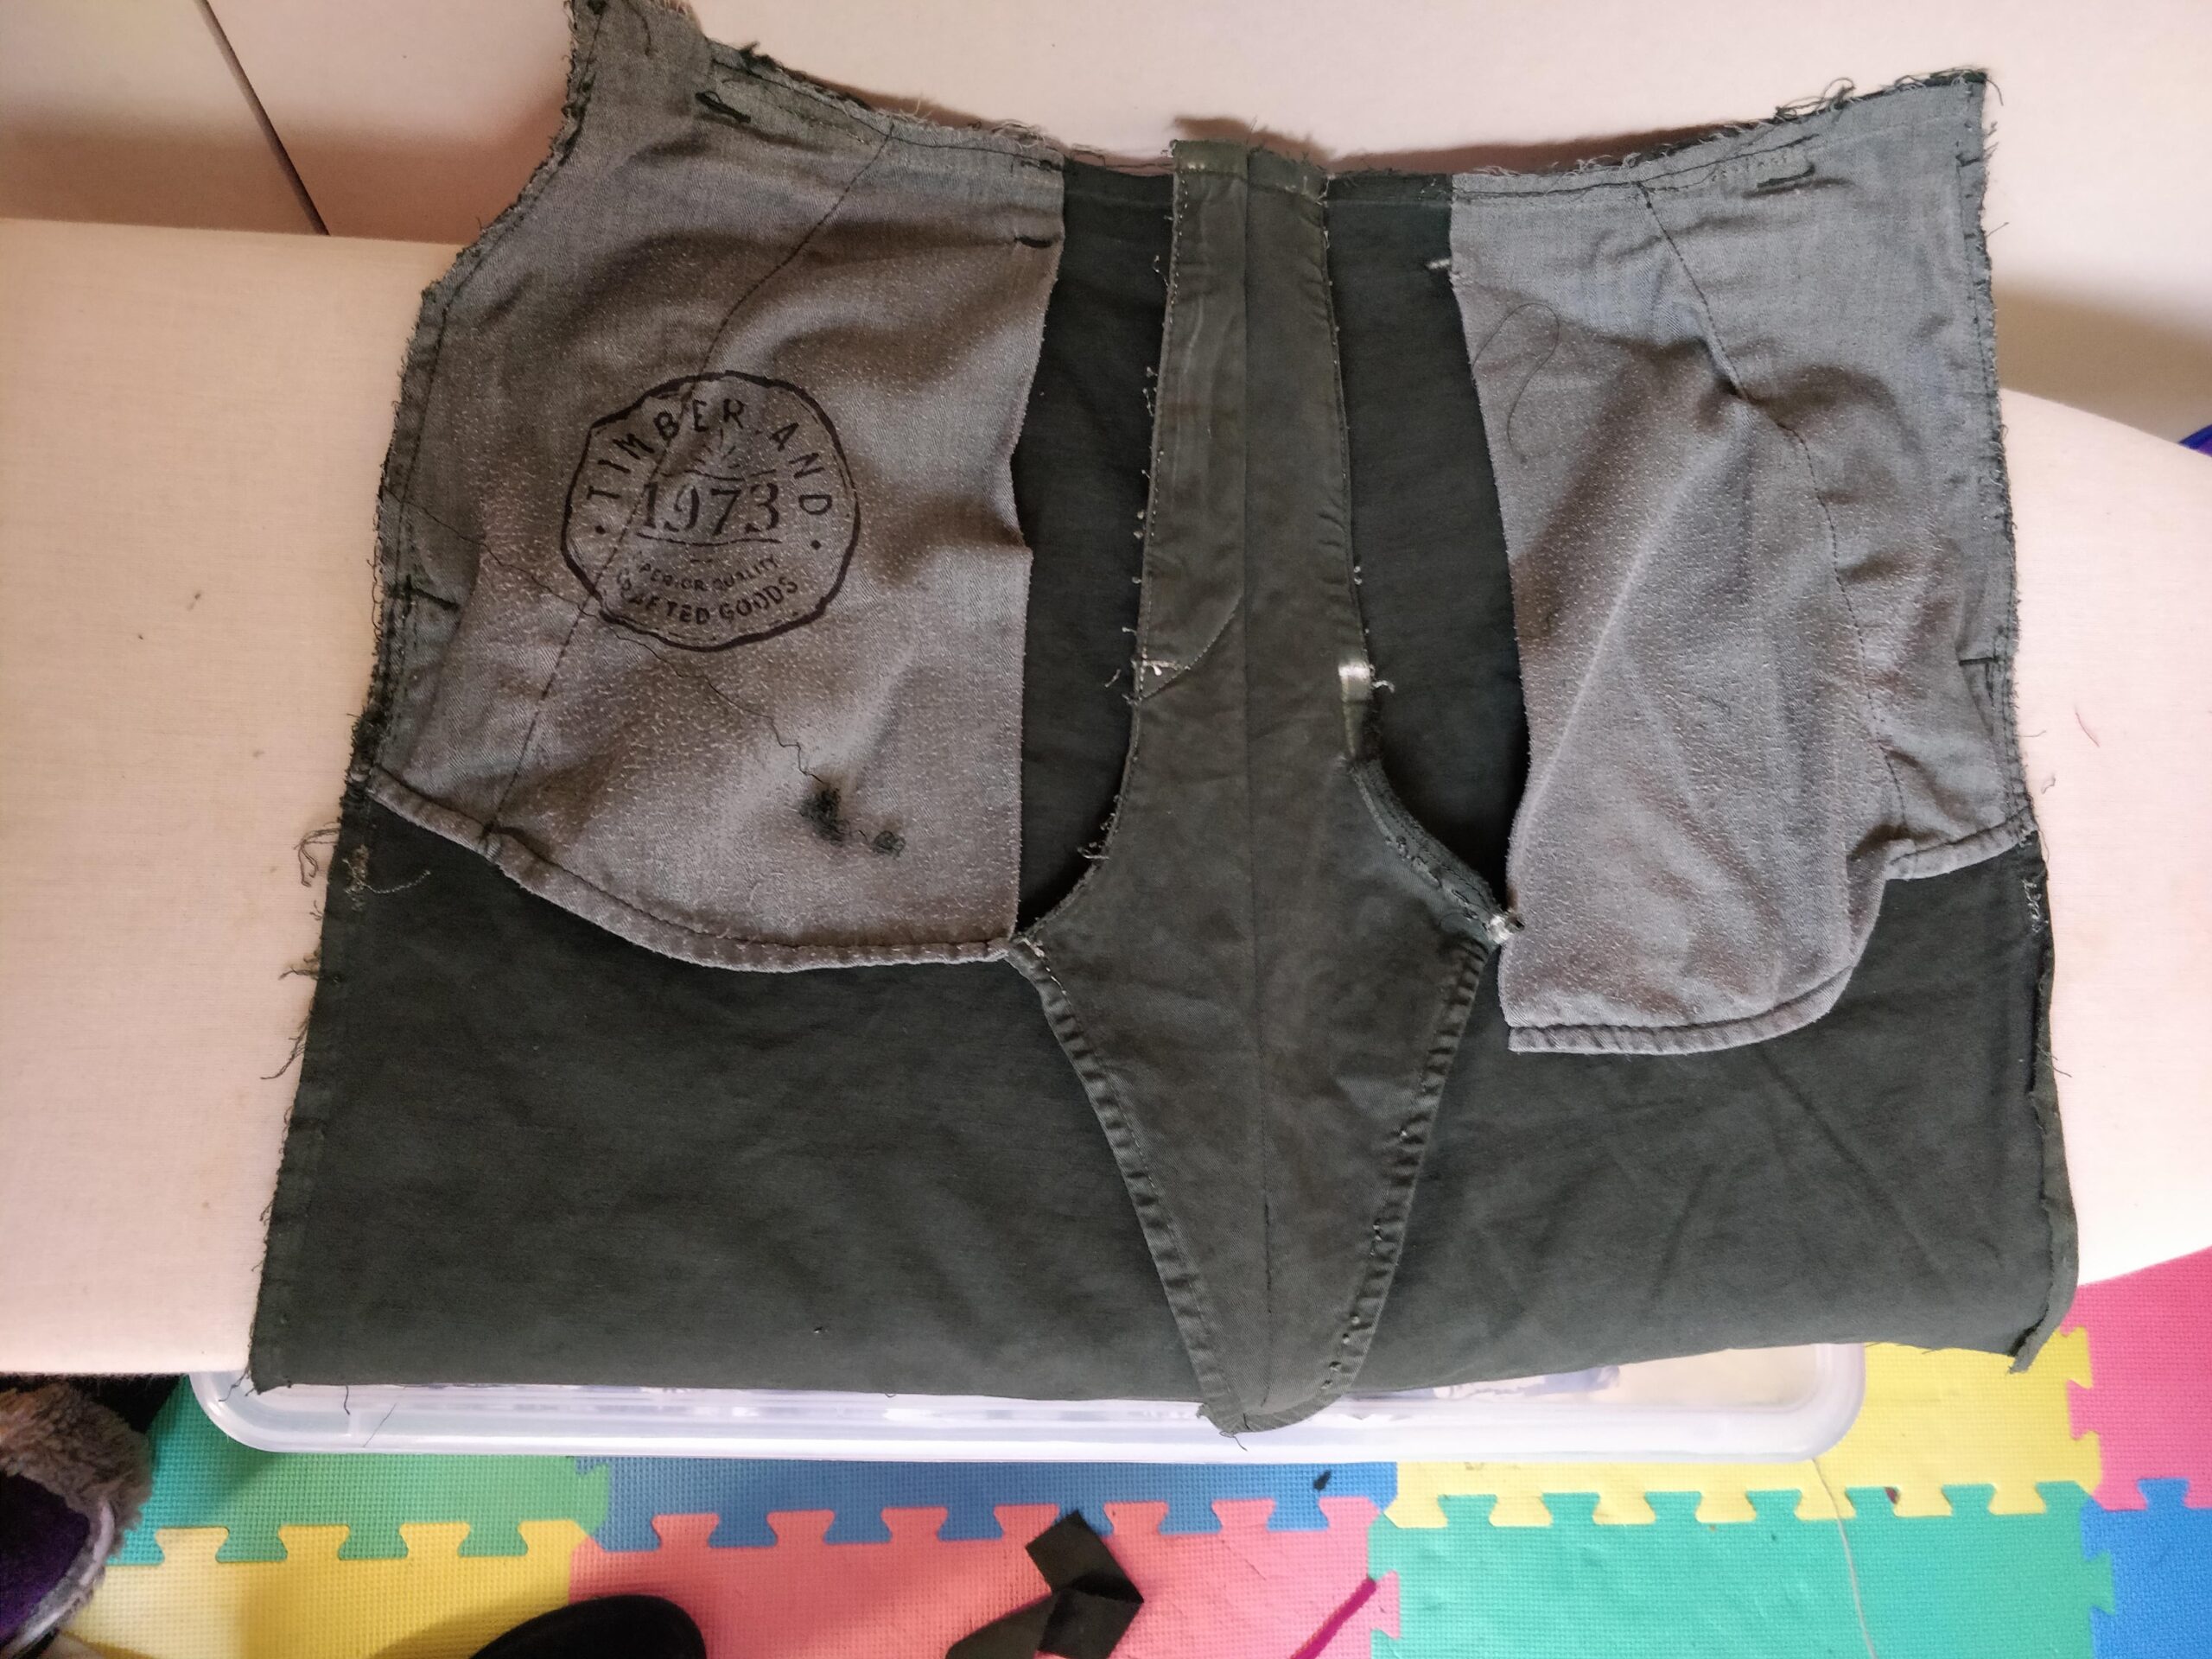
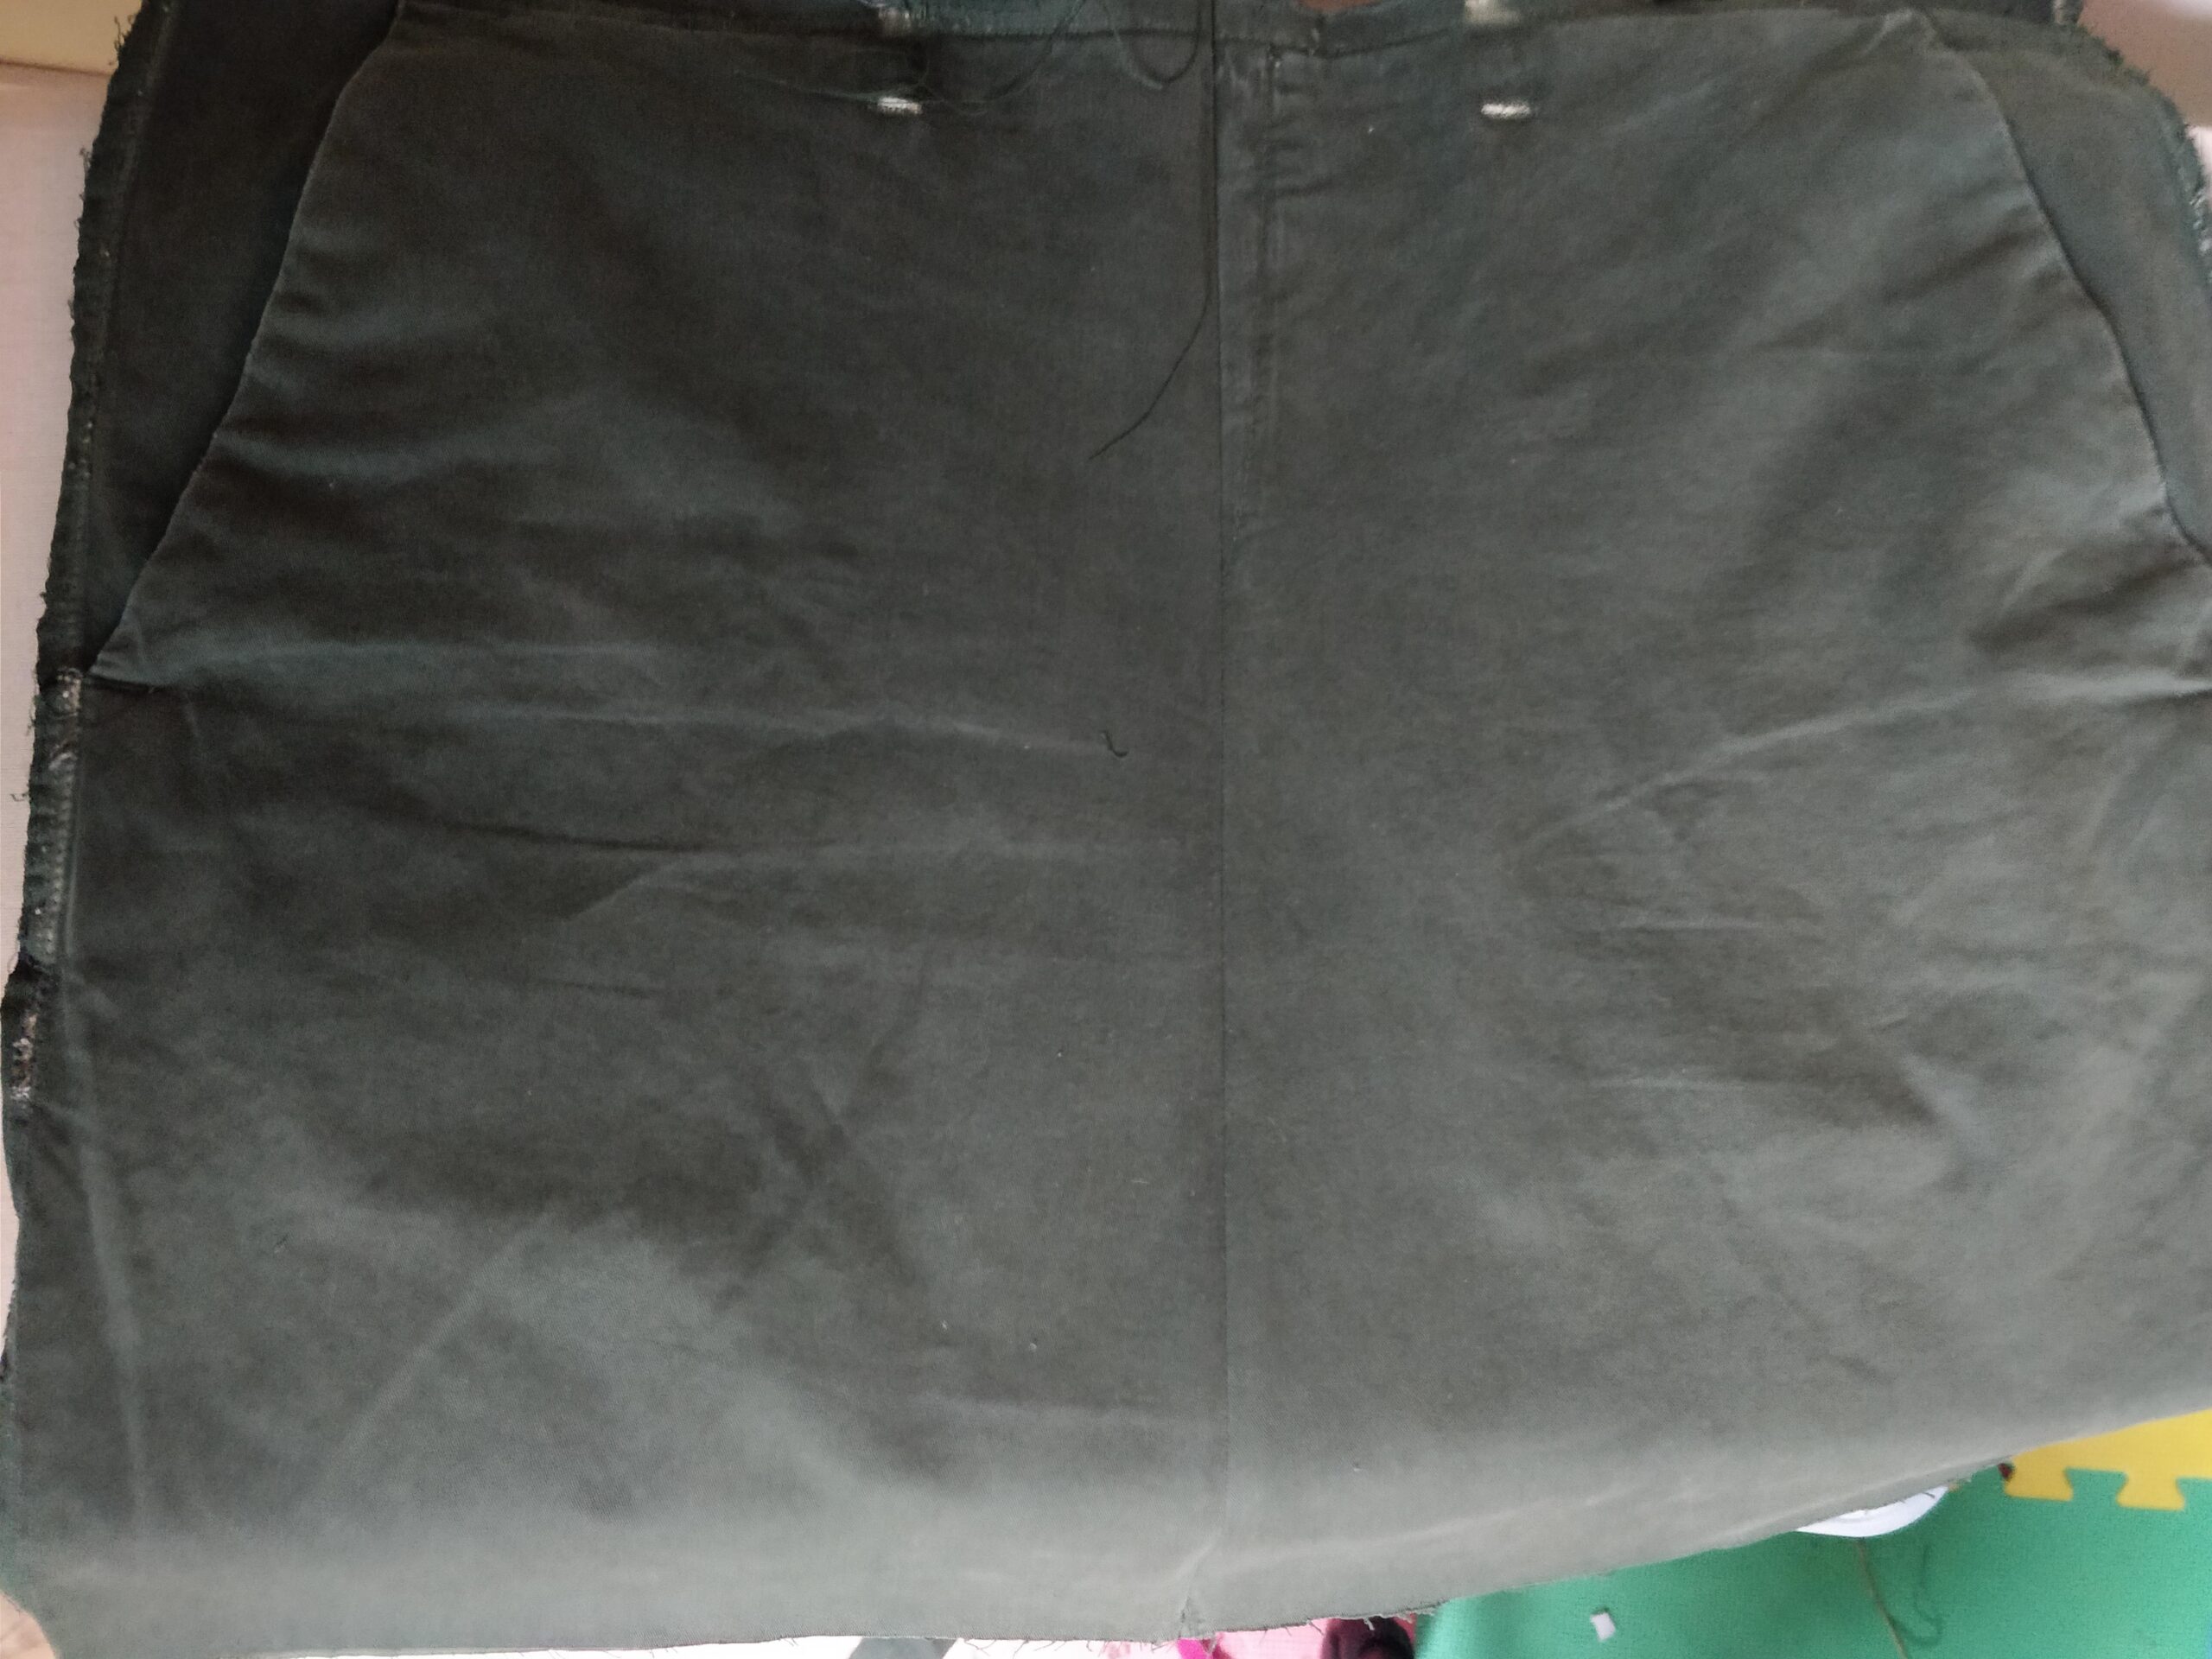
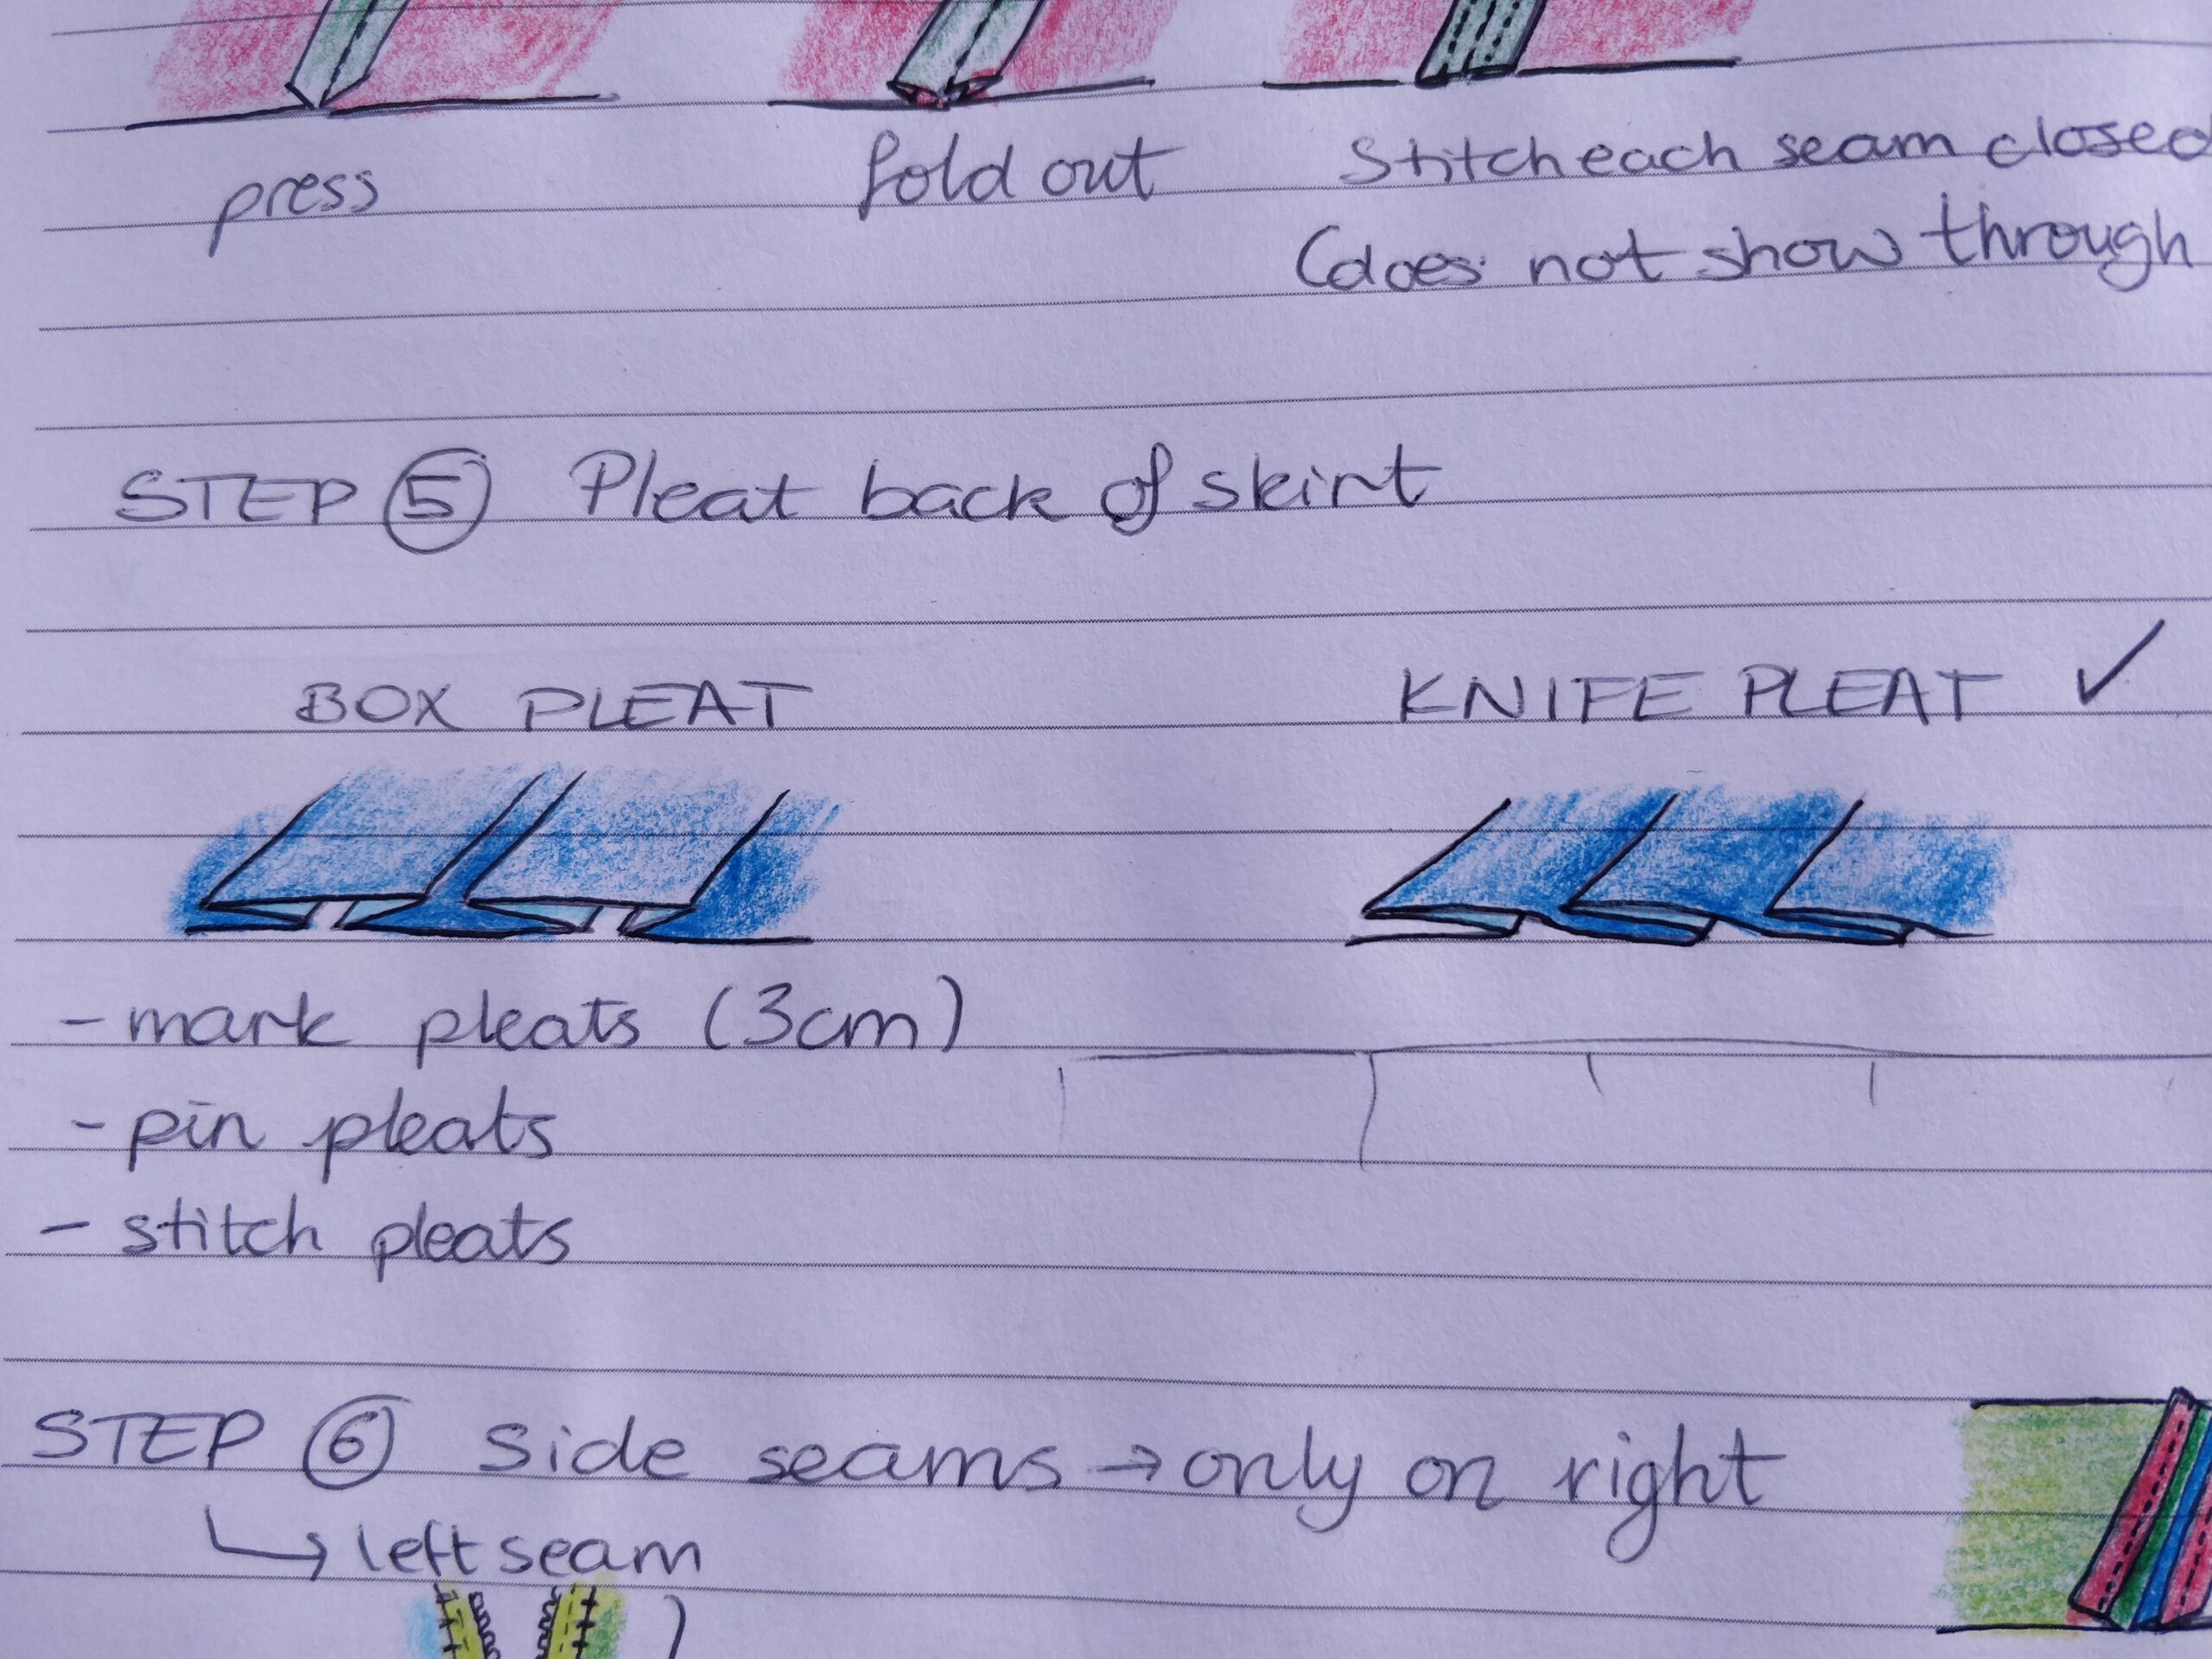
As I was limited by the size and shape of the fabric for the front of the skirt, I was fortunate to have a large amount of fabric available to be cut to size for the back piece (as it was obtained from bedsheets). To work out the size of the back piece, I measured my waist and the already built front piece and worked backwards to figure out the remaining width that needed to be covered. I cut out a 90cm by 60cm rectangle from the duvet cover as I needed it to be 30cm after being pleated (not including seam allowance). In order to cut a straight sided rectangle from the fabric I tried my hand at thread pulling, since this fabric is made in a very straight weave. Initially, I had thought of doing box pleats over knife pleats, but after pinning both options into place to see what they would look like, I opted for knife pleats.
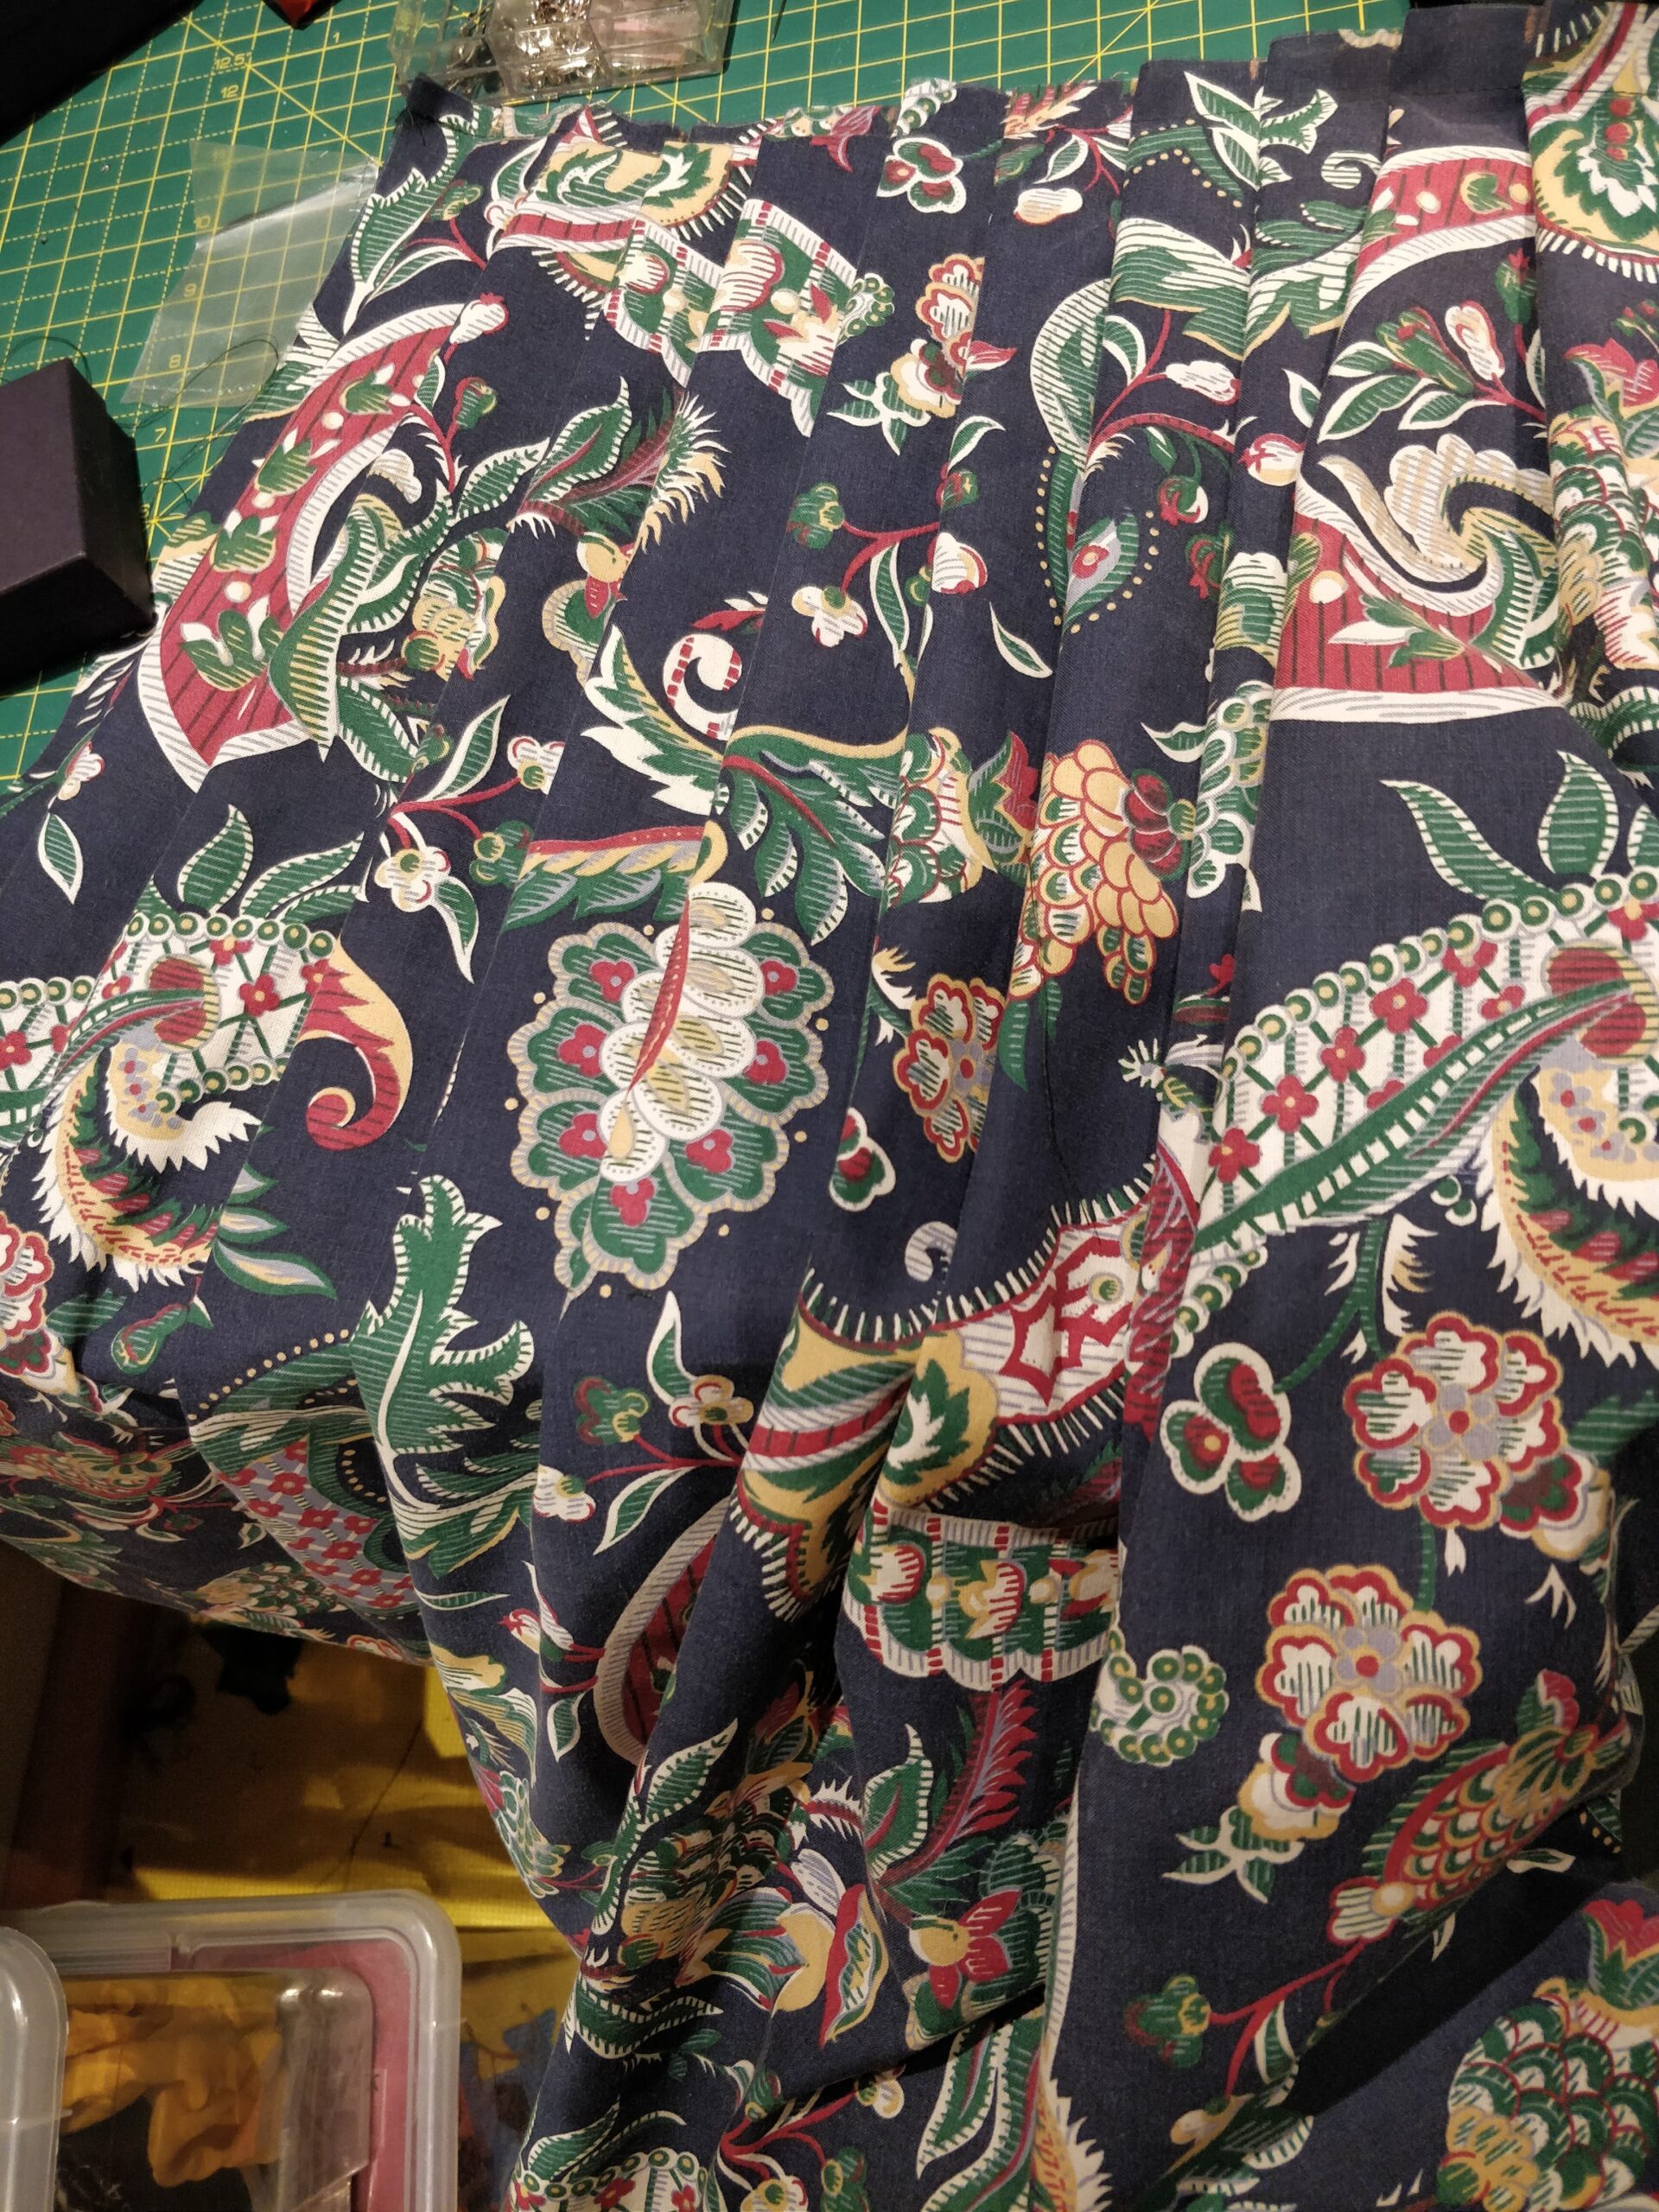
After completing both front and back pieces of the skirt, I sewed them together on the right seam and selected a zipper to add to the left seam. All this, I managed to do during the Christmas holidays. However, at this point, work became incredibly busy and stressful, so I had limited time to dedicate to this project which subsequently advanced in small steps. There were many things that I had never done before, such as, installing a zipper, making and using bias tape and installing a waistband. All tasks that were quite scary at the time but I overcame with resilience and determination. I have unstitched my fair amount of seams in this project just to start over hoping to get a better result.
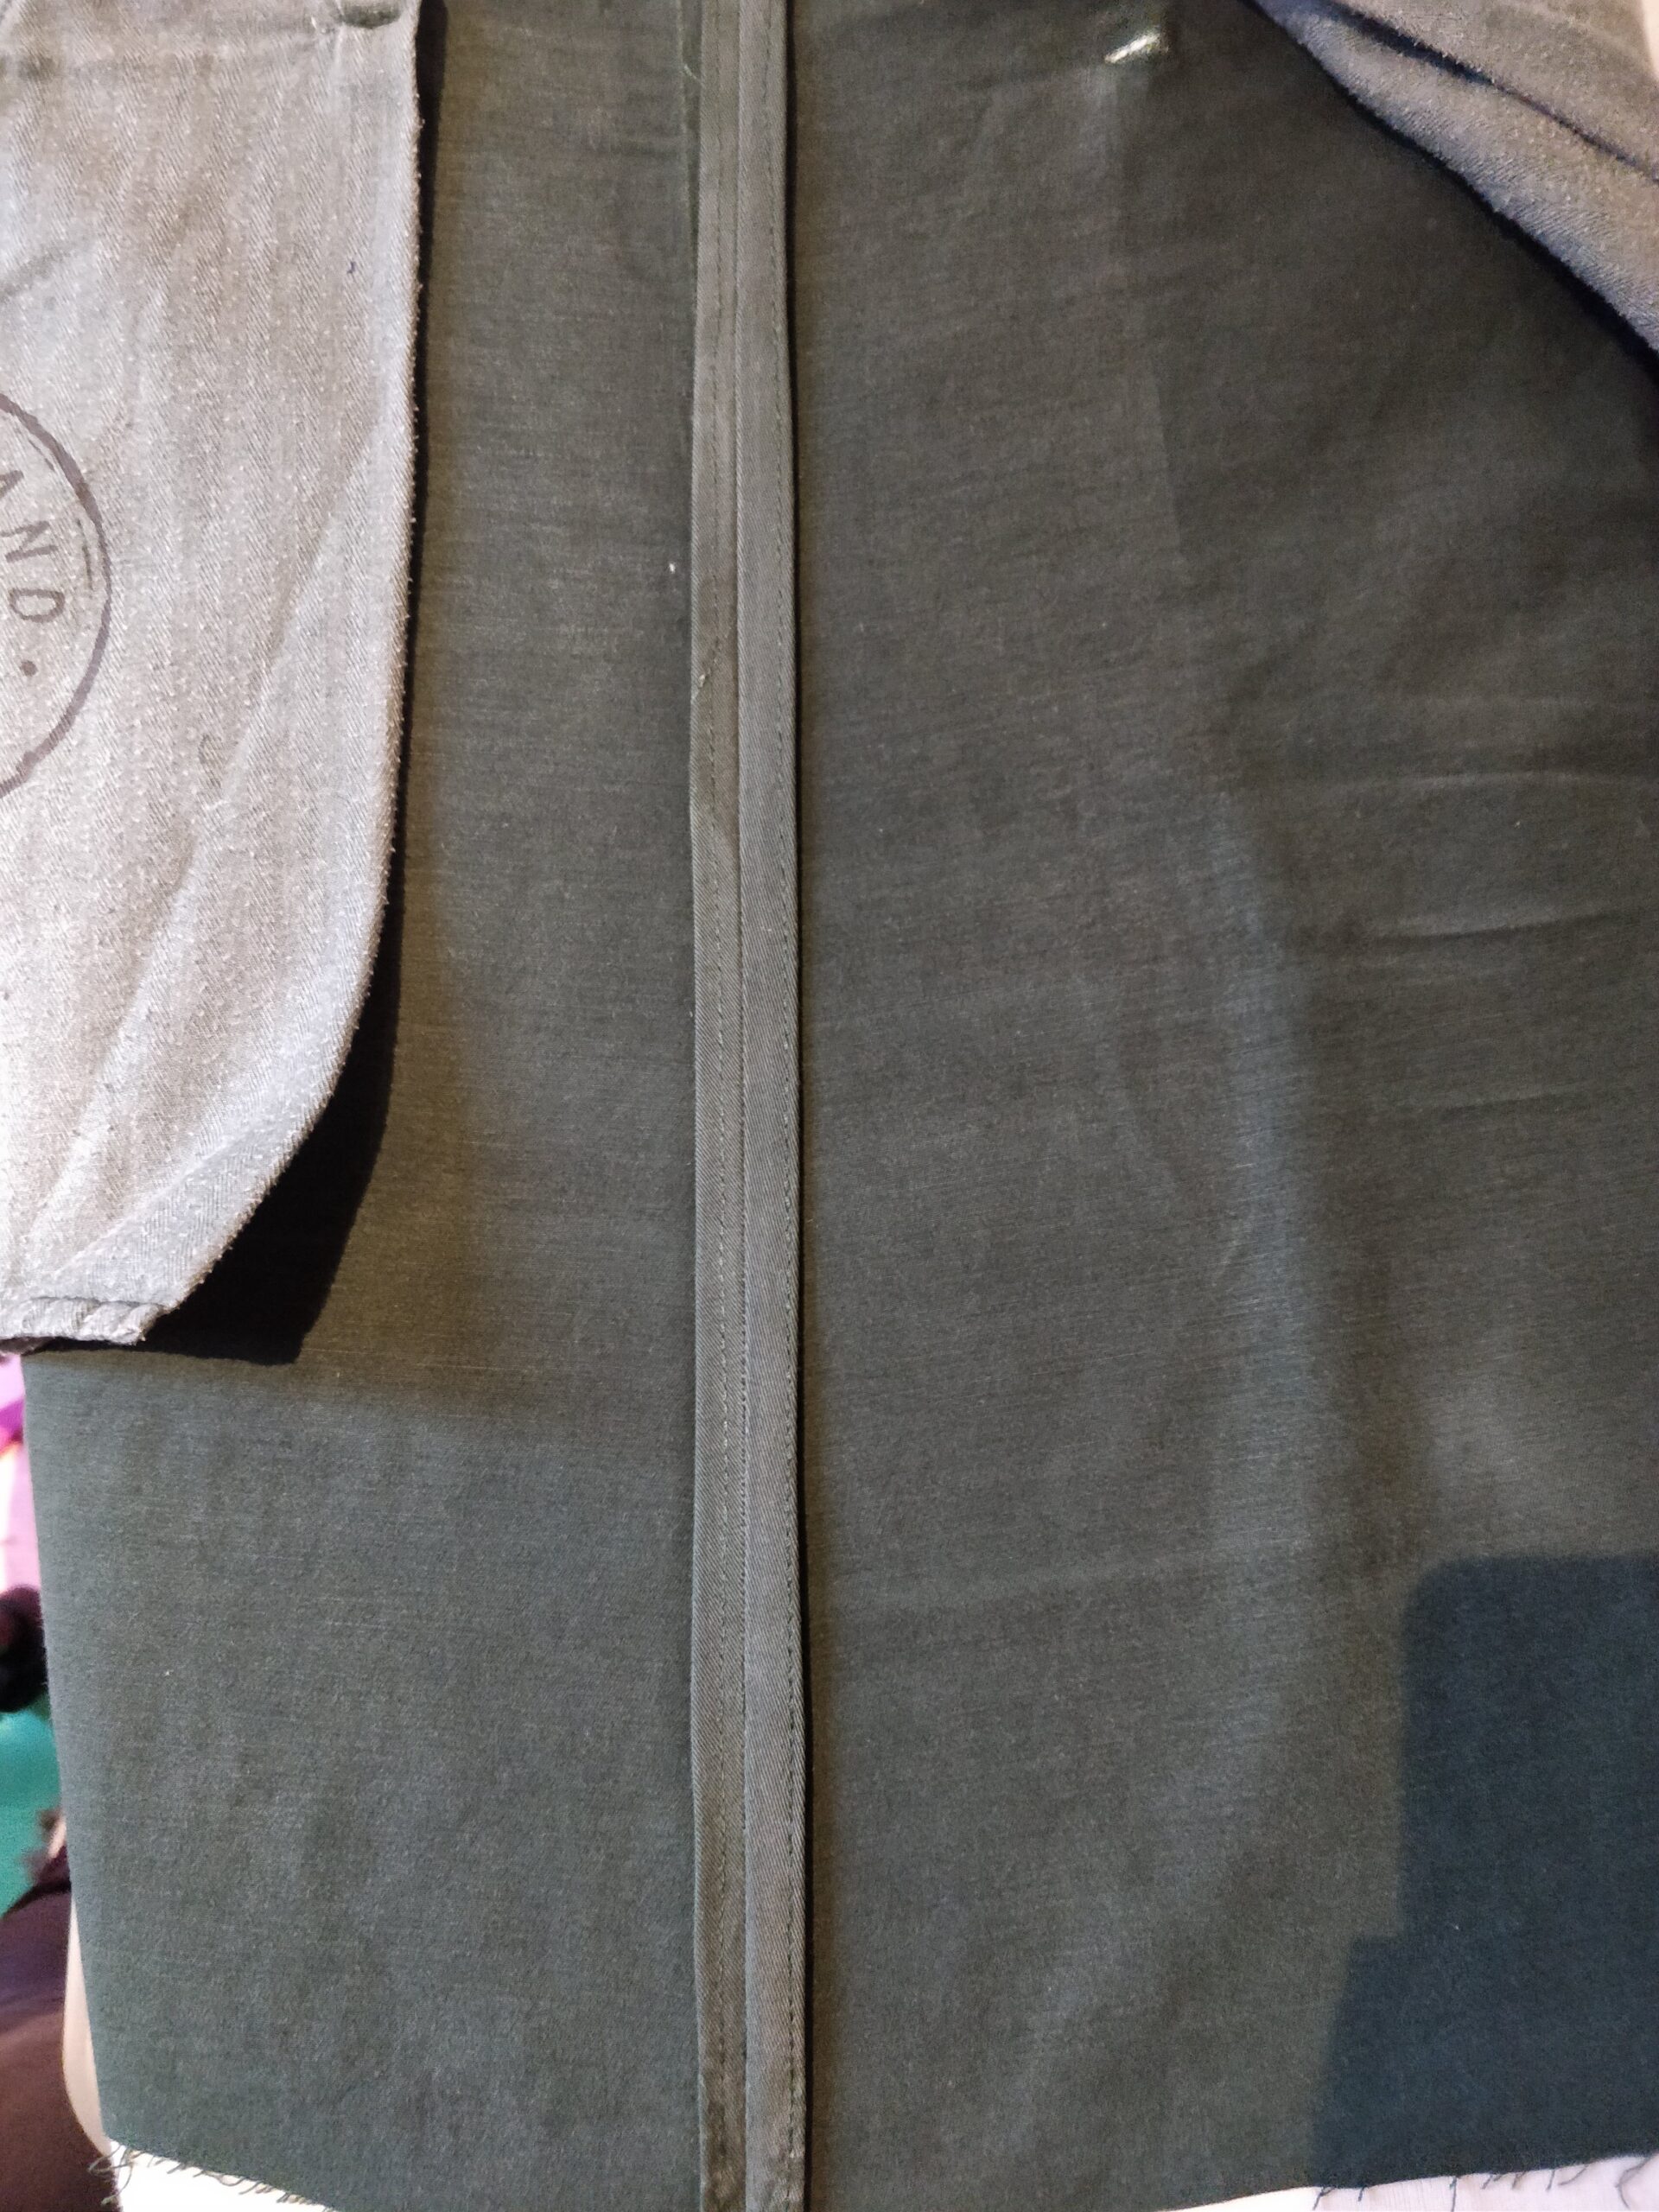
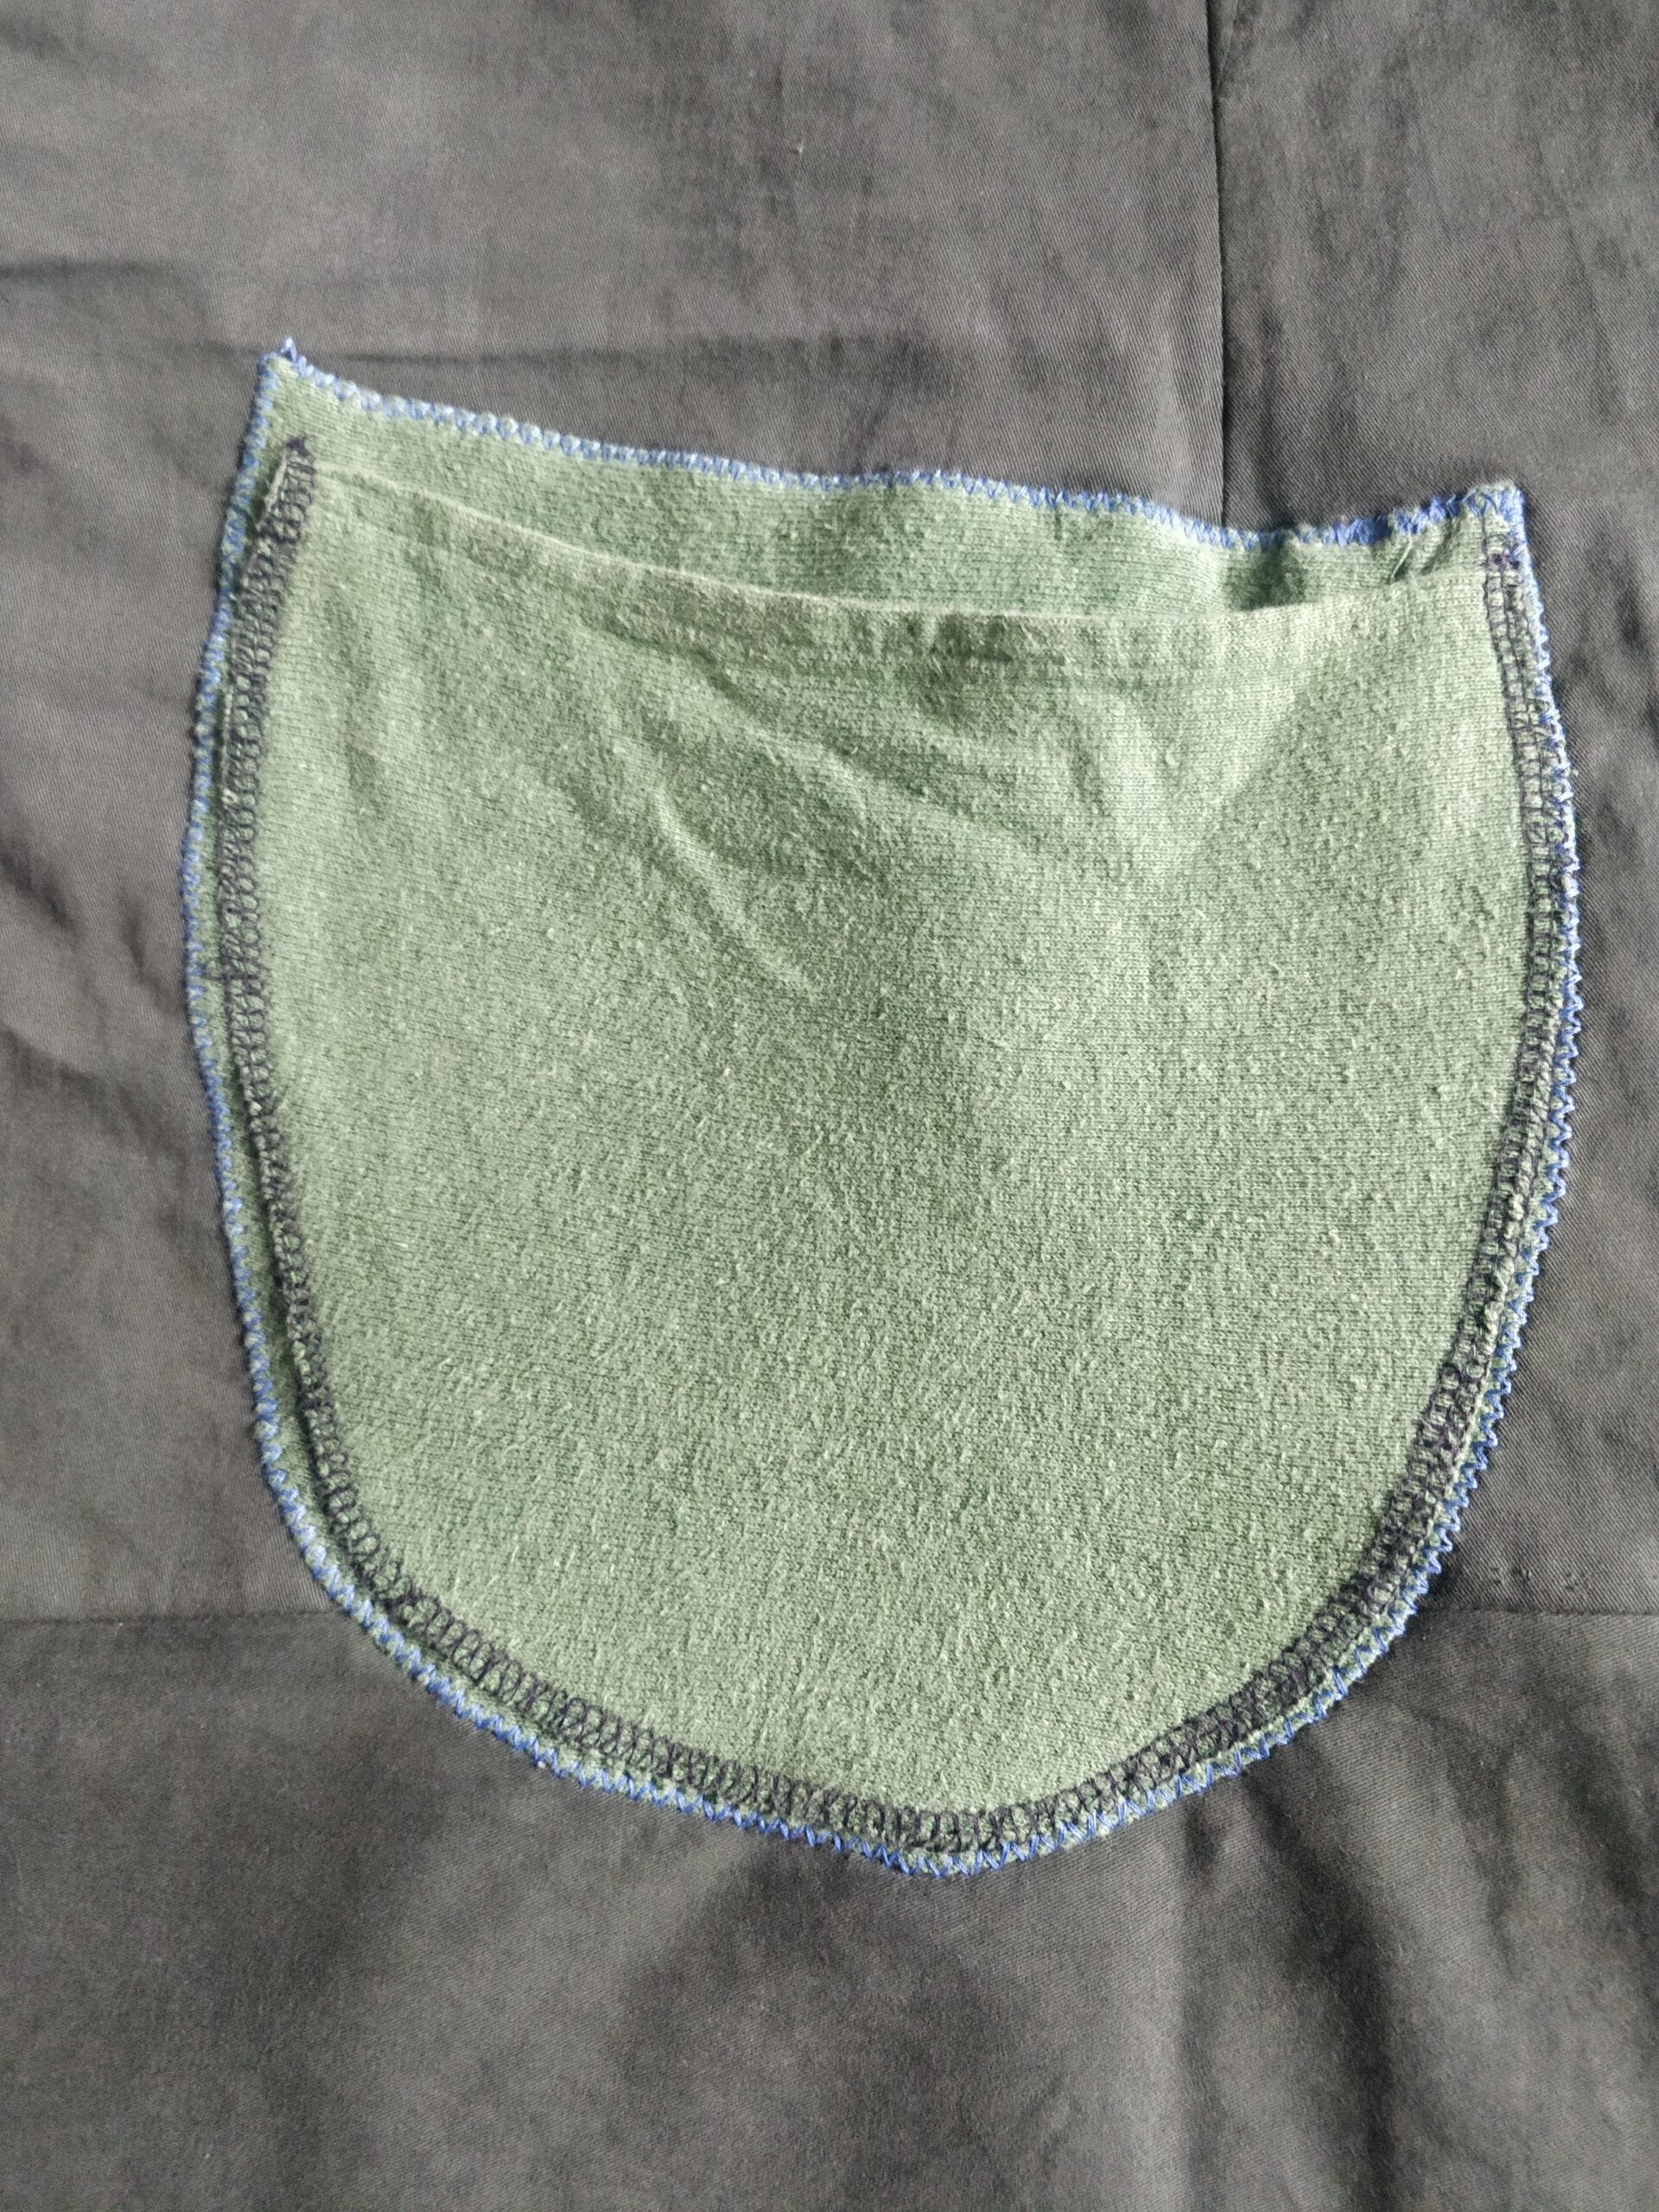
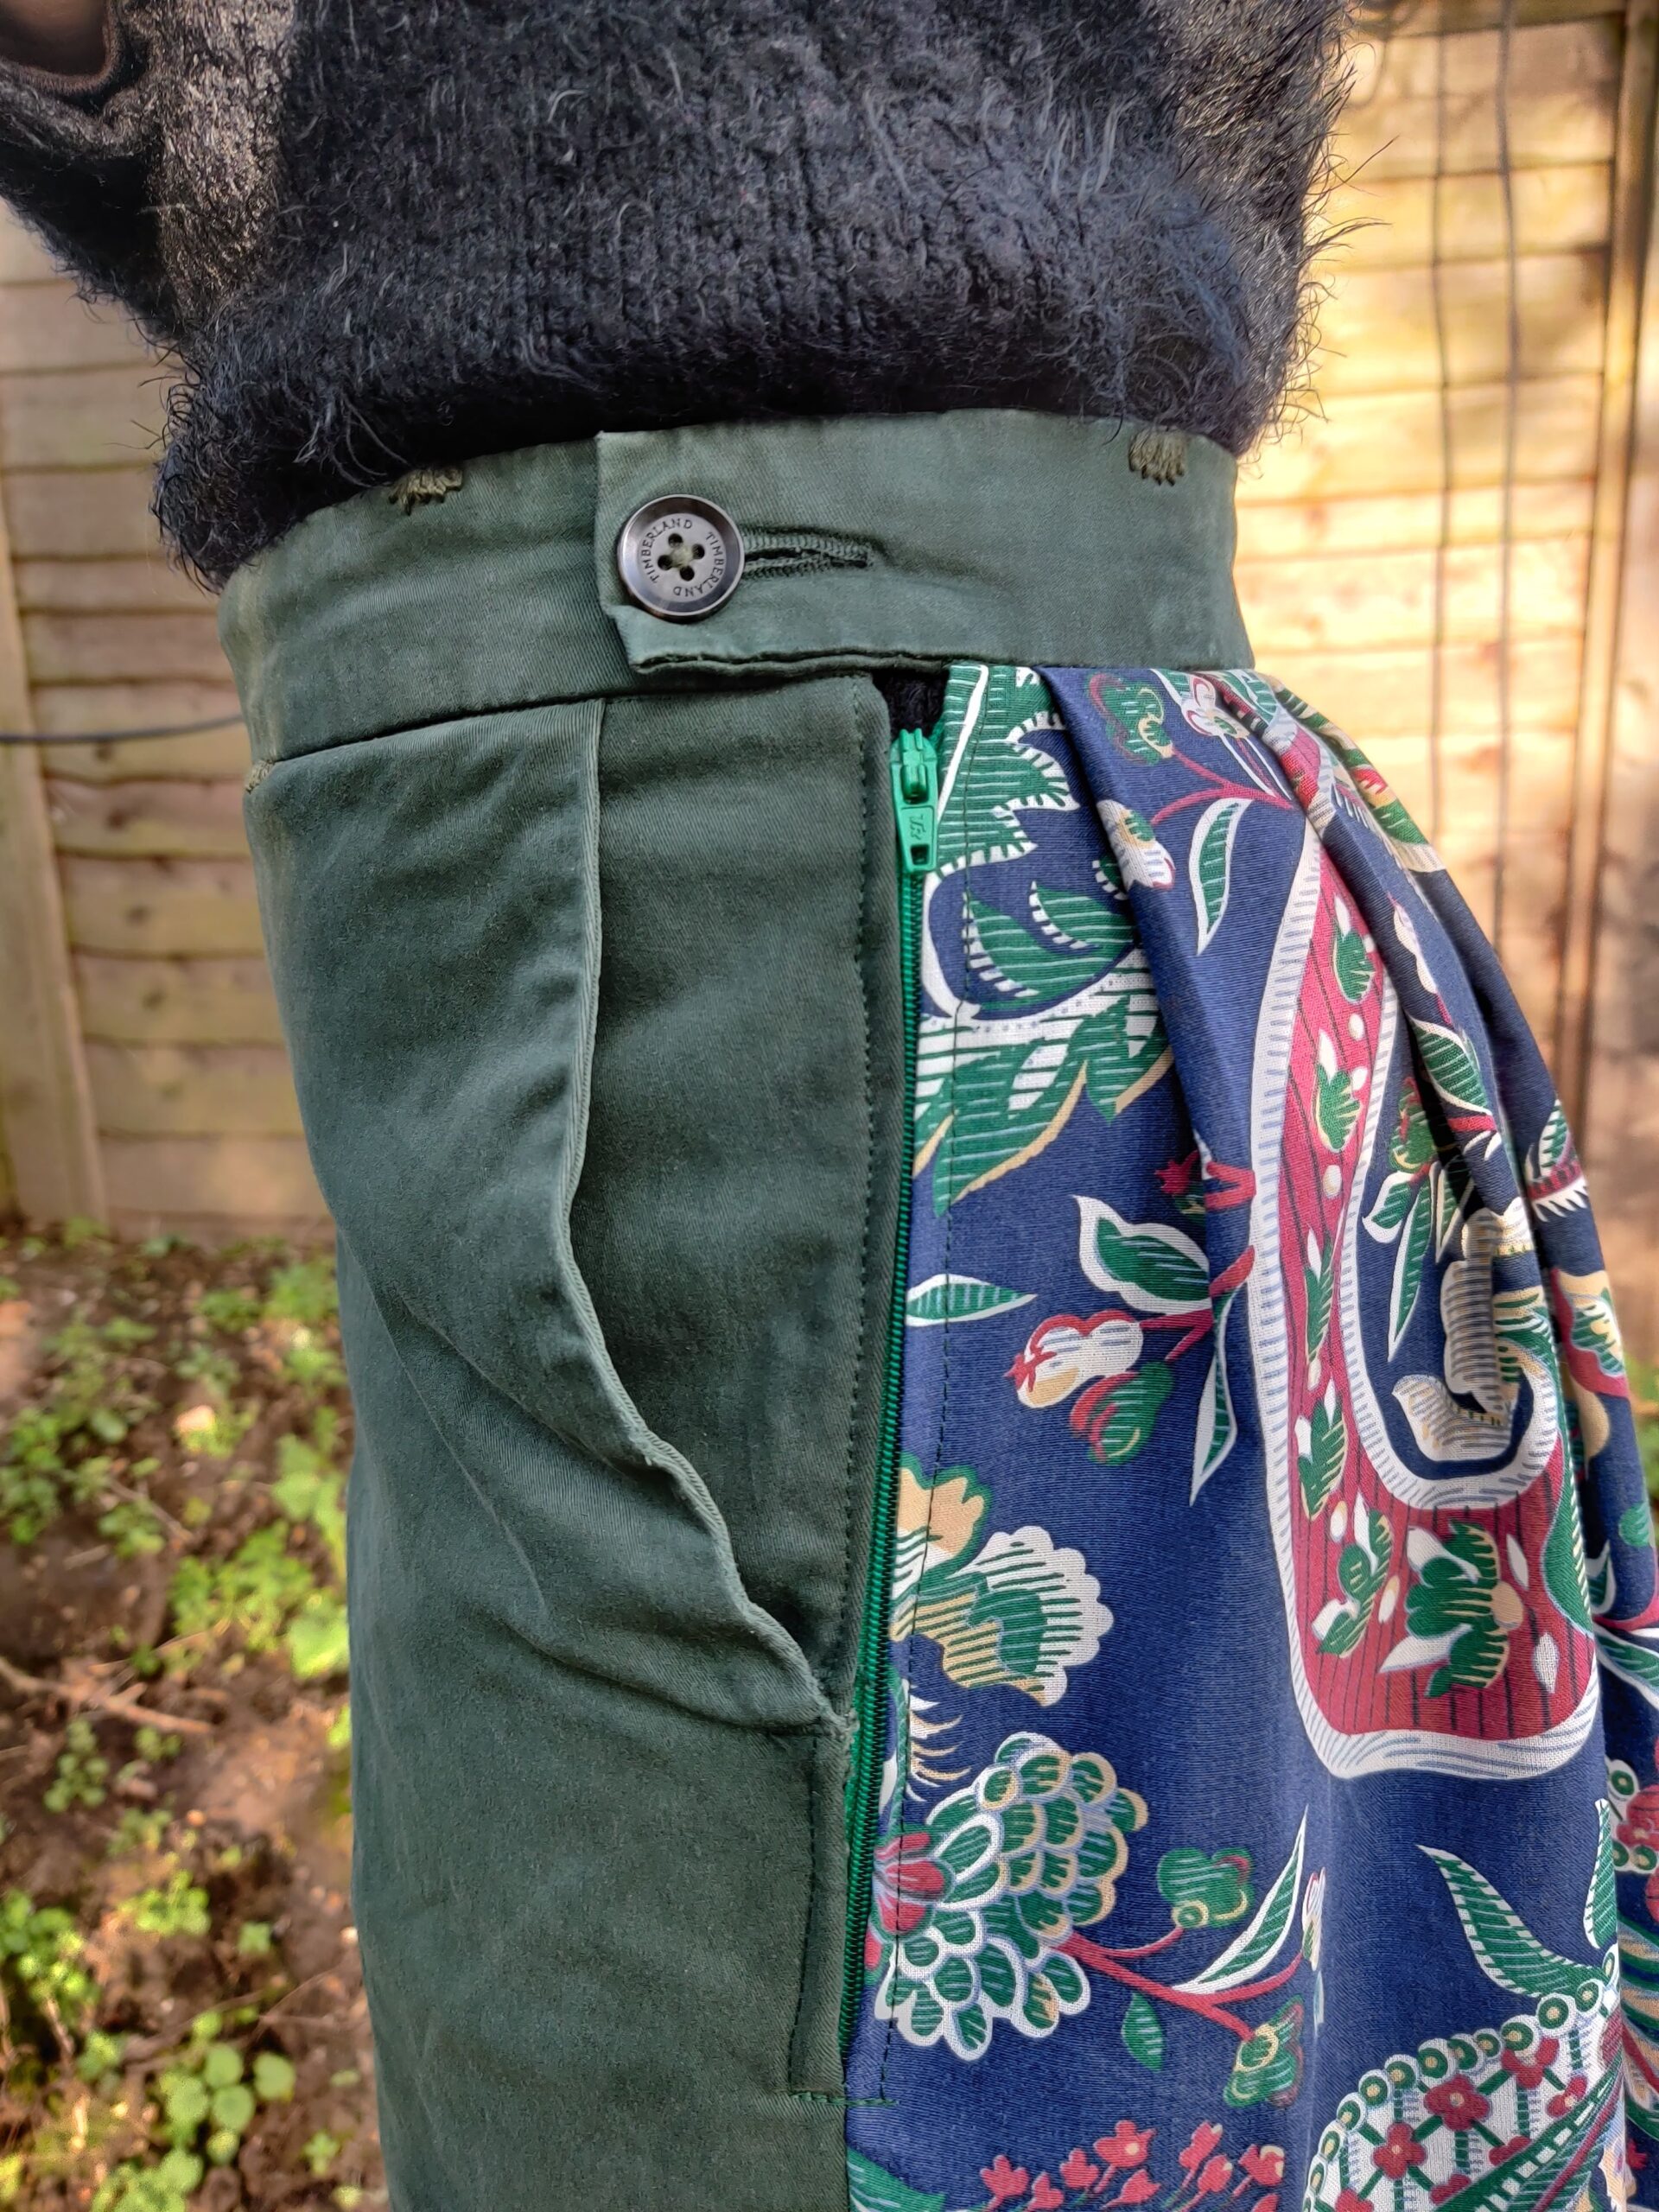
I opted for bias tape for the side seams as the front piece had very little seam allowance that I was able to recover from unstitching the trousers, and in order to keep the side pockets intact, I couldn't spare to make it any wider. Before finishing the left seam and installing the zipper, I added the lighter green front pocket. I overlapped it with the point where two seams meet at the centre of the front piece, but kept the positioning asymmetrical. I opted for a bright blue contrasting thread and a thick zigzag stitch to overemphasize the 'snip and stitch' theme of the book. When installing the zipper I ran into problems as the side pockets of the front piece were very thick at the edges so I ended up lining up the bottom of the zipper with the bottom of the pocket, which meant taking some length of the skirt off the top and installing the waistband lower than planned. This wasn't too much of a problem as the pockets were still very large and I could fit my hands in easily even after taking 2cm off the top.
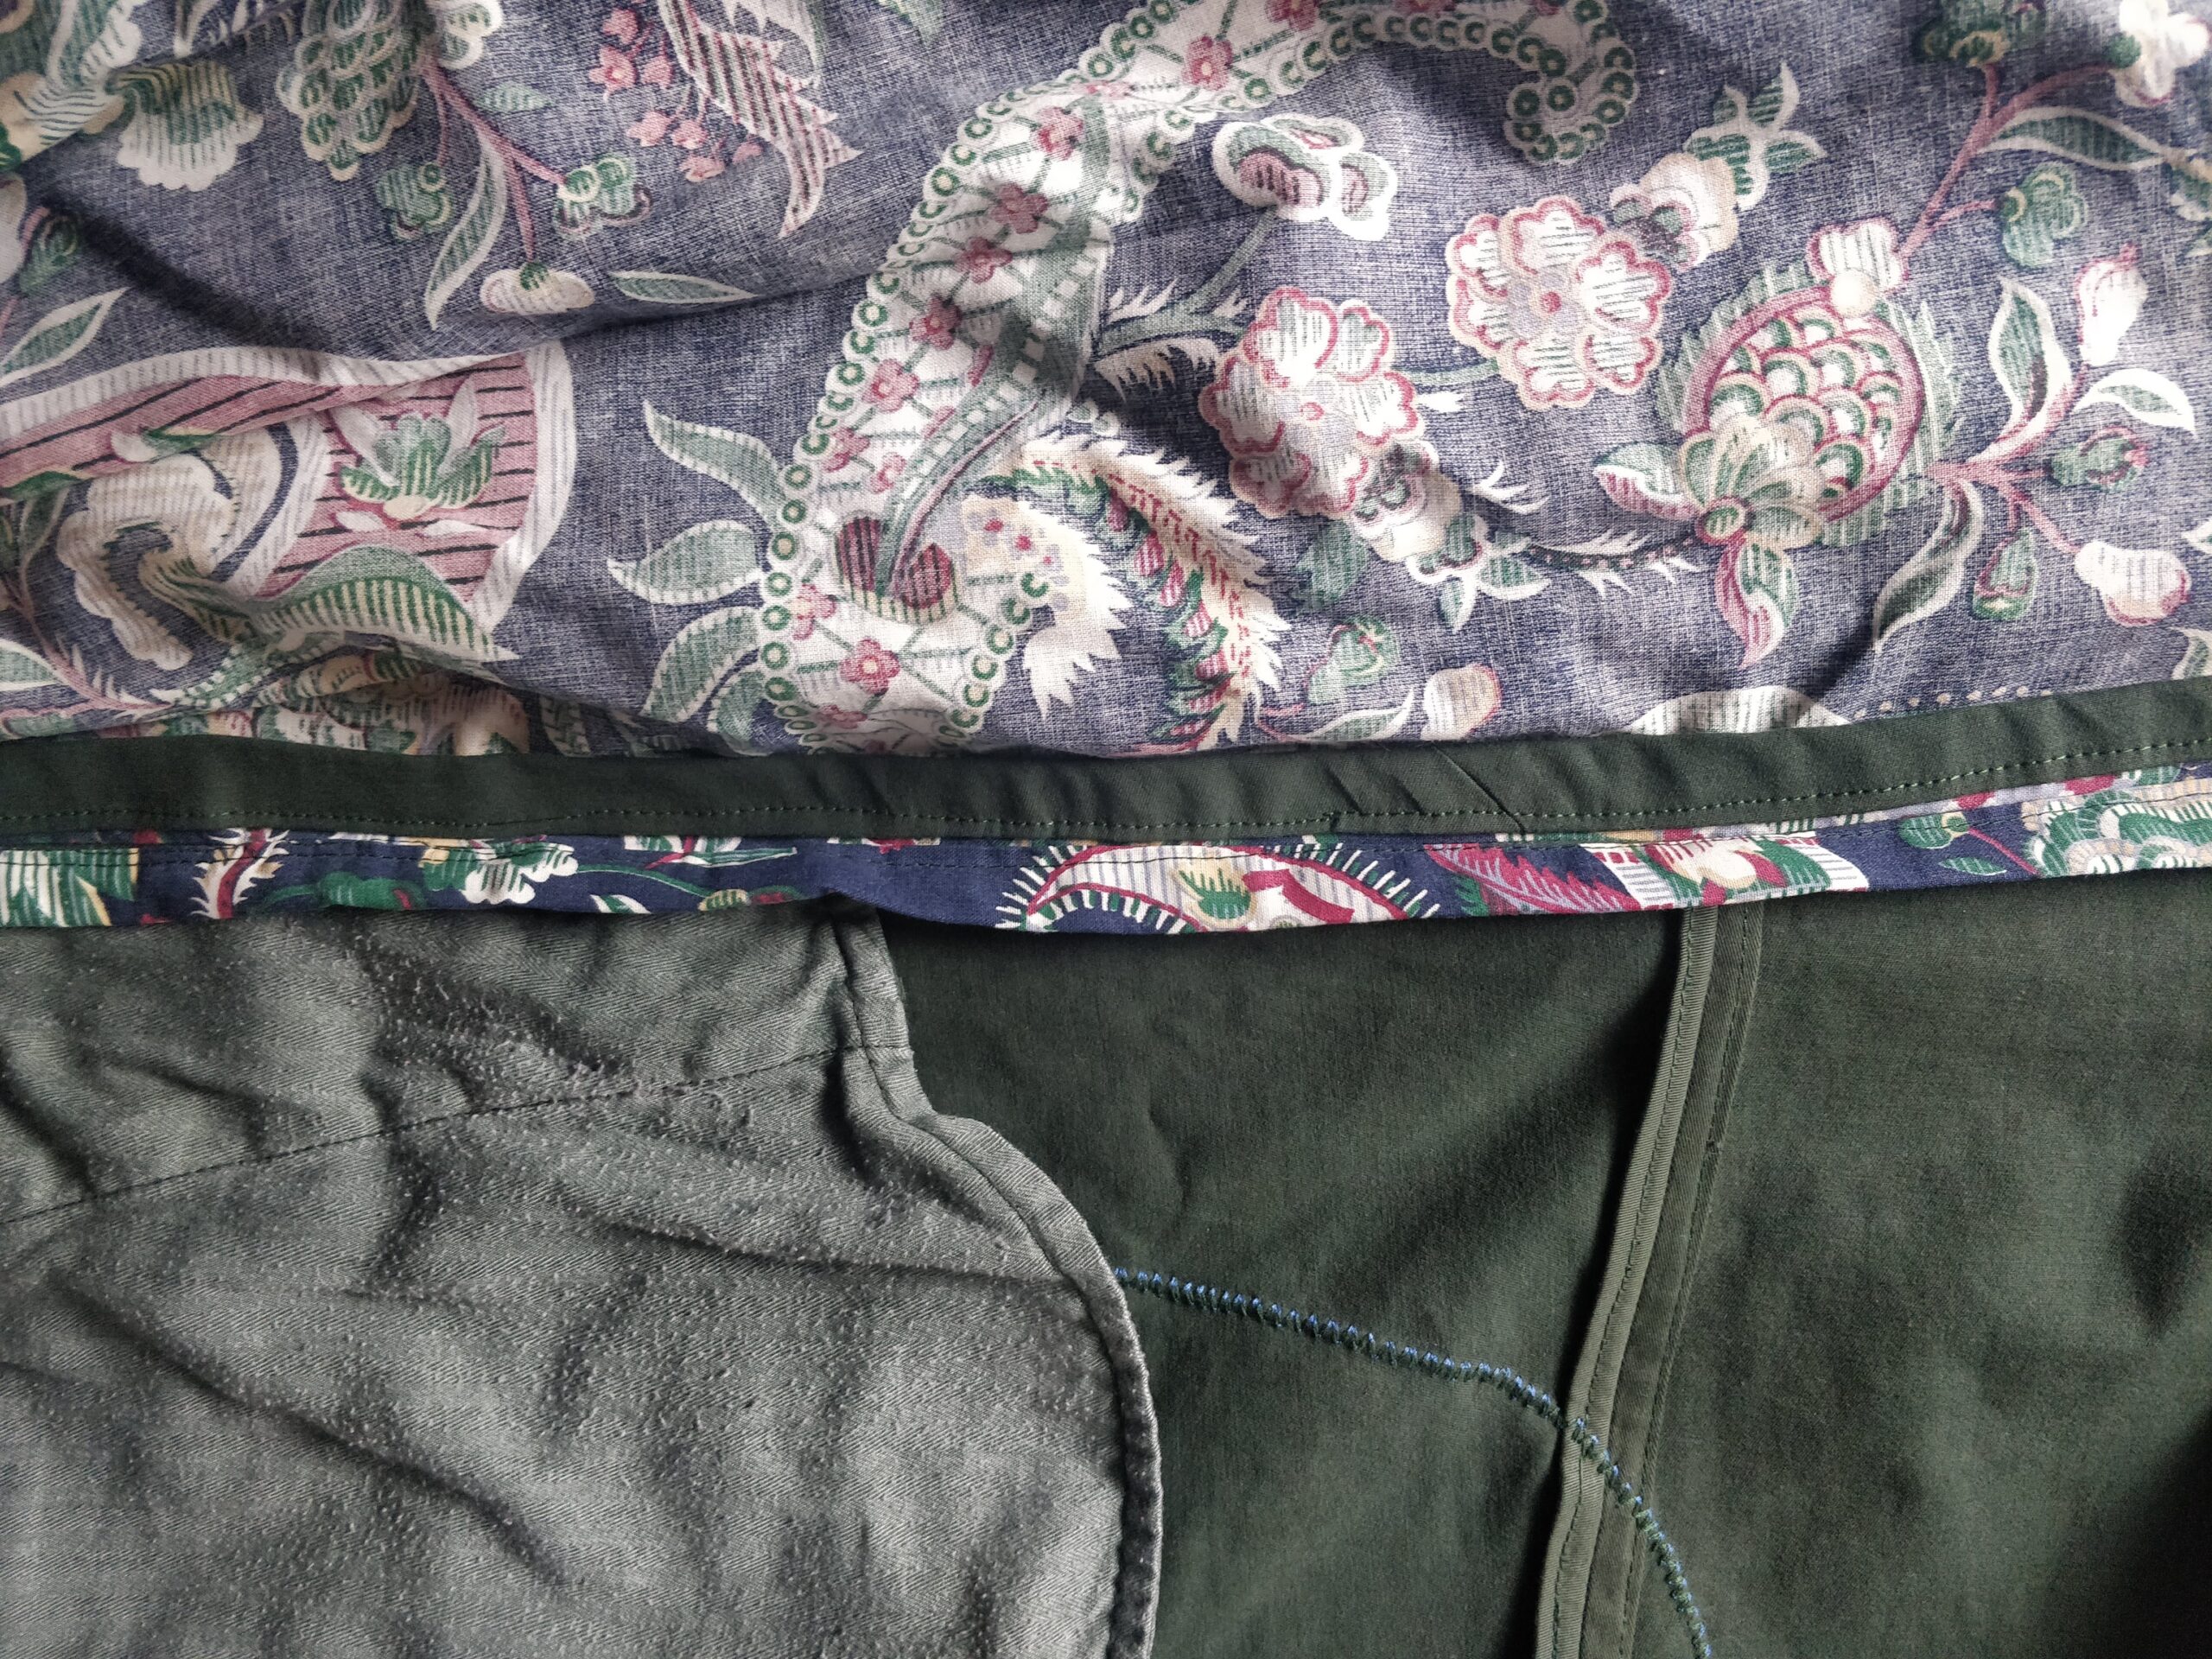
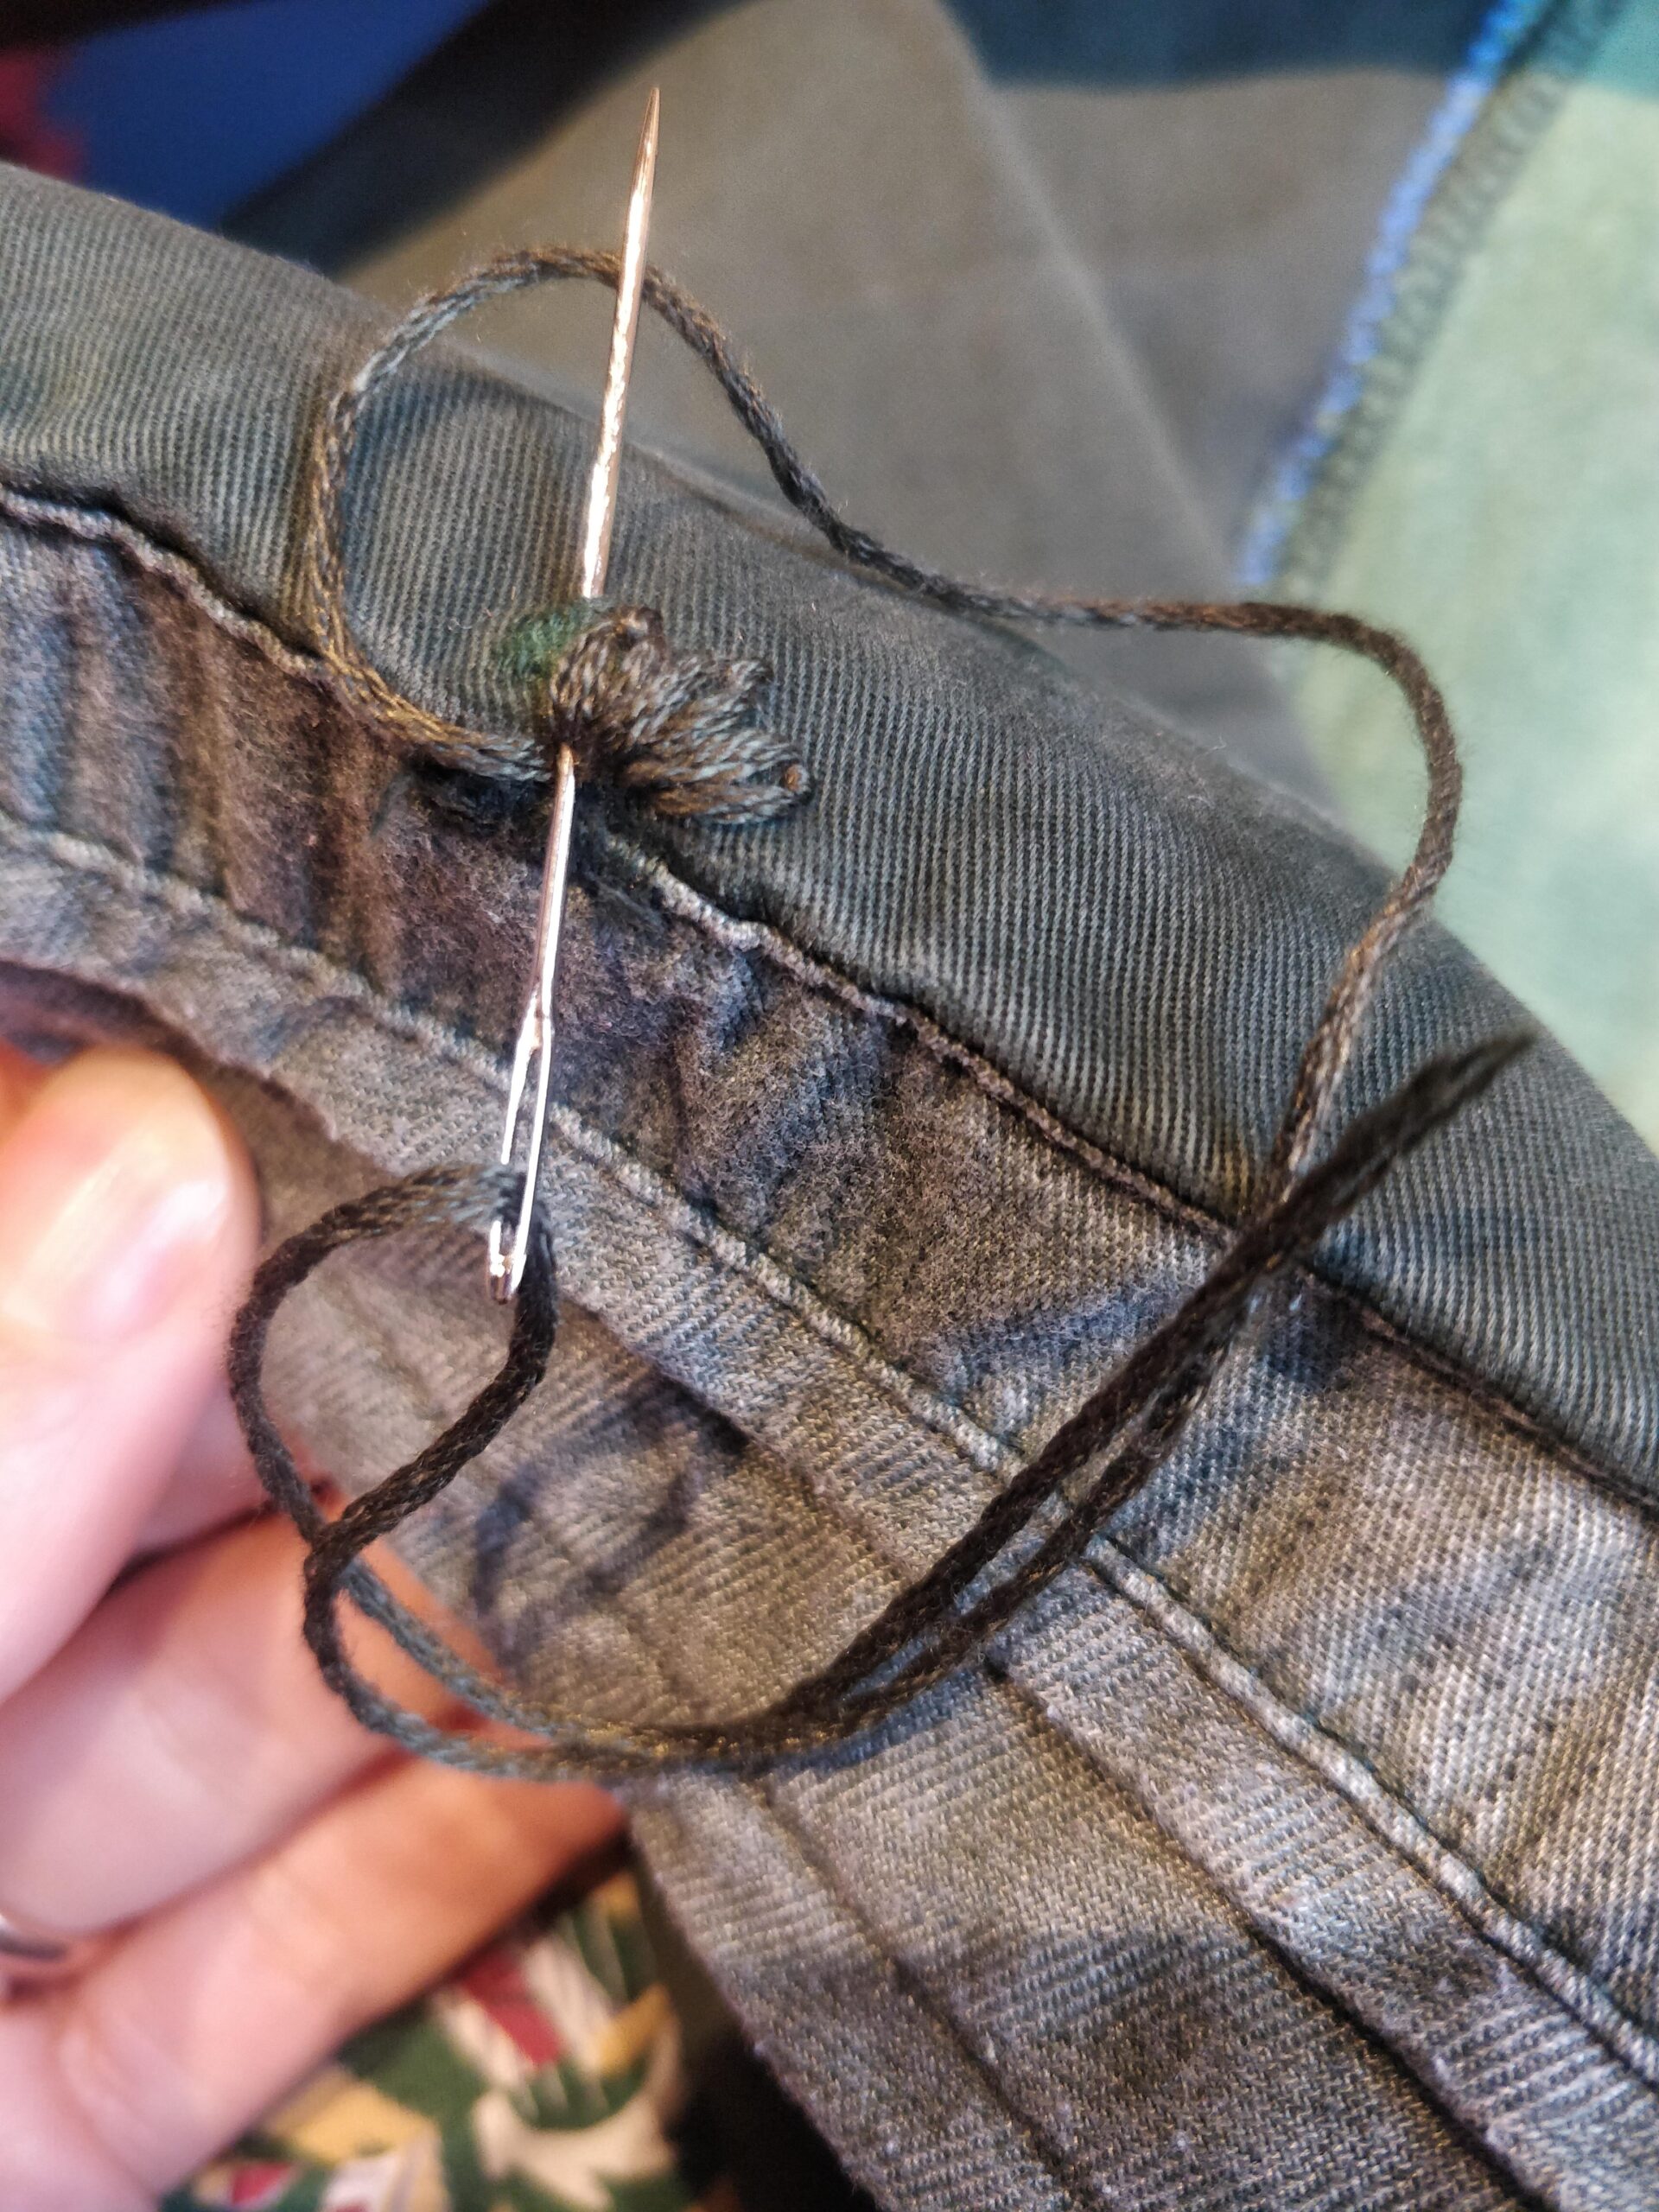
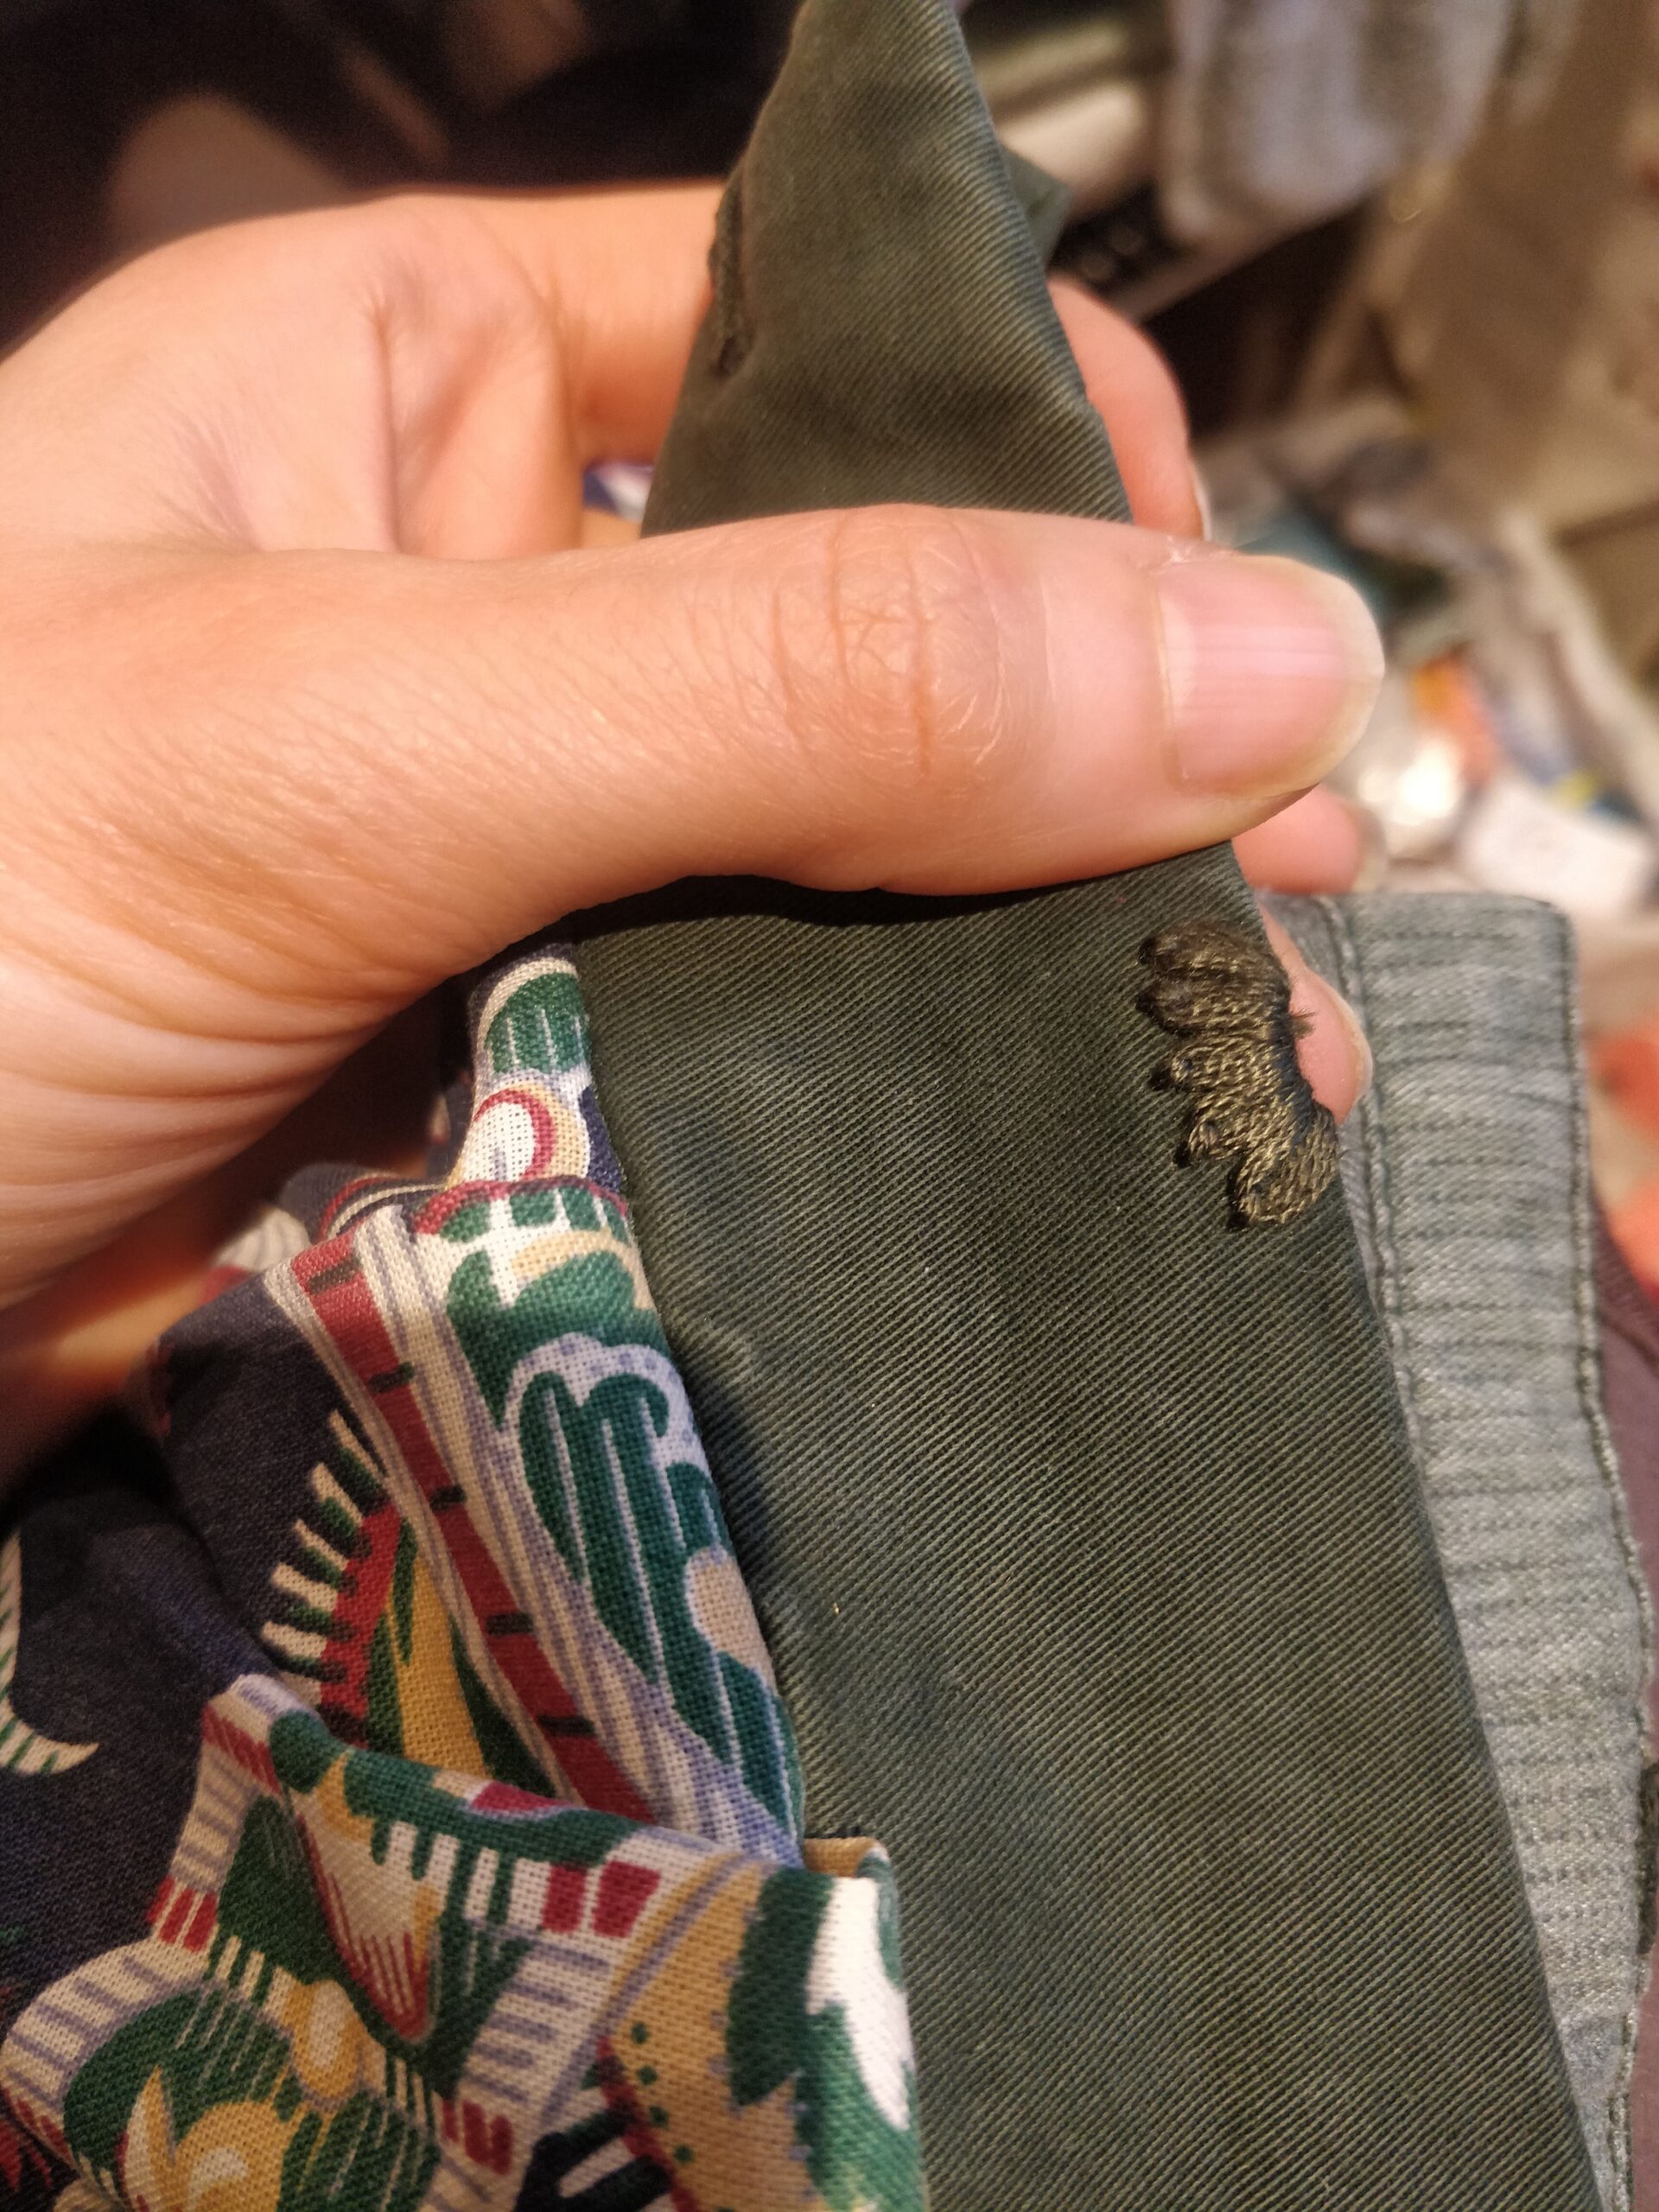
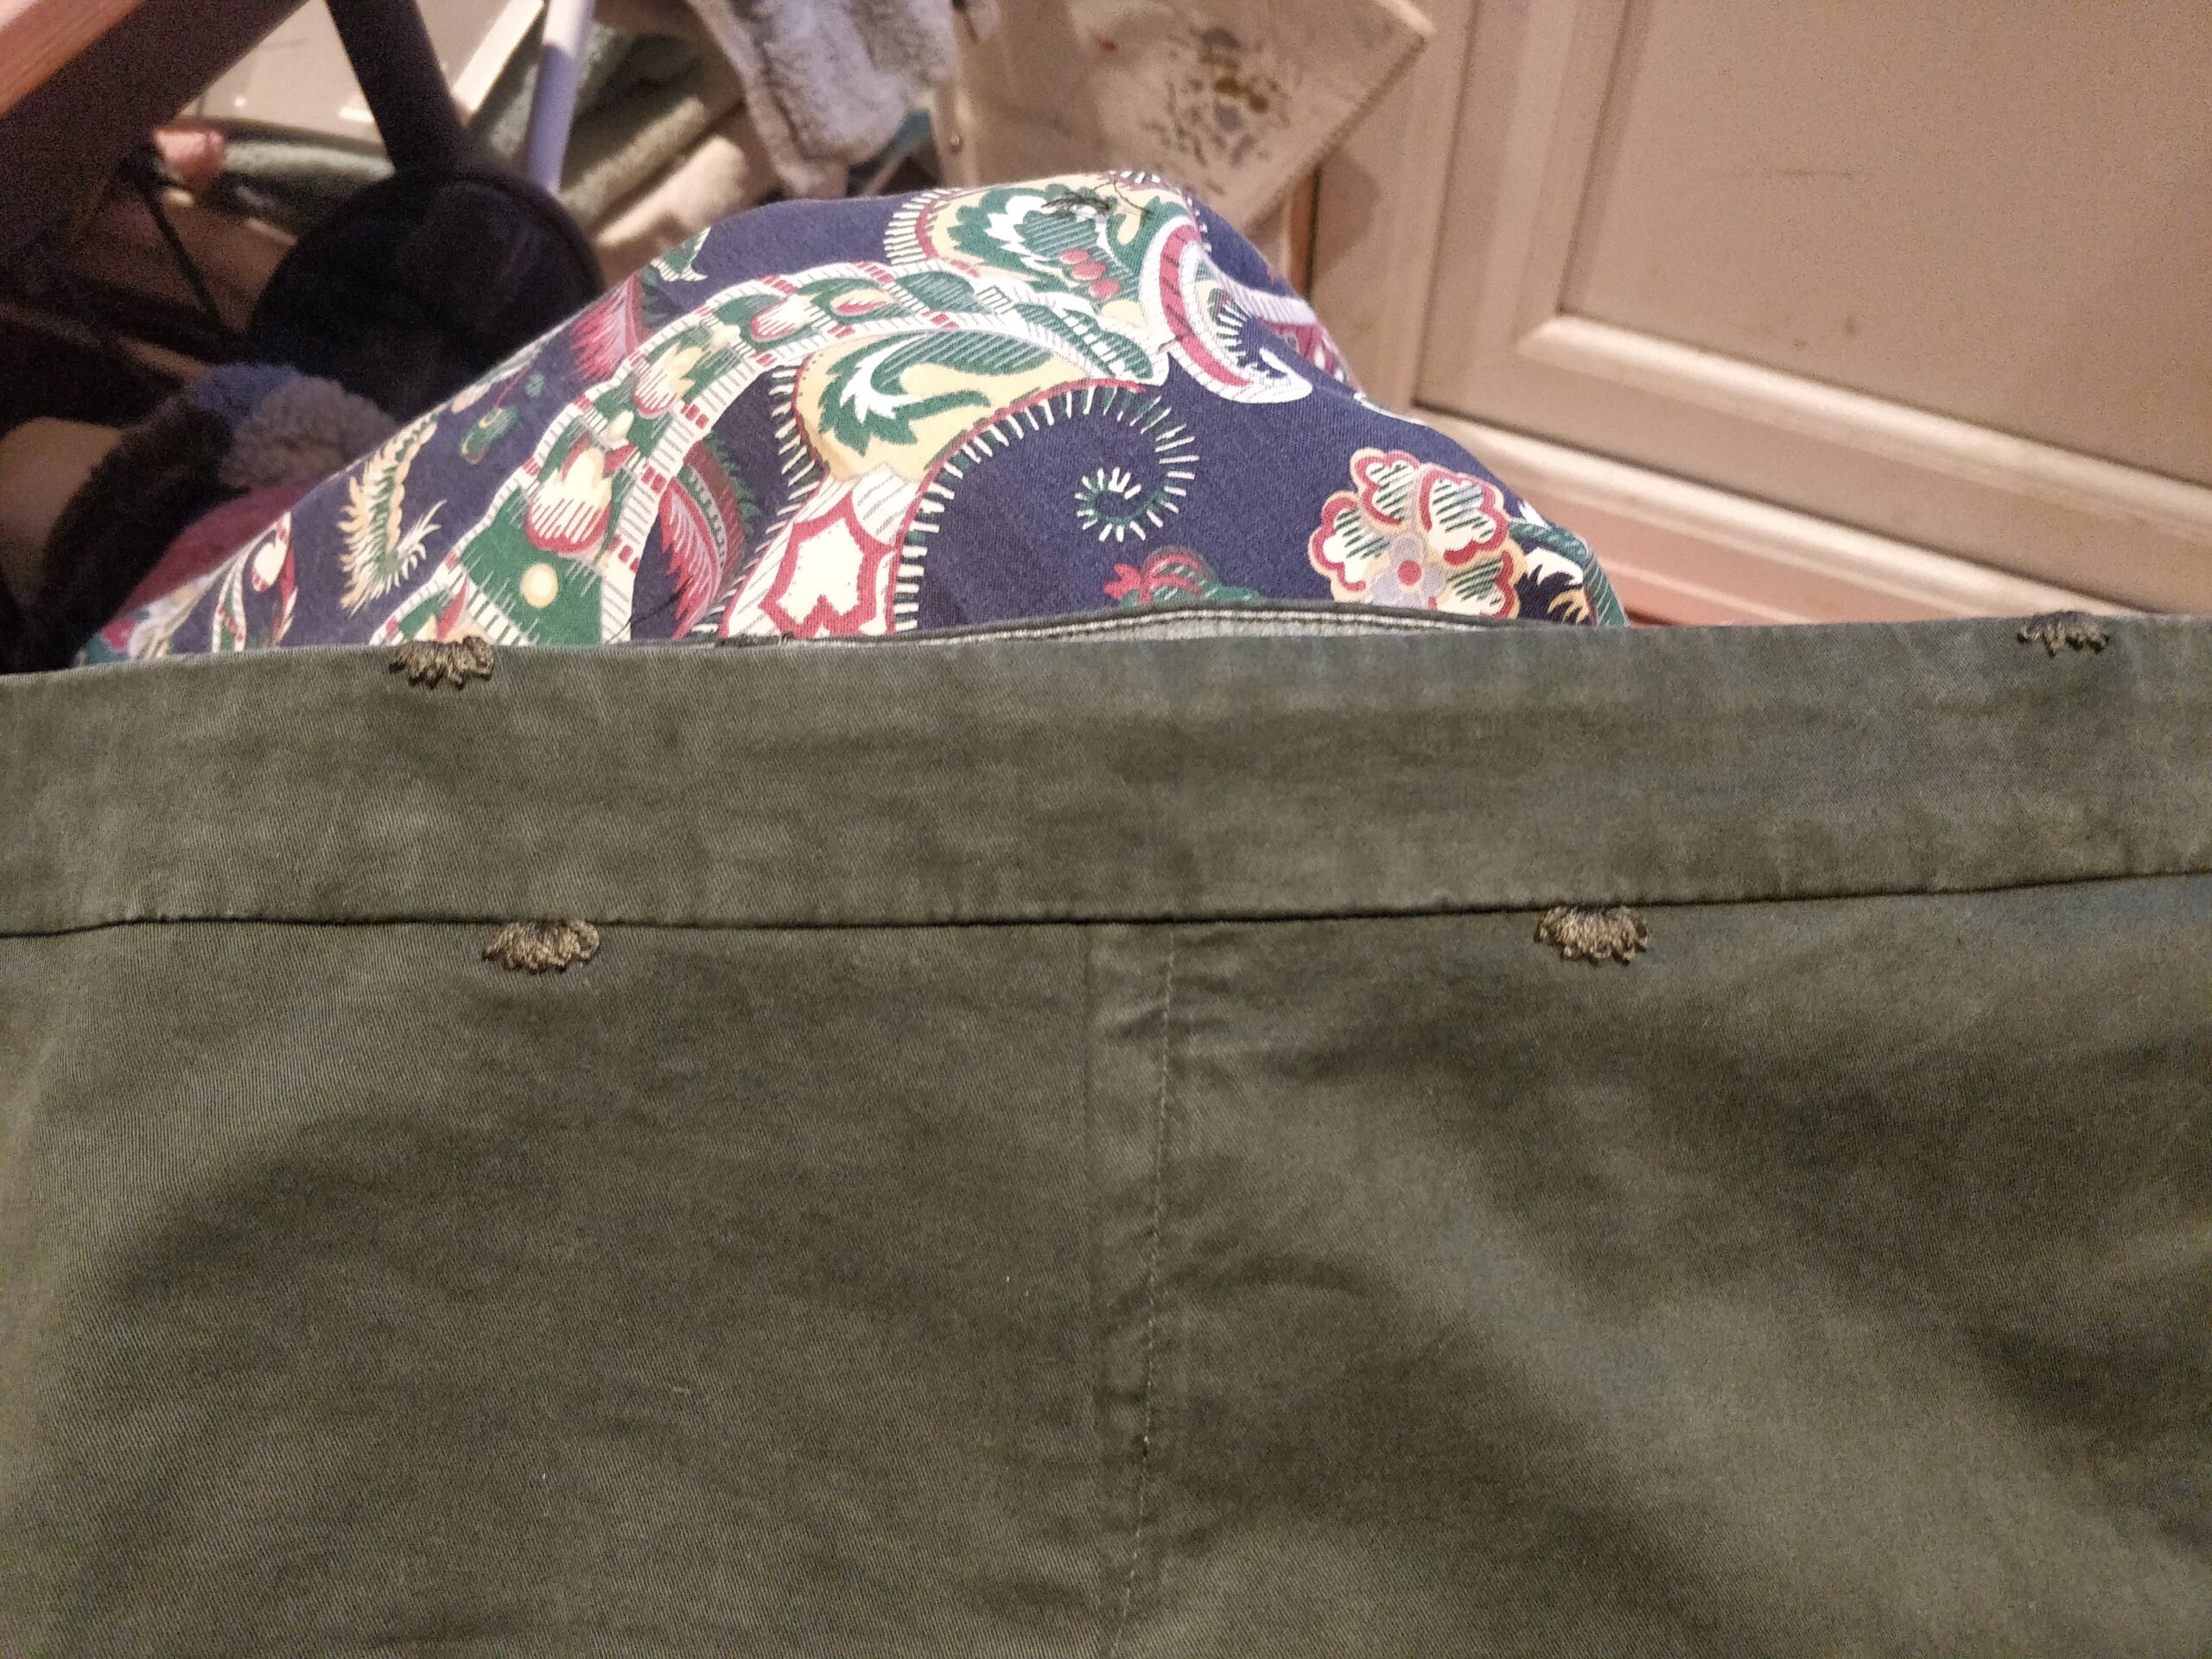
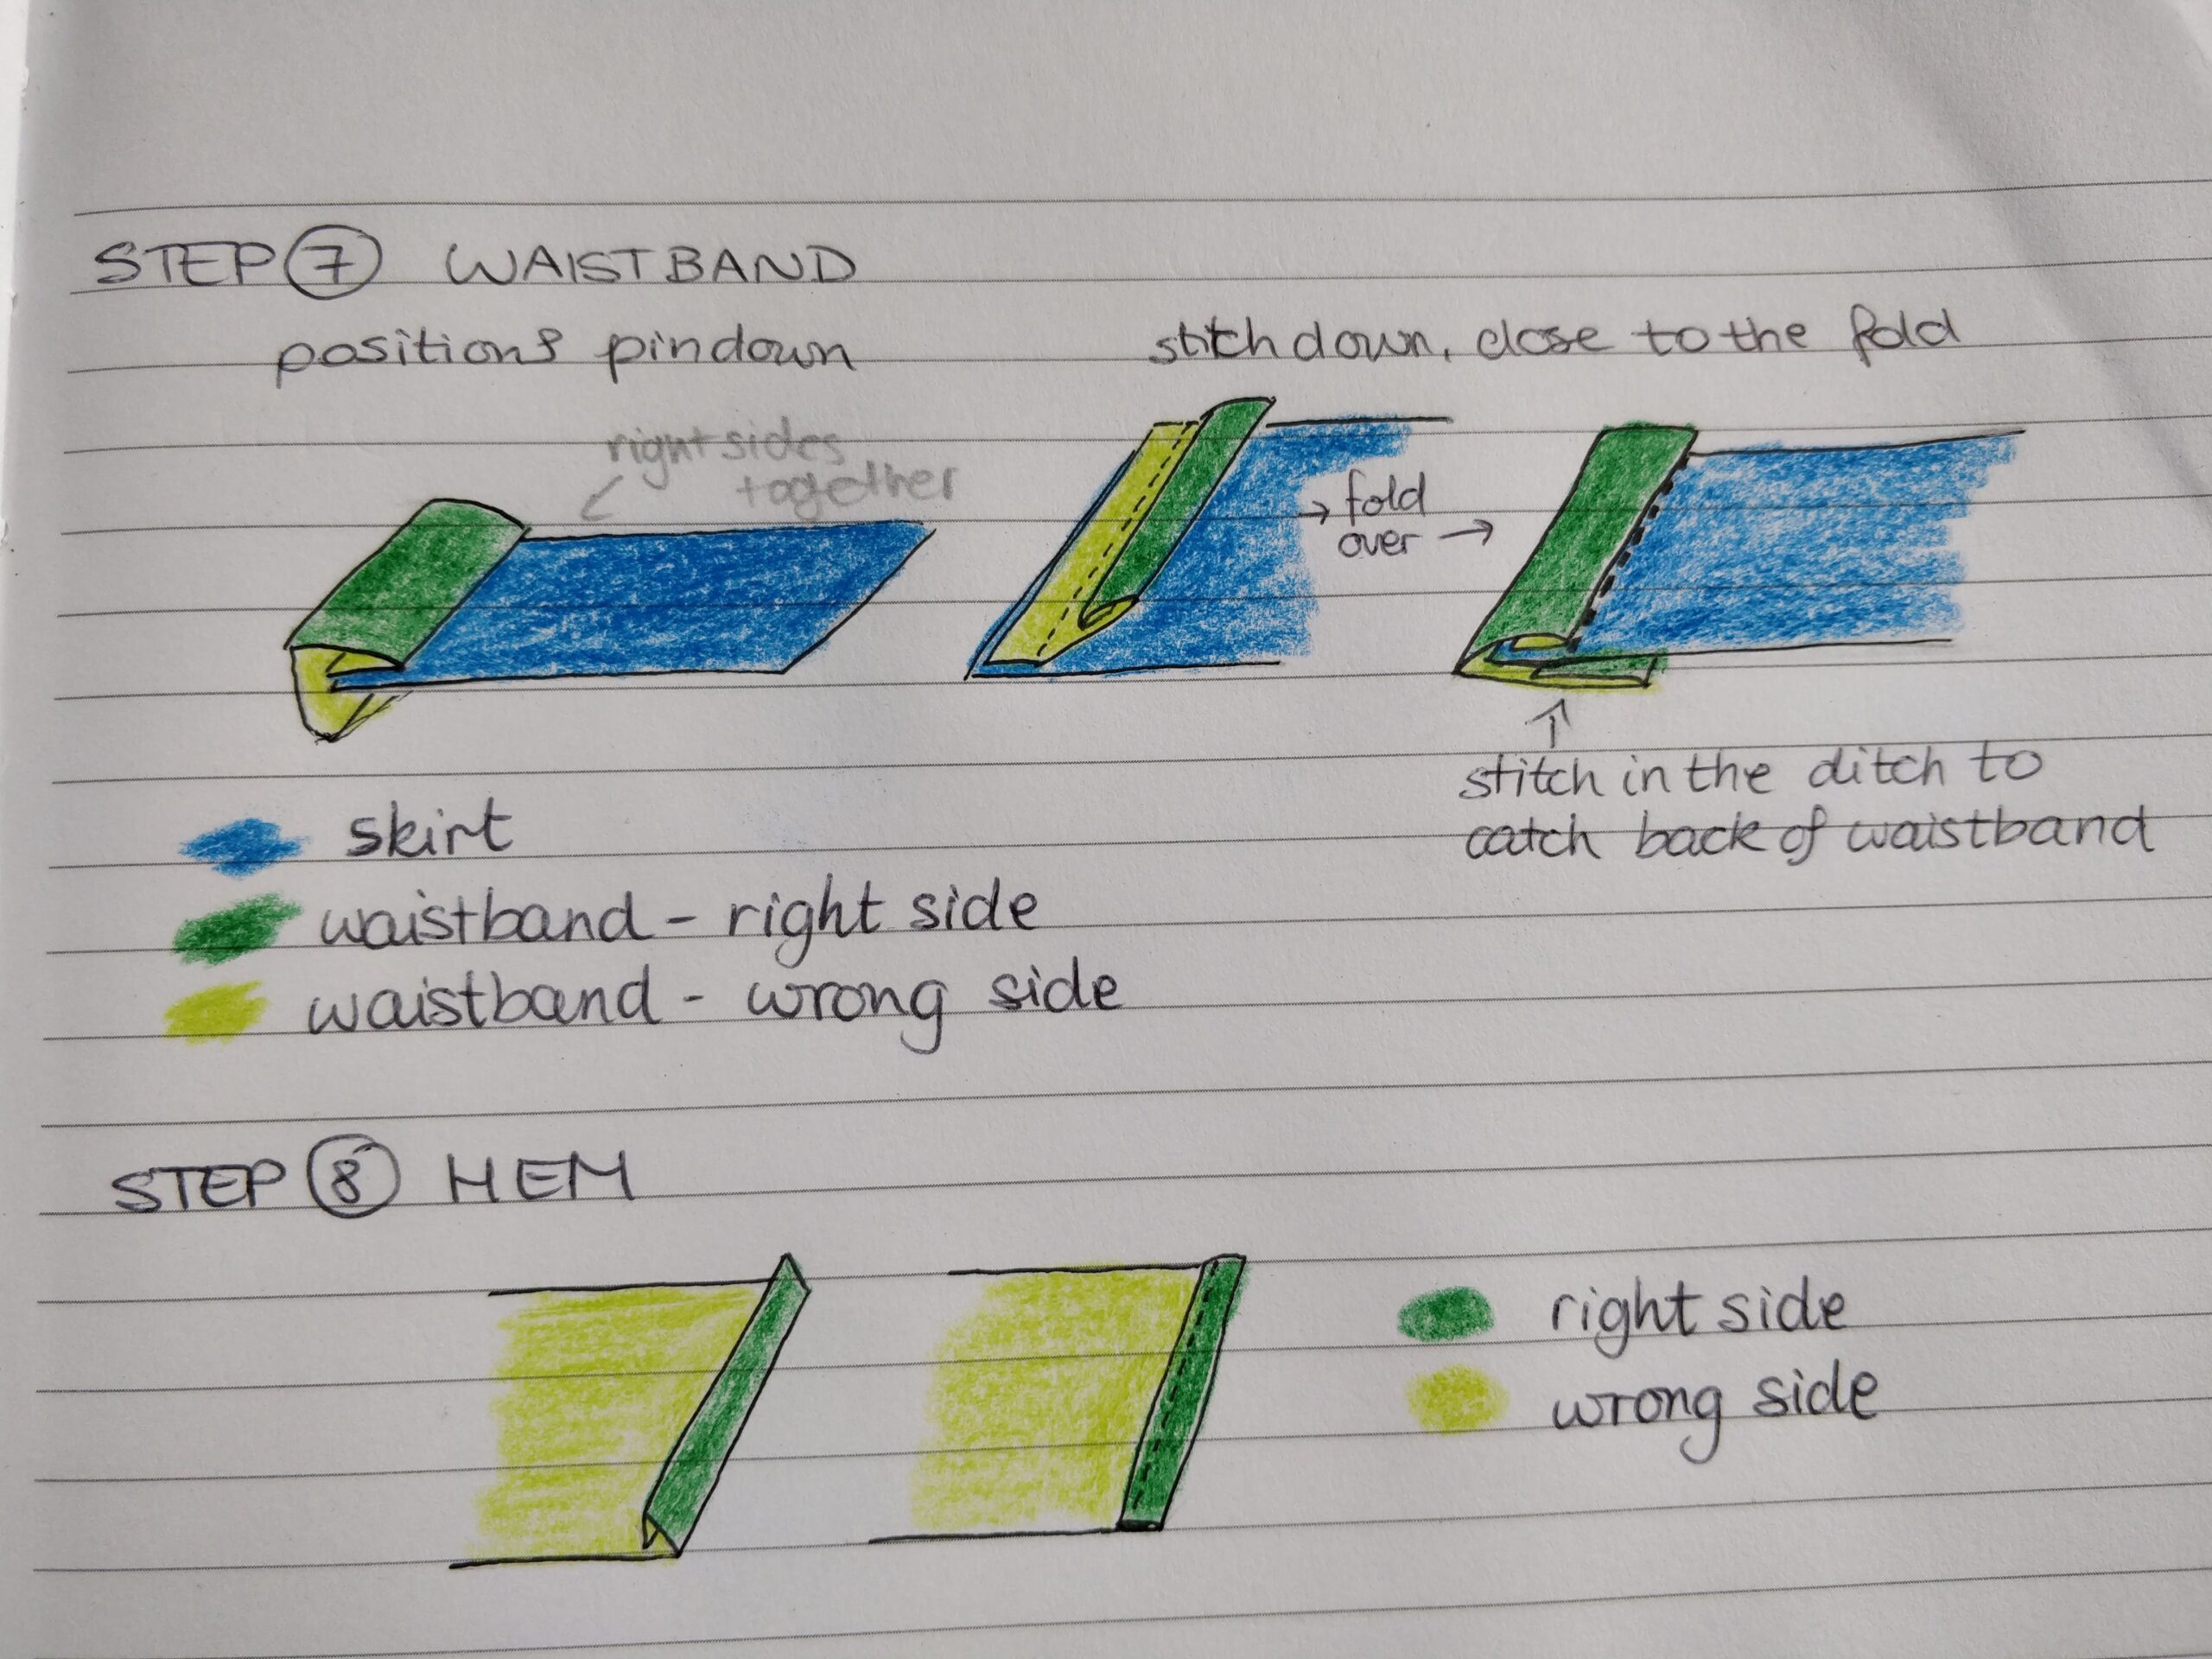
Before installing the waistband I had to deal with a small issue that arose when I removed the belt loops from the trousers. The garment had clearly been dyed after being assembled and the dye hadn't penetrated under the thick belt loop stitching, so after removing them, I was left with some unsightly white patches in the front piece and waistband. I decided to try my hand at some embroidery and I picked a dark olive colour that matched the hem trim. I had quite a lot of fun doing this actually and kept perfecting my technique over the different patches, to the point that I ended up redoing the first few. Once the white patches were taken care of, I was finally able to install the waistband. I reused the trousers' waistband almost completely as it was already well constructed and I wanted to repurpose as much as possible of what I was using. I kept the button hole end of the waistband intact and cut it to size on the other end. I reattached the button at the right spot for my waist size and measured it so that the button hole part of the waistband would overlap the other side completely, closing over the zipper. I was quite pleased with the result. To attach the waistband I used the stitch in the ditch technique which was completely new to me.
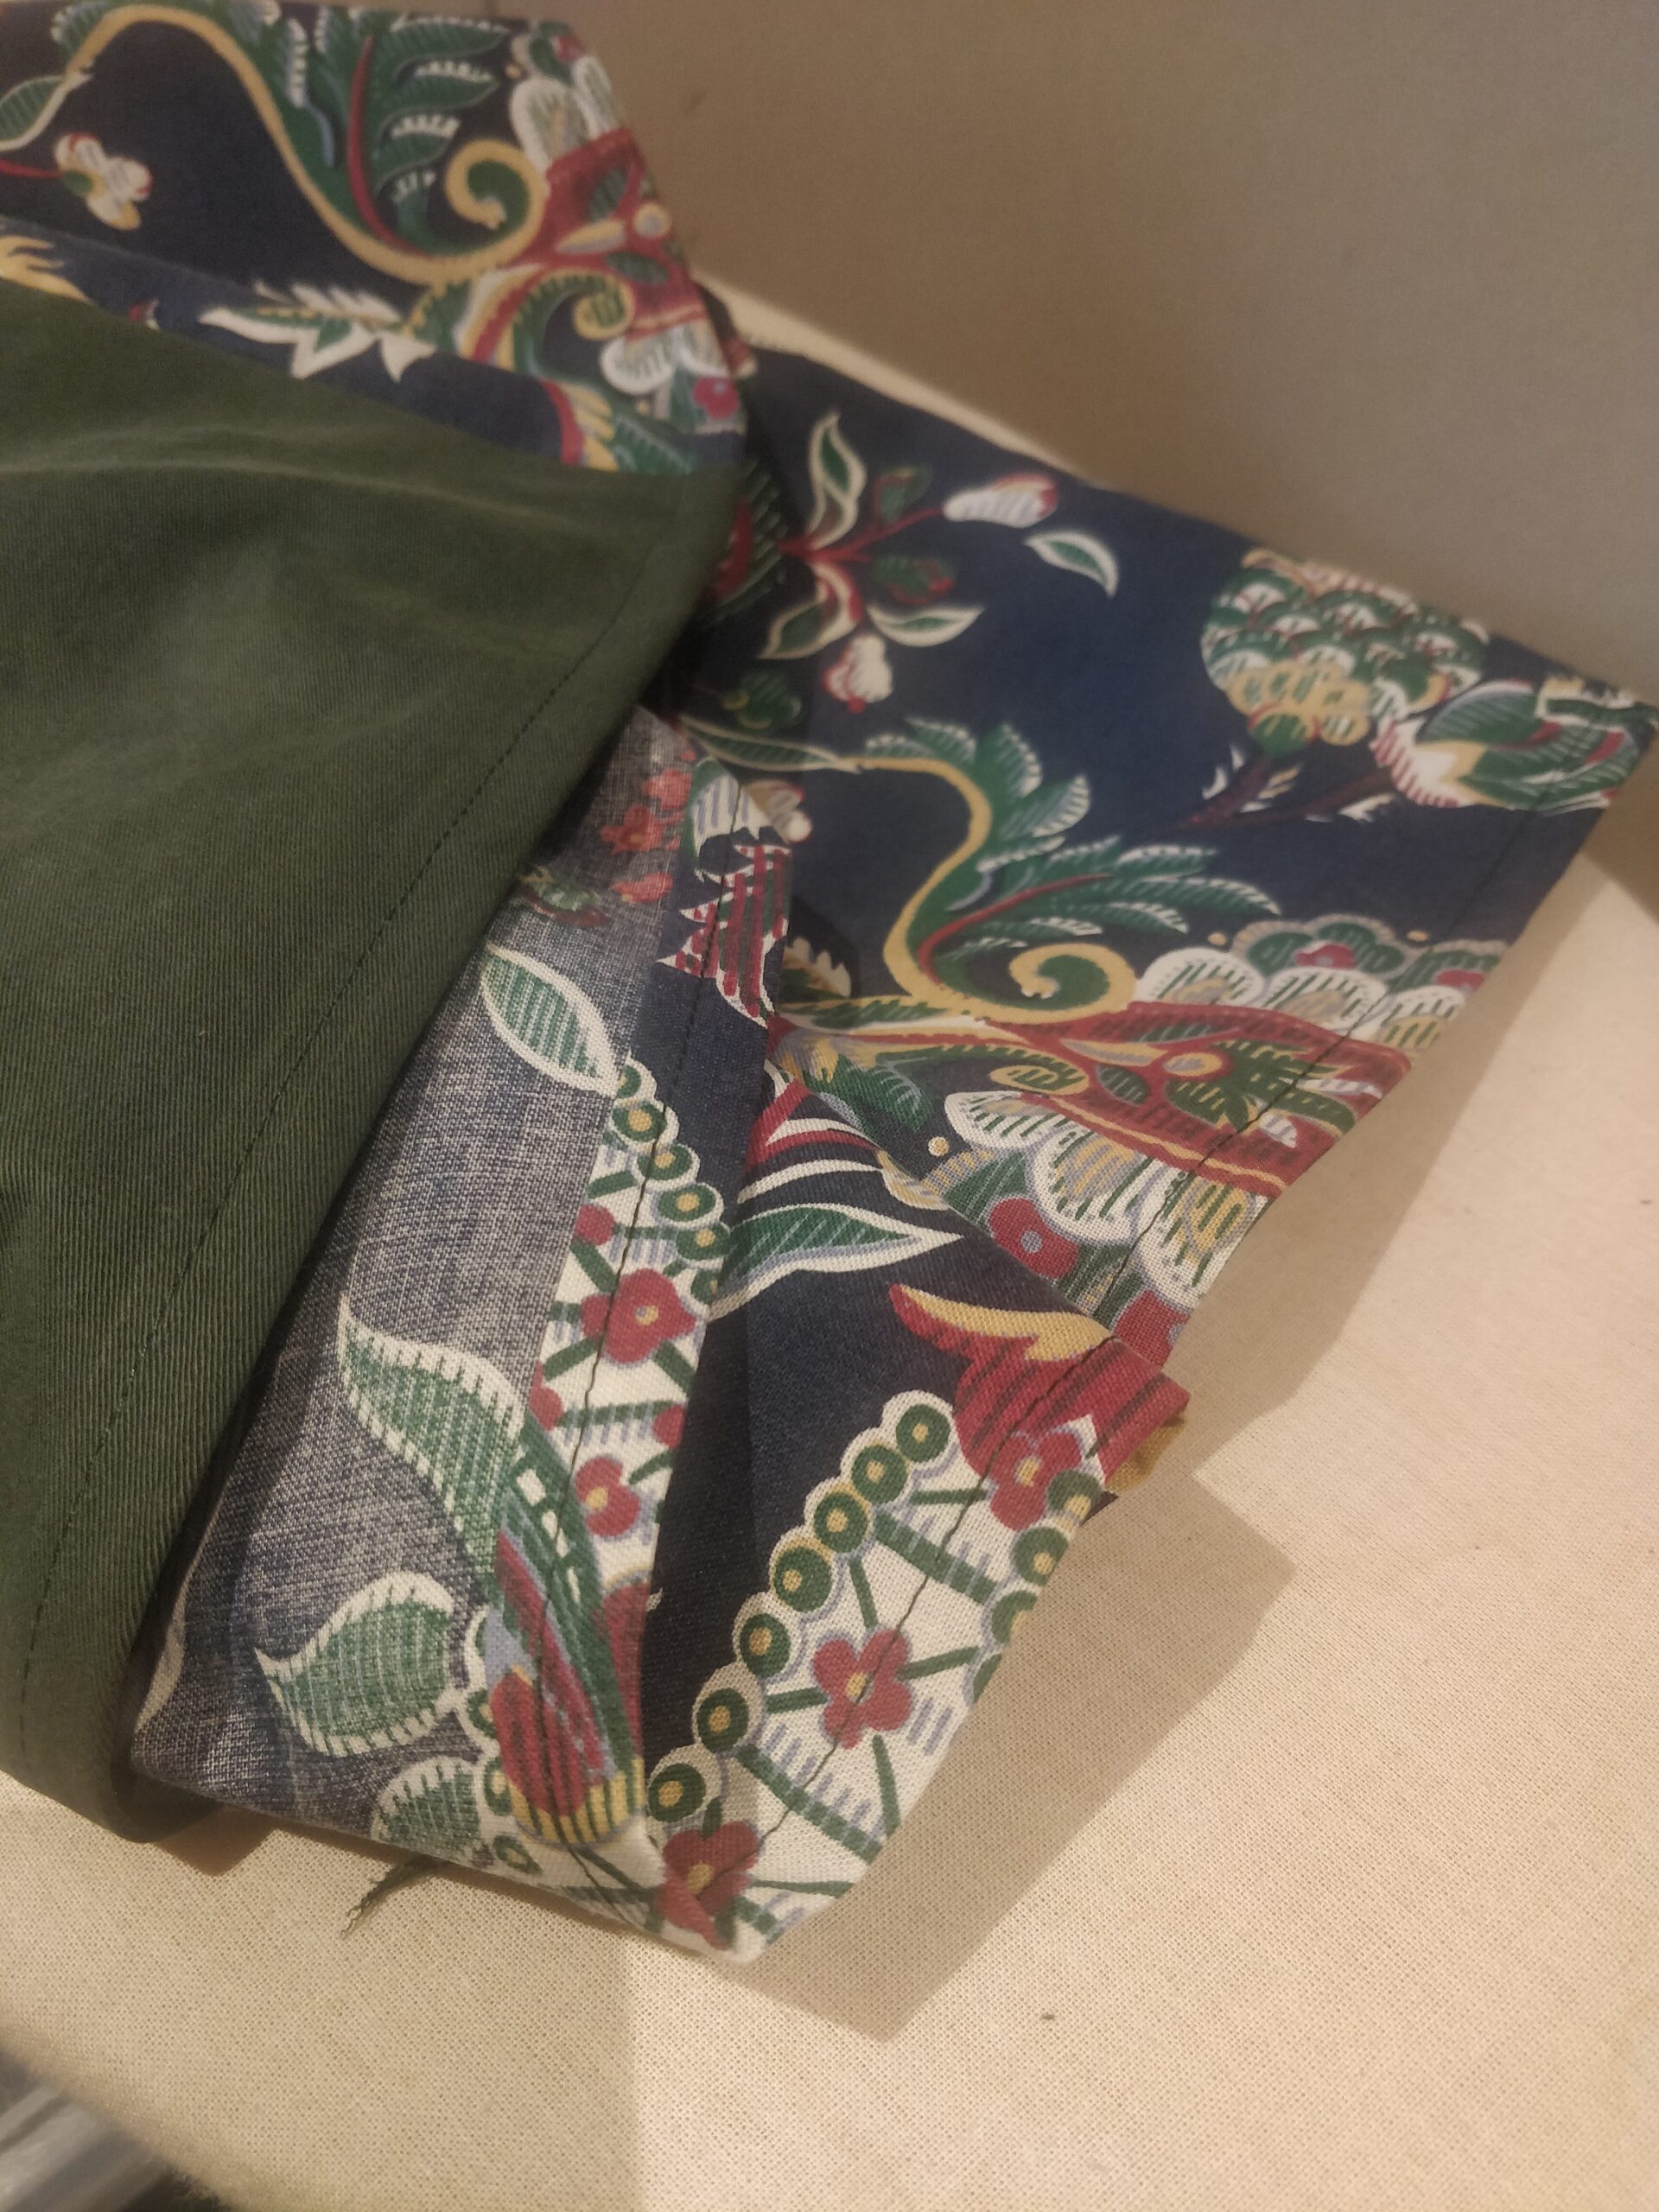
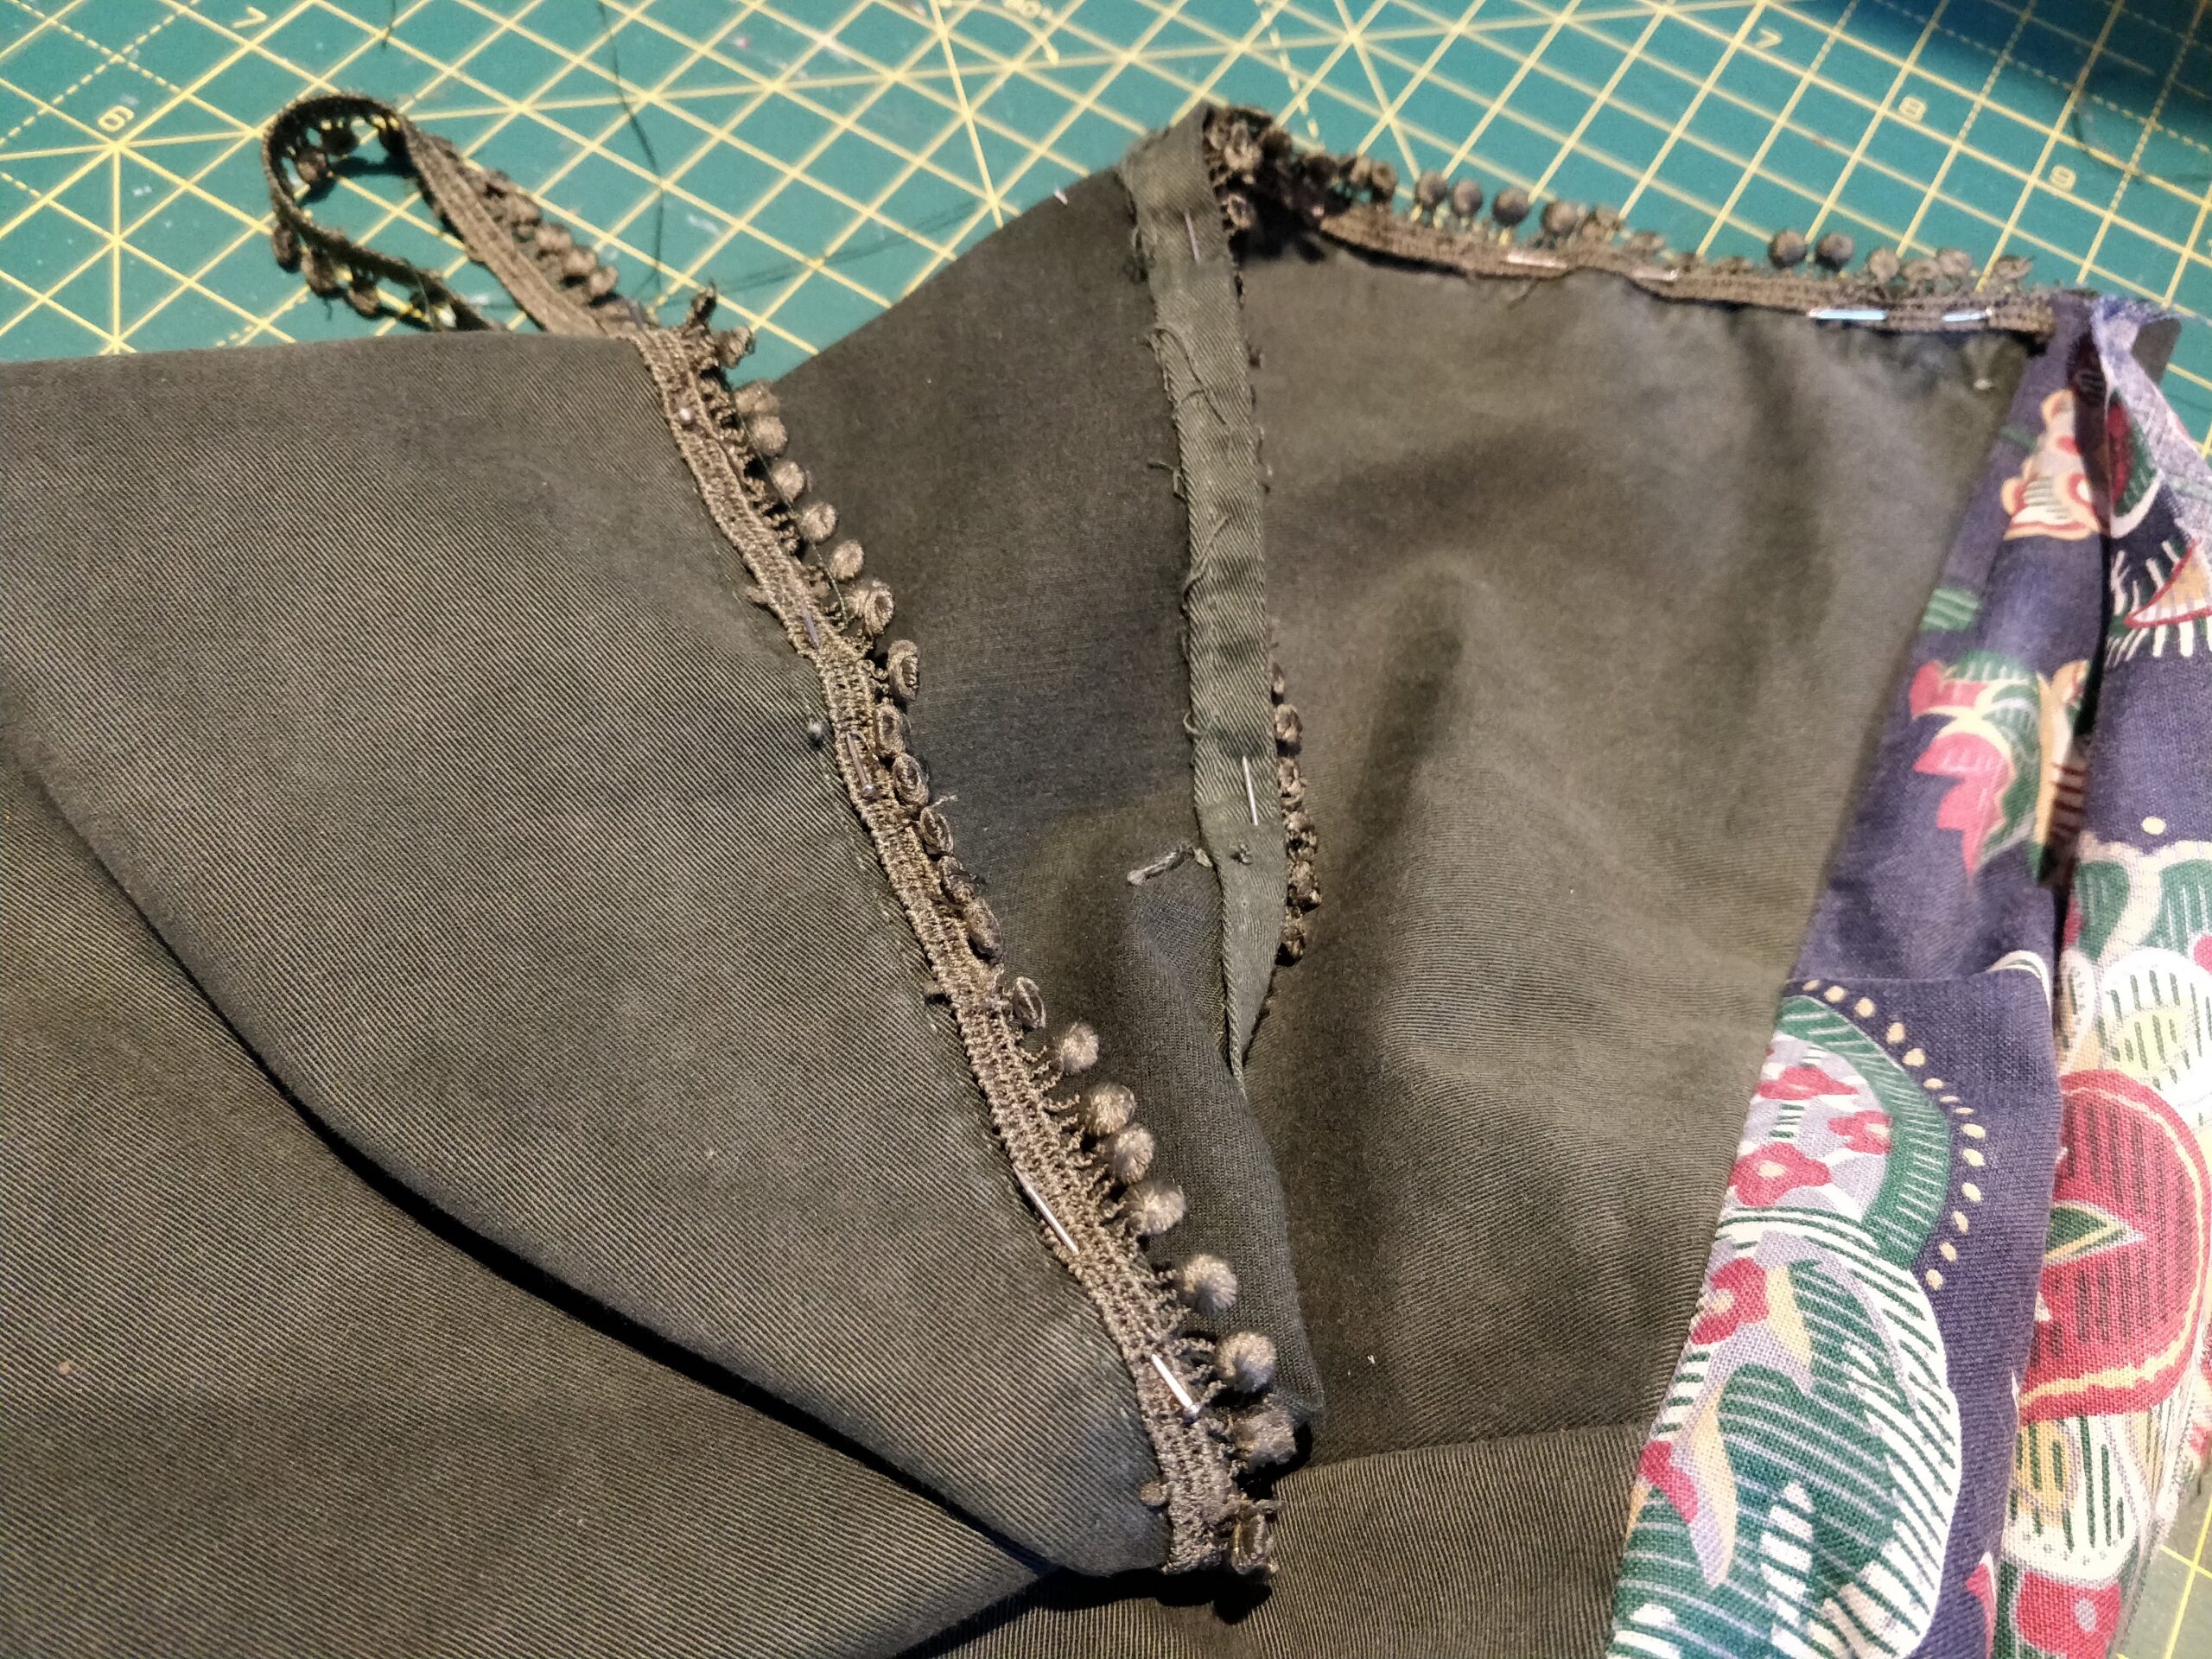
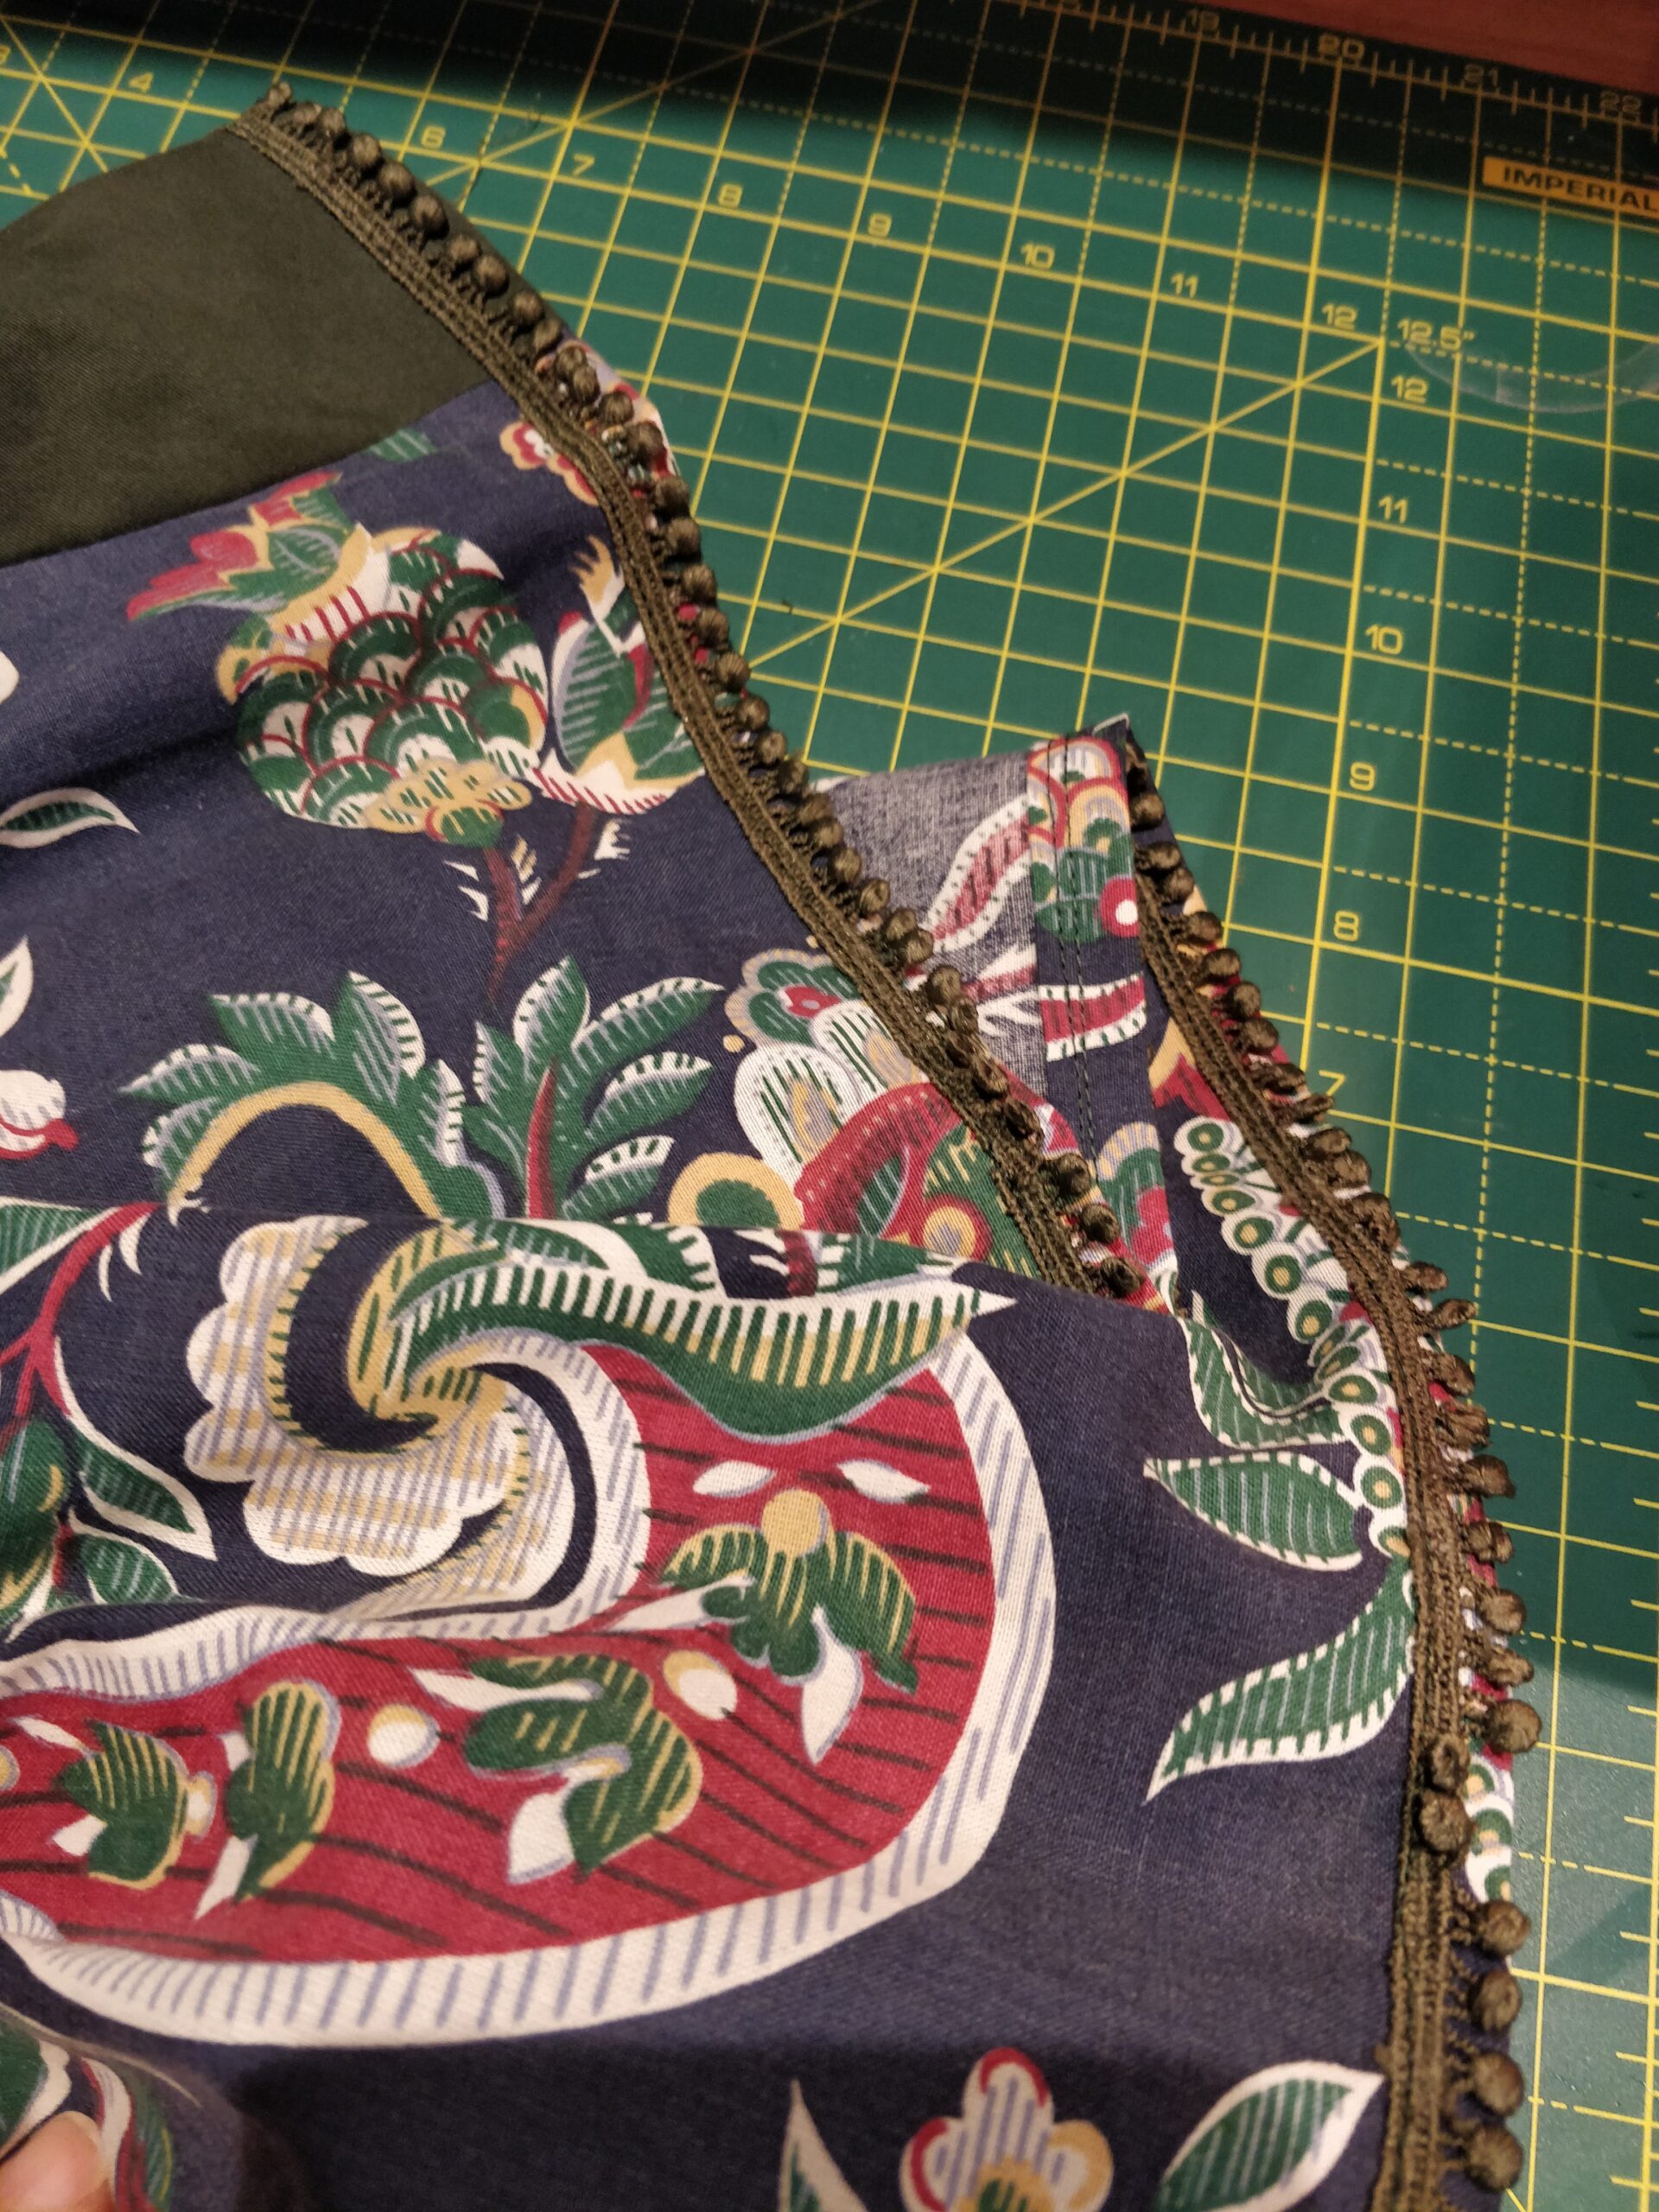
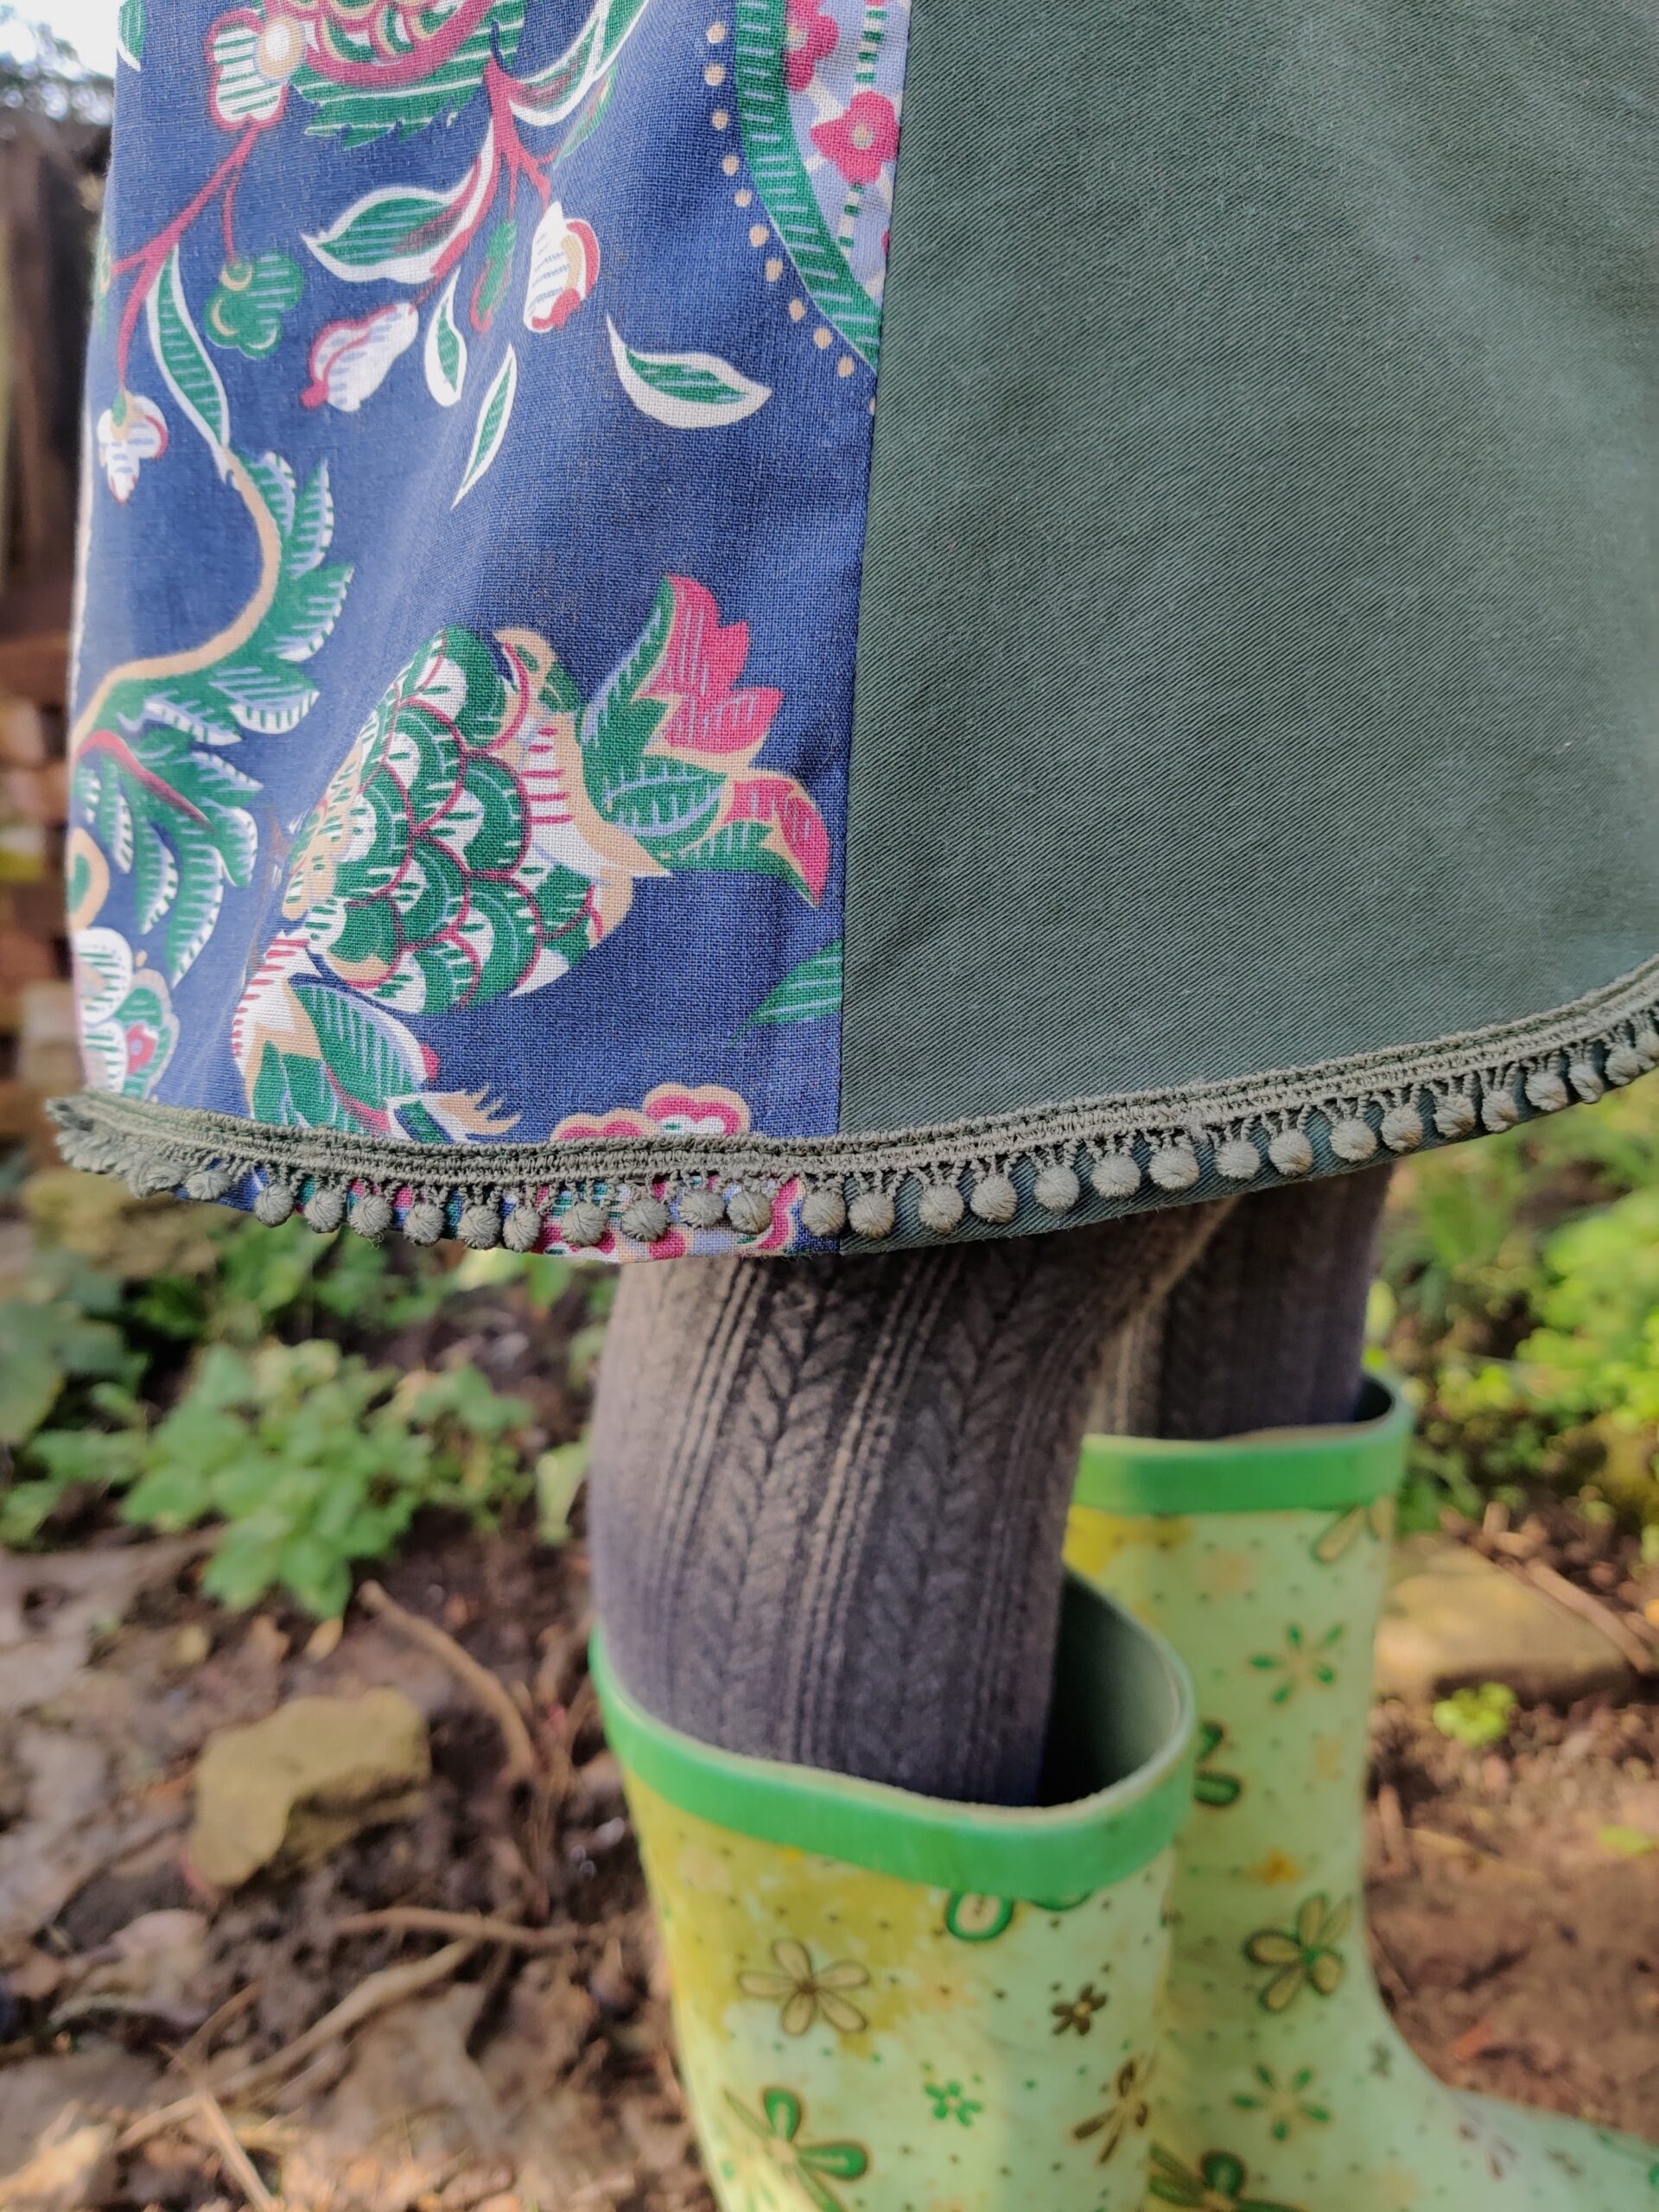
The last thing to do was hemming and deciding on trim or no trim. I first finished the skirt by hemming it with a straight stitch, then pinned the trim over the bottom to decide whether it would make a worthwhile addition. In the end, I decided to attach it slightly higher so that it would cover the hem stitching and the bobbles would like up with the bottom of the skirt rather than poking out. I felt this look was much neater and put together whilst still adding a bit of fun to the hem. The trim was not all in good condition as the shorts I unstitch it from were second hand. I snipped out the worn out bits and made up the length by adding together the parts that were in good shape. I am very happy with how it turned out.
The finished product
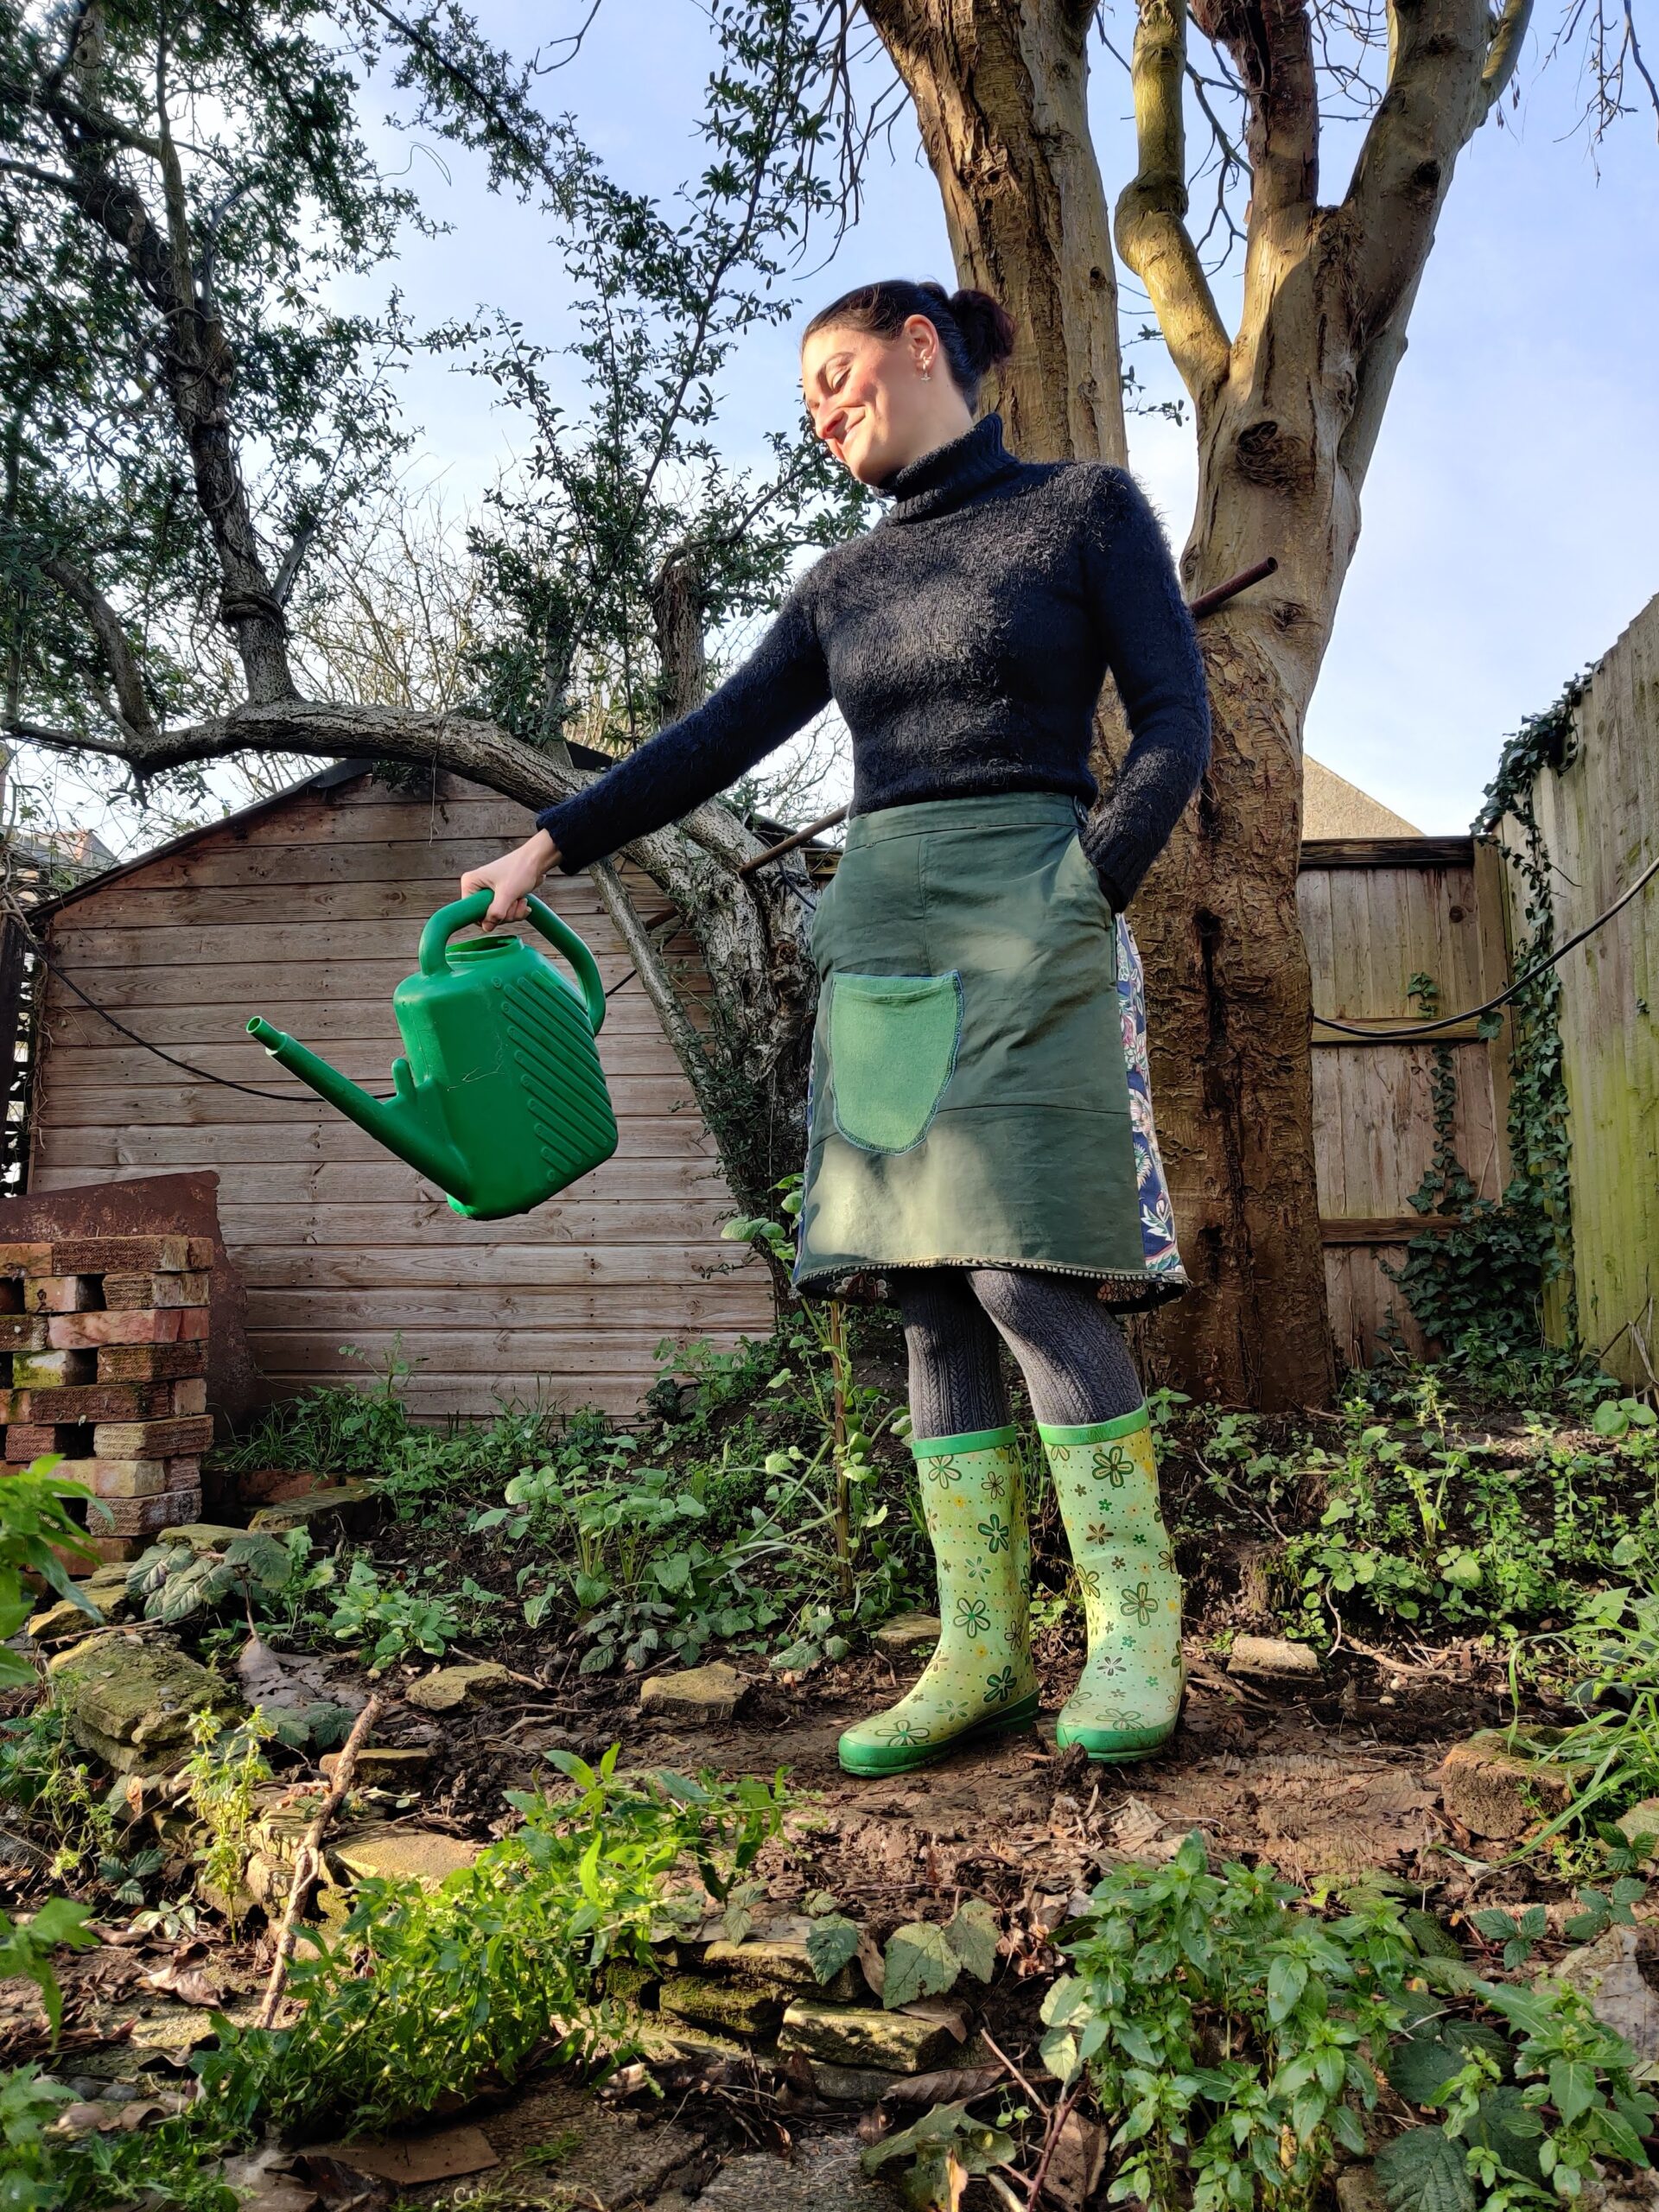
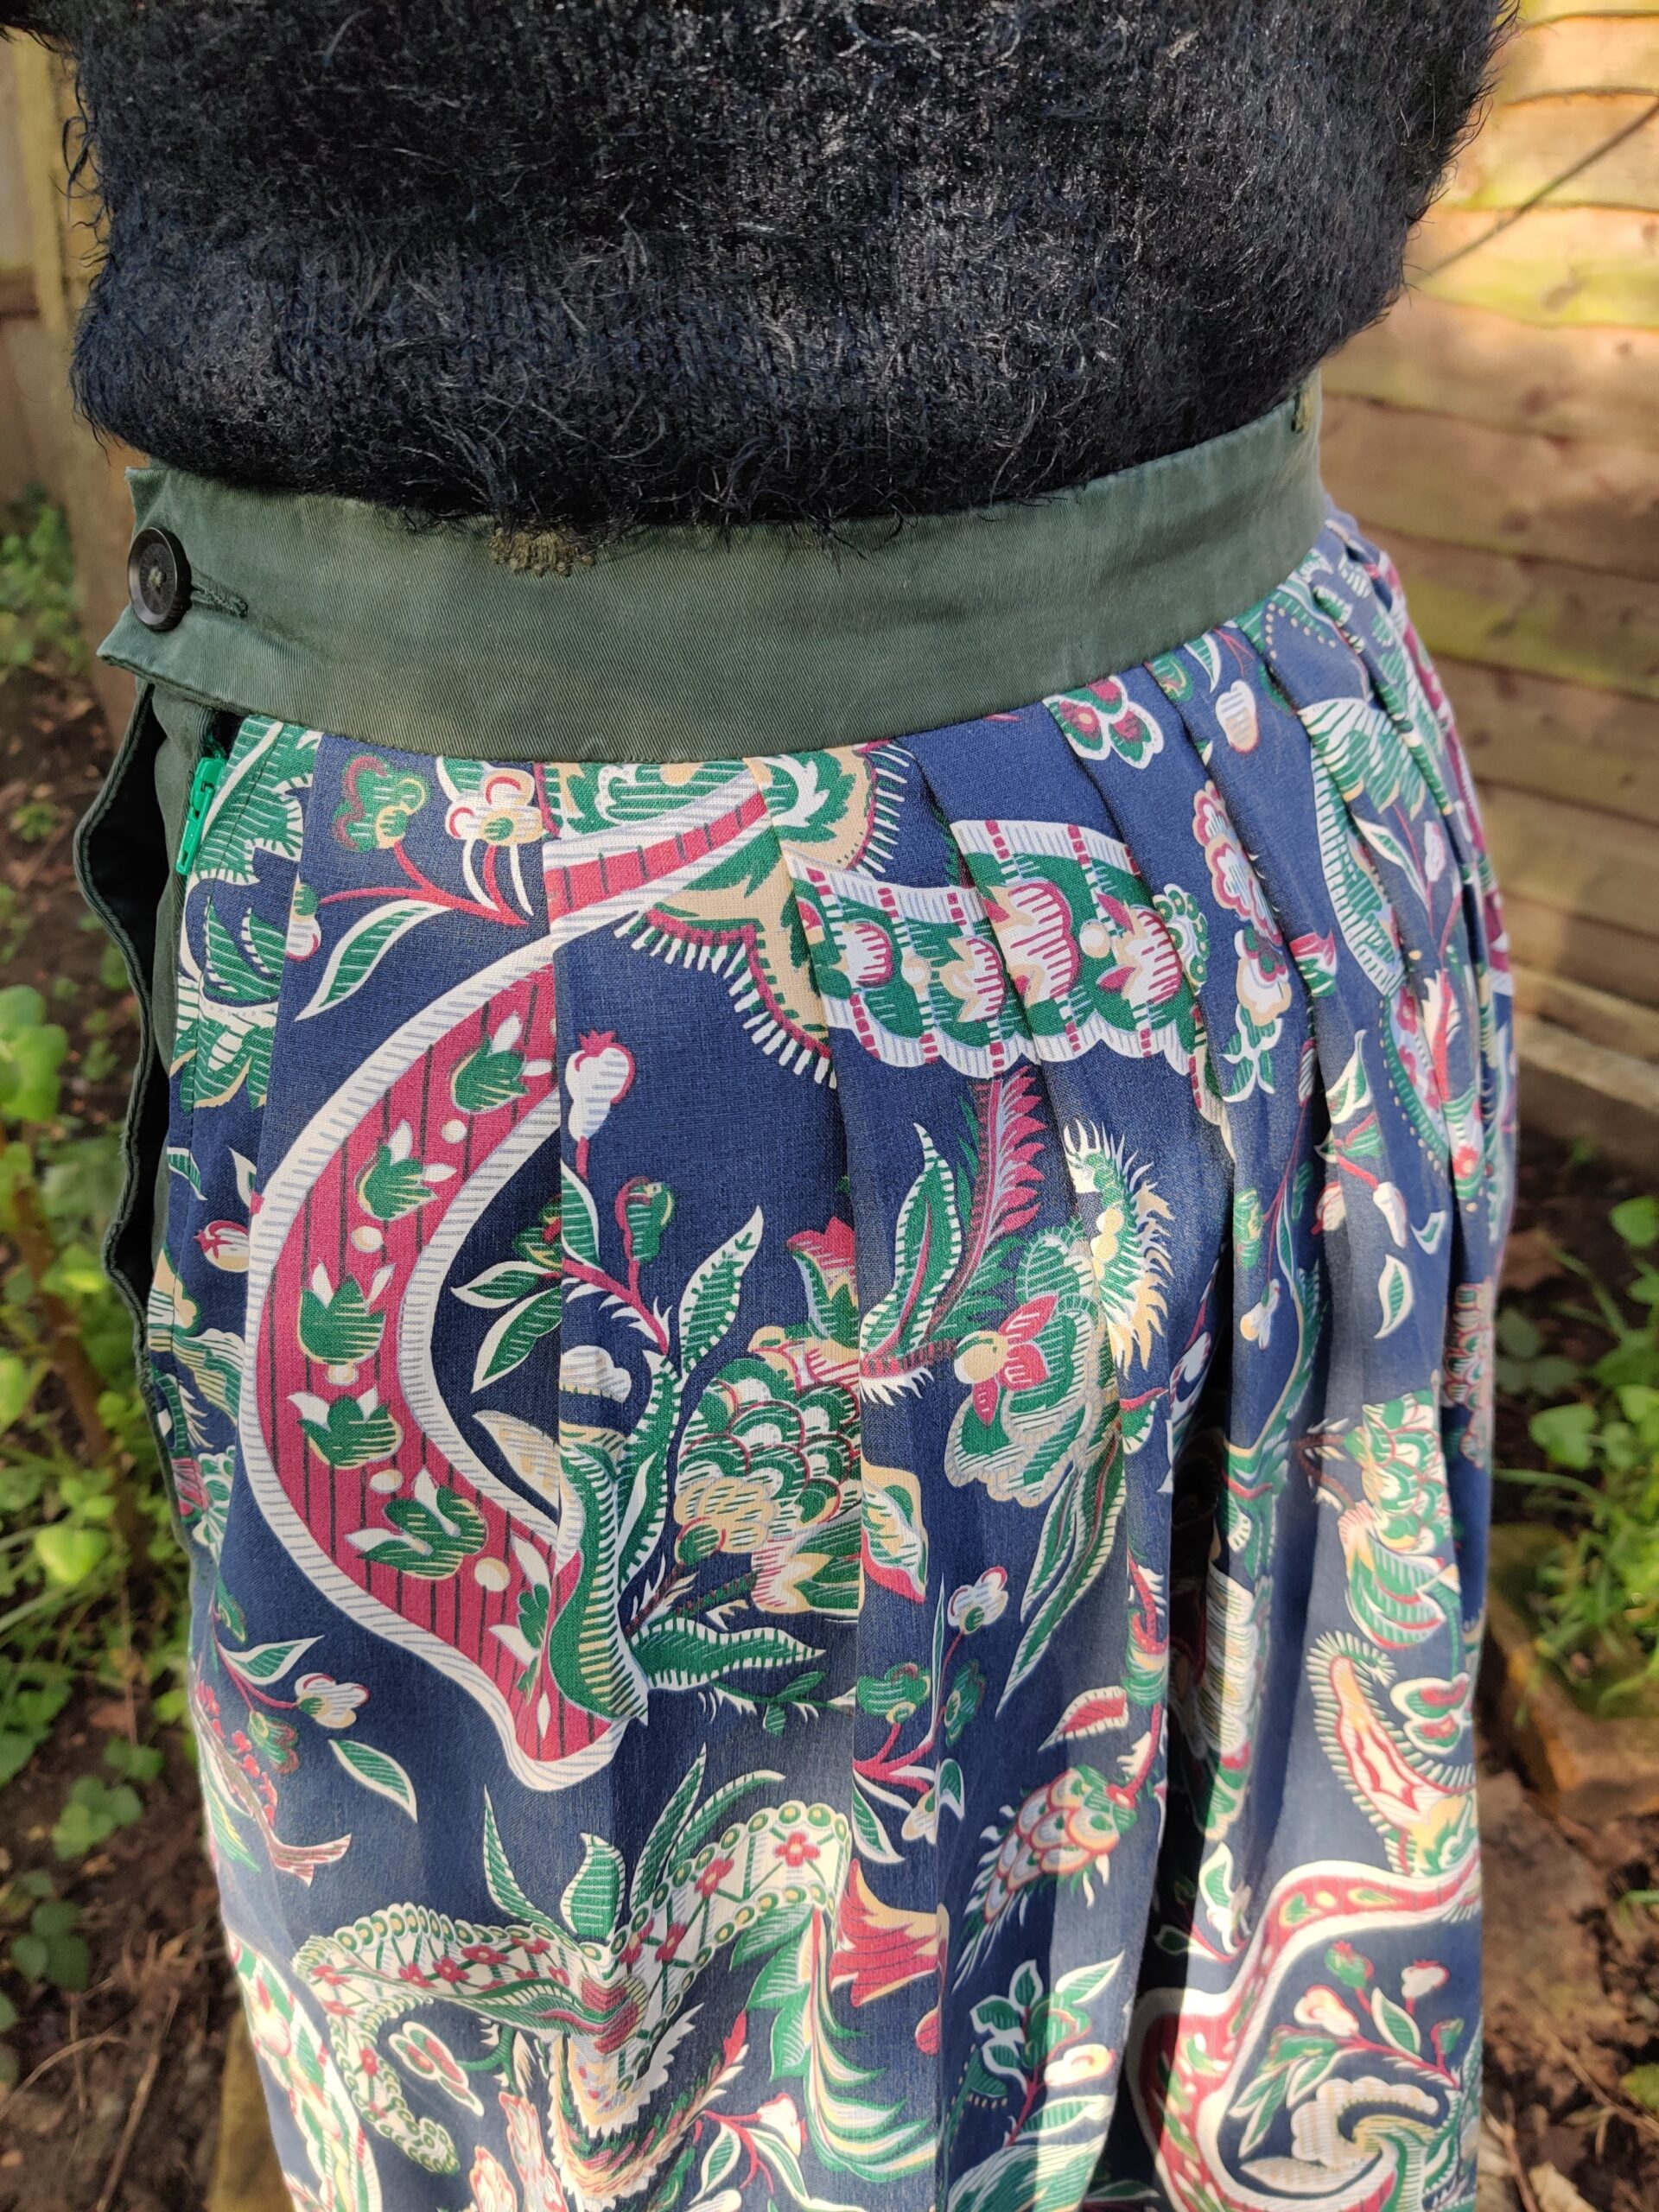
Finally, here it is: Mrs Hempstock's skirt. I am very pleased with the final product and with how much I've learnt in the making process. Sure, it's not perfect, but I believe it is a very good attempt considering the circumstances at the time. I am very happy to have made a whole garment completely out of post-consumer repurposed items. It has certainly given me the confidence and inspiration to get creative and to make more things out of stuff that already exists. Here are the final pictures.
Project Book
Since learning how to sew, I have started keeping a project book to document my design process and the techniques that I learn along the way, so, here are some photos of the skirt's entry in the book.
It looks great and fits you really well. What a fantastic way to reuse pieces of fabric. Looking forward to your next project.